A Pack is a versatile tool for organizing and sharing content within Plickers. We recommend using Packs to bring together related resources that cover specific sub-topics within a curriculum, thereby making content easier to manage. You can find more info here.
Creating a Pack is very simple and straightforward, and it's done at plickers.com on your computer. This article takes you through the steps required to do so.
Flash guide
- Sign in to Plickers on your laptop/computer at plickers.com
- Select New Pack from the bottom of the left-hand sidebar
- Enter the necessary information about your new Pack and click the blue Create Pack button
- Select the New Set button to create questions within the Pack
- Or, to find out how to move existing content into the Pack, click here
If the Flash guide above is a little too brief, have a browse through the steps below to learn the specific details involved in creating Packs:
-
Sign in to plickers.com on your laptop/computer
You'll arrive at Your Library (aka the Plickers homepage).
-
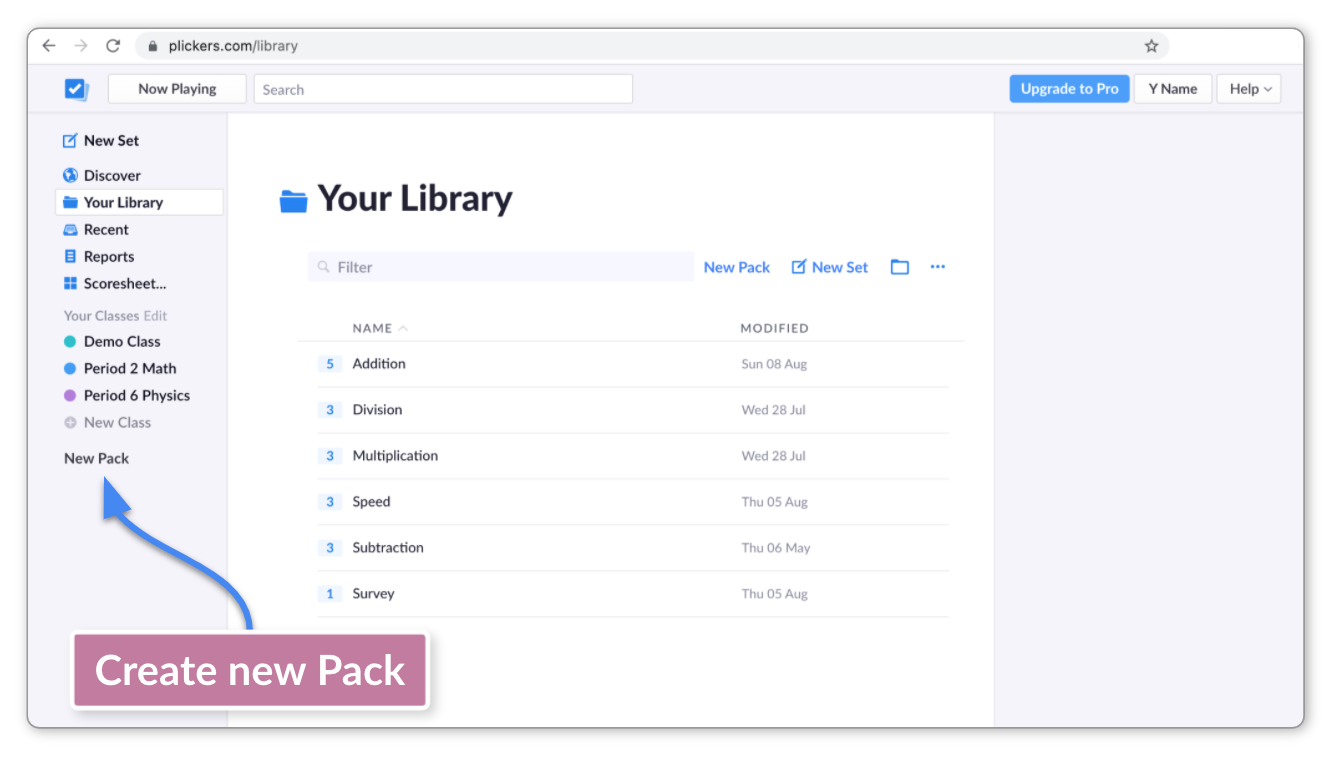
Click the 'New Pack' button
This is located at the bottom of the left-hand sidebar, as shown below:
A pop-up window will appear (shown in the next step), which is where you'll enter the Pack details.
-
Name your Pack
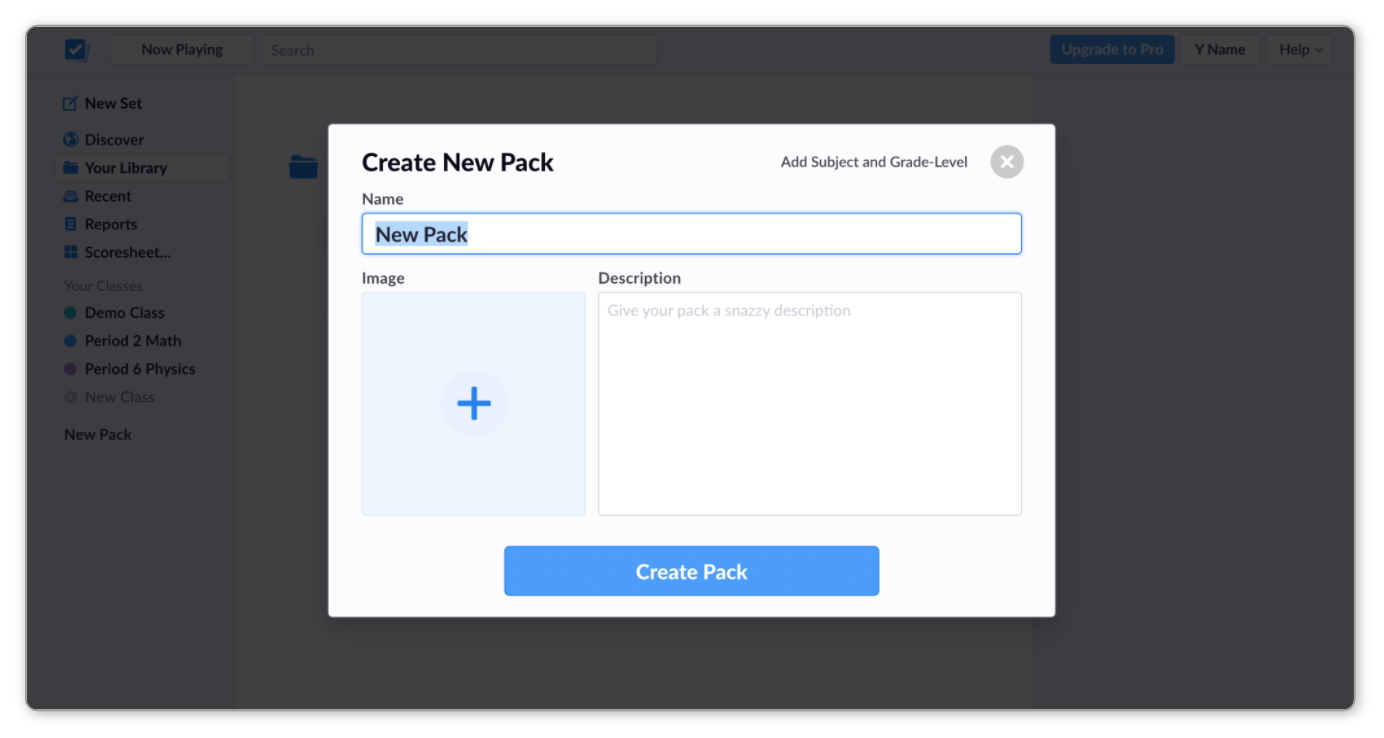
By default the Pack will be called 'New Pack', but you can change this by typing in the Name text box.
-
Add more details about your Pack
We'd recommend filling in the remaining details about your Pack. These include a Pack description, an image, and the Pack's subject and grade level.
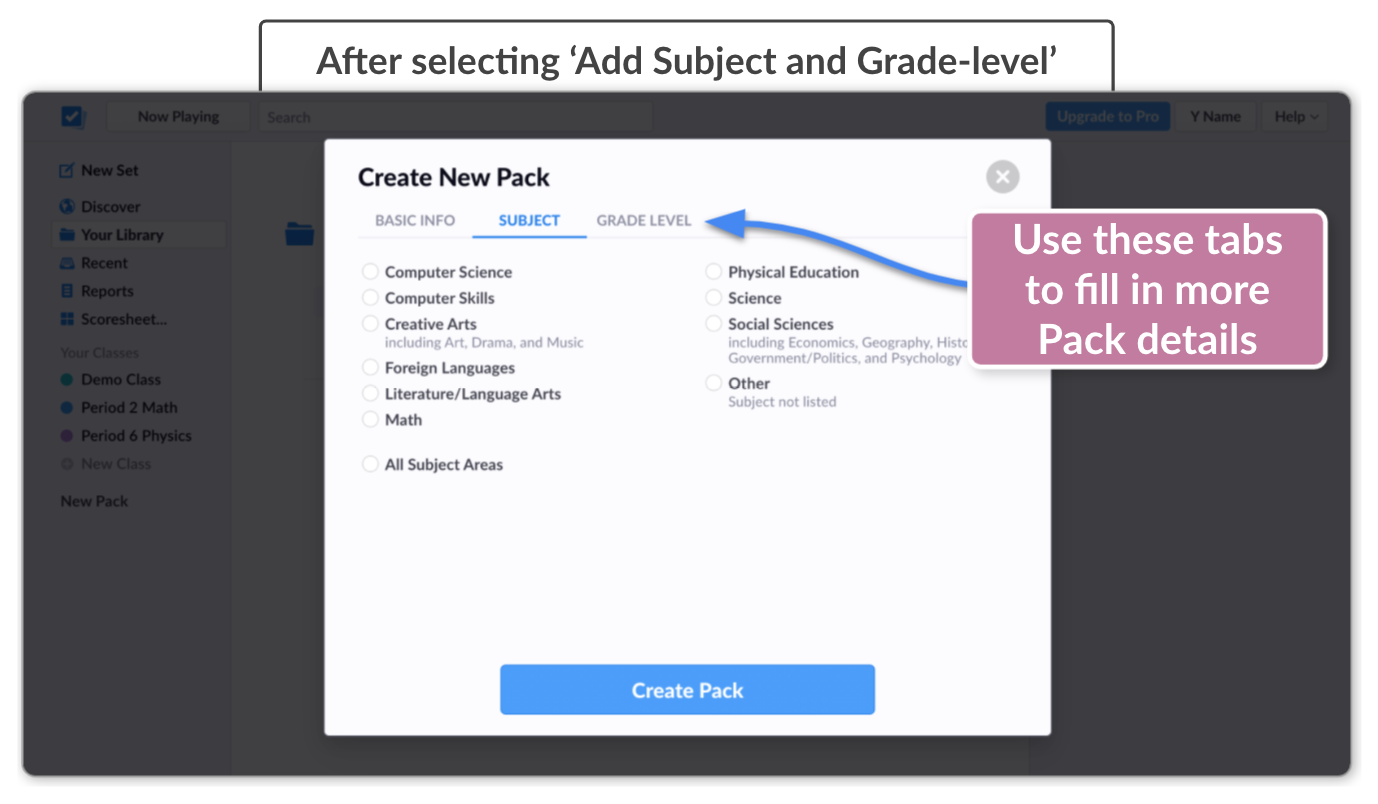
You can access the subject and grade level options by selecting the link in the top right-hand corner of the dialog box. After you click that link, three tabs will appear that you can use to complete the process, as shown in the image below:
 Note
NoteThe only thing that's initially required here is the Pack name. However, if you'd like to publish your Pack, then it's necessary to enter all these details.
-
Select the blue 'Create Pack' button
Once you've finished entering all the Pack details, you can press the blue button. This will create the Pack, and you'll then be taken to the Pack page, which you can see in the next step.
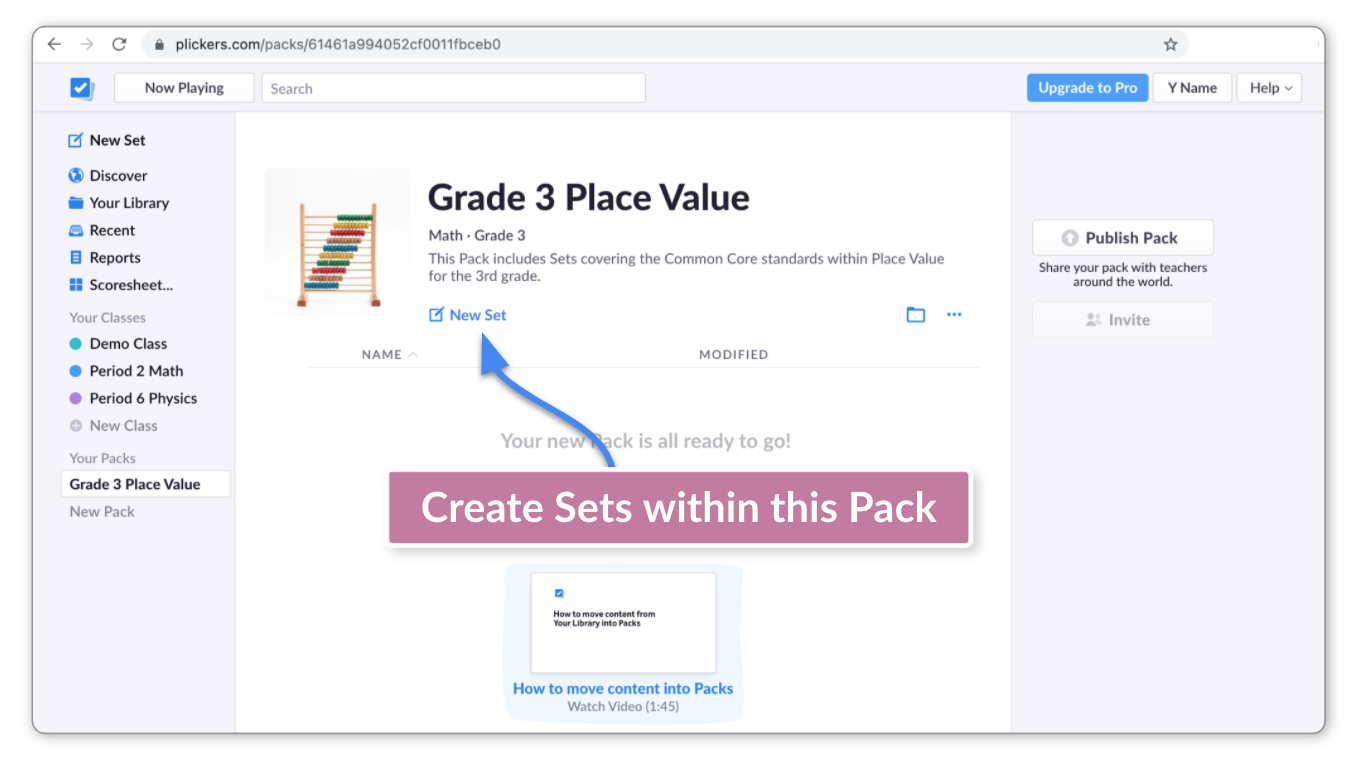
Notice that the name of the Pack now appears in your left-hand sidebar. You can click on this to quickly access your Pack at any time.
-
Select 'New Set' to start writing your questions
The New Set button is located towards the top of your Pack page, just underneath the Pack title and description.
 More info
To find out more about Sets, and how to use them to write questions, feel free to check out our Explore article here, and our How-to Guide here.
-
You can also move content into your new Pack
You might want to add material from Your Library, or from another Pack. You can do this by simply dragging-and-dropping items from your main screen to the Pack listed in your left-hand sidebar.
Browse through the detailed steps on how to do this by clicking here.
If you need to edit your Pack details at any time, you can simply click on the Pack title at the top of your Pack page.
Comments
0 comments
Article is closed for comments.