By this stage you'll already have signed up on plickers.com, created your Classes and added your student rosters. Now it's time to build some content to play to your students.
There's a world of possibilities to explore when creating content in Plickers (you can find out more in our overview article linked here), but for now, we'll go through the basic process together.
Creating your own content
The best way to create your own content is to build Sets.
A Set is a collection of questions that's played and assessed as a group. For instance, a Set of questions might form a quiz that covers a particular sub-topic or assessment type. For more info, click here.
So how do you go about creating a Set?
To show you, we've included a gif tutorial below:

Or if you prefer, you can follow the steps written below:
-
Head over to your plickers.com homepage on your laptop/computer
-
In the top left-hand corner, click on the button called 'New Set'
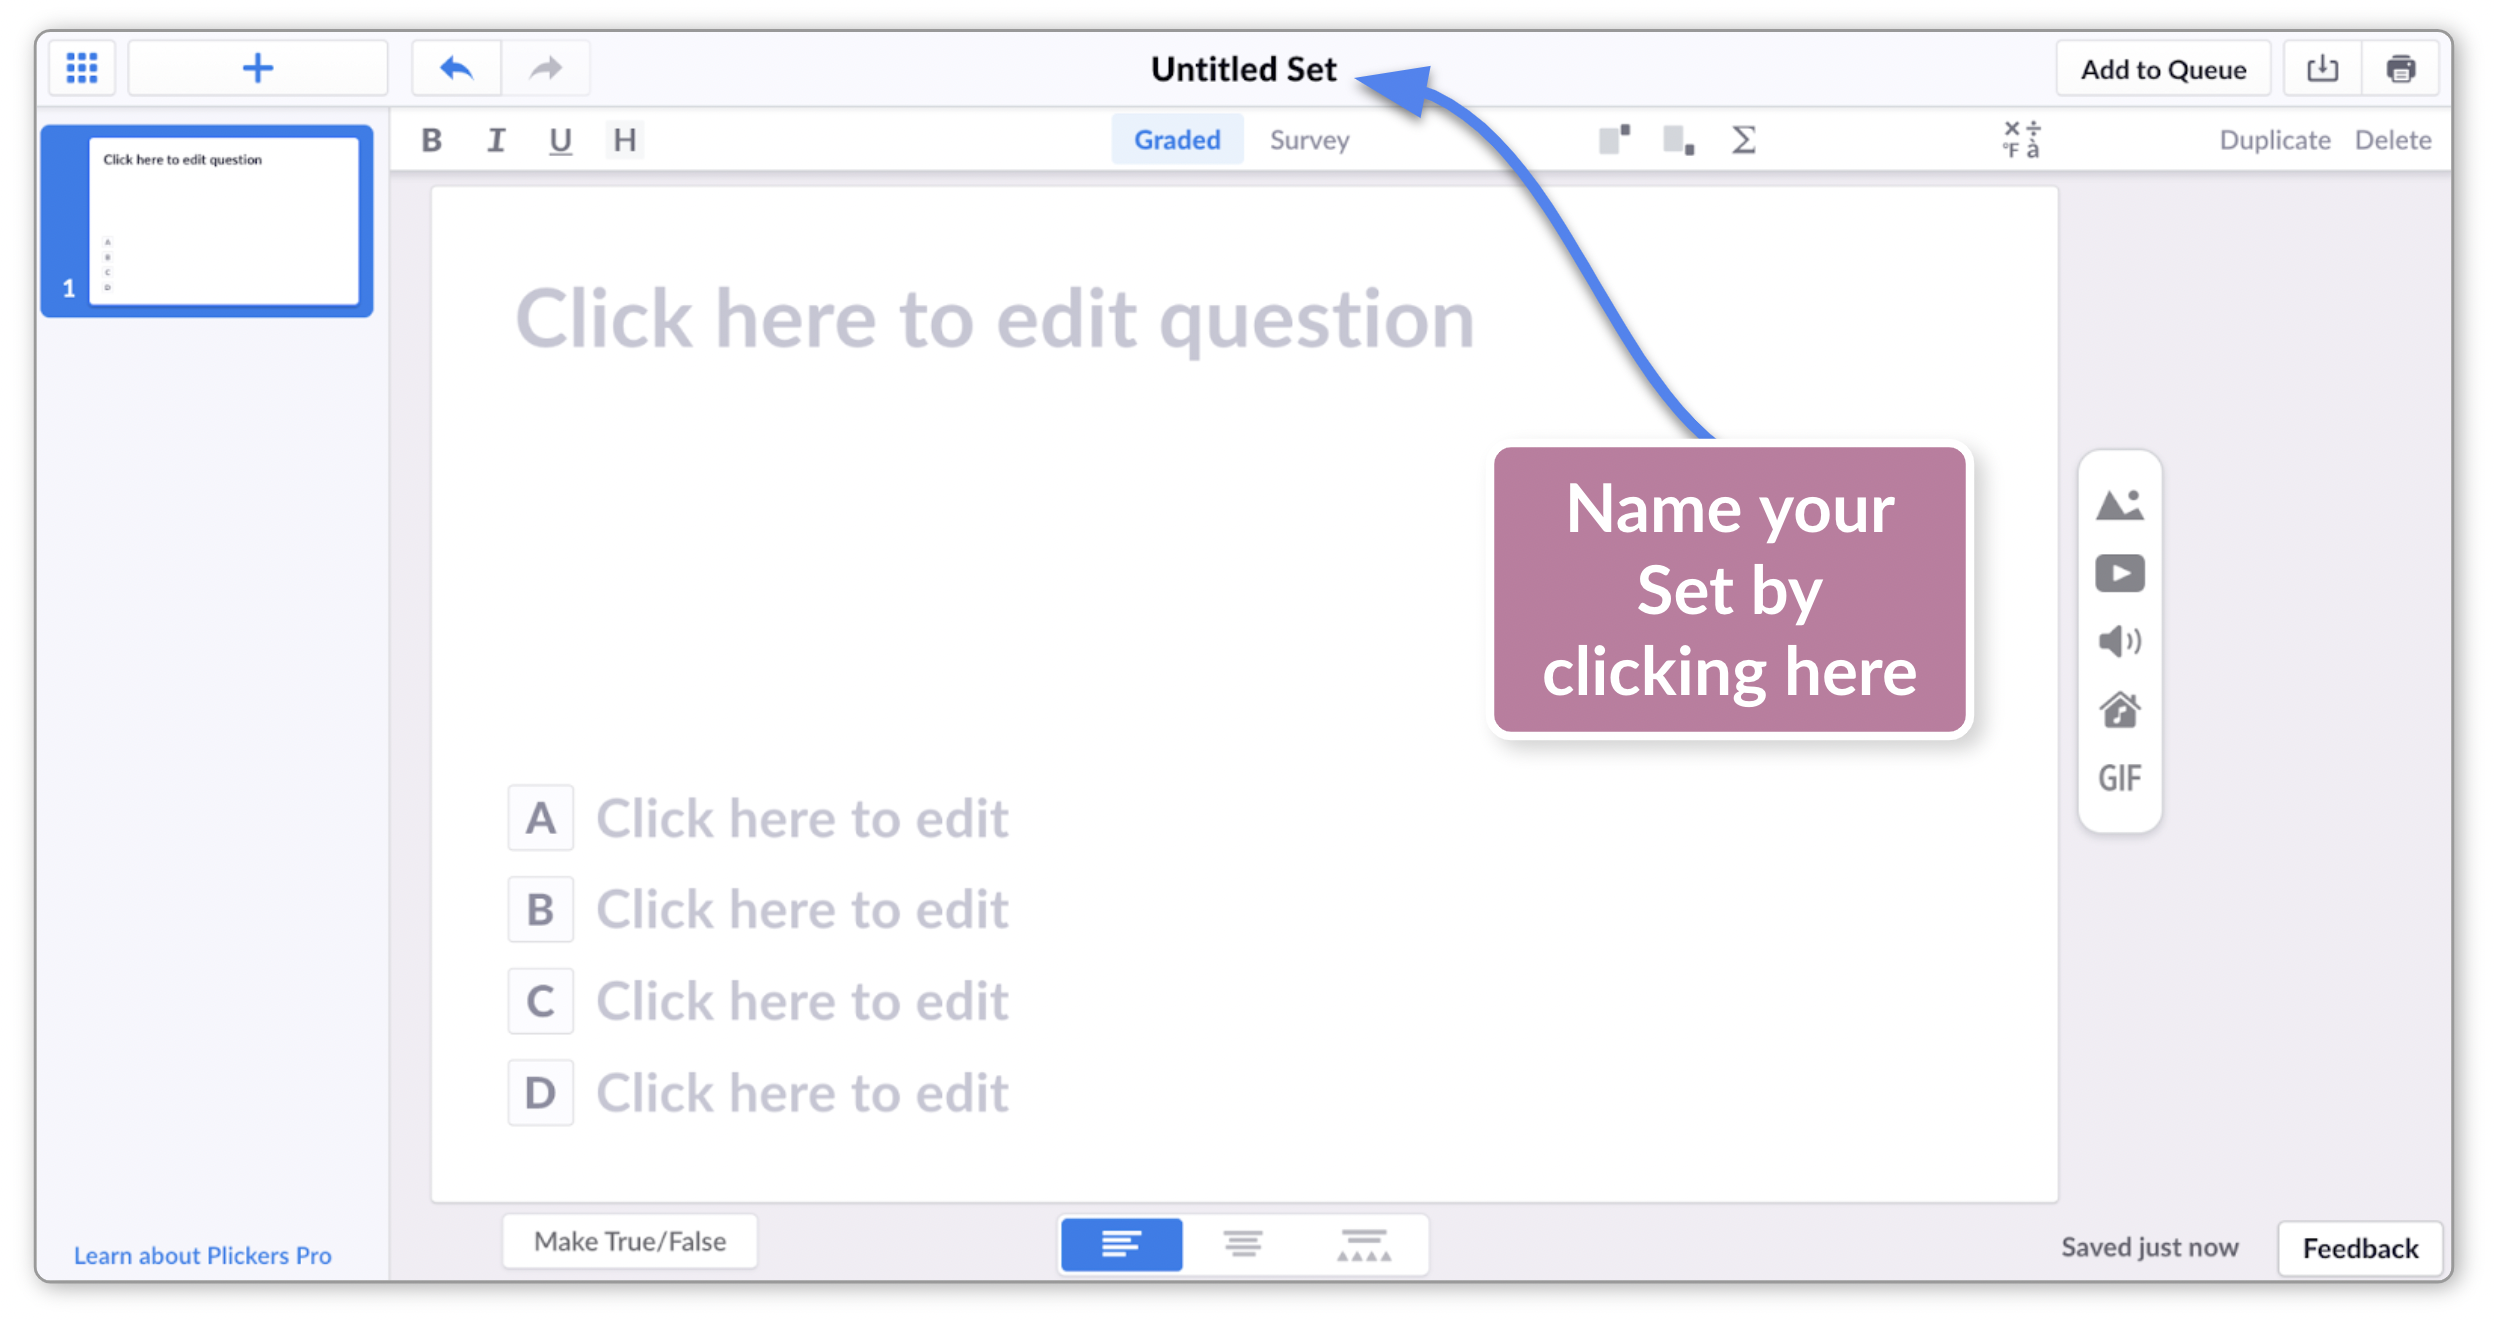
You'll be taken to the Set Editor (the screenshot in the next step demonstrates what this looks like).
-
Click on the 'Untitled Set' text box at the top of the page to name your Set

-
Write your first question, then add in the answer choices
There are many things you can do in the Set Editor, including importing external content and adding media to your question slides. For more info, click here.
-
Make sure to label the correct answer
When all choices are filled, you'll see that choice A is highlighted in green, which denotes the correct answer. To change the correct answer, simply click on the gray box containing the appropriate letter.
TipWhen entering choices, enter the correct answer into box A first. Then, when all boxes are filled, click on Shuffle Answers. This helps to save time and reduce errors.
-
Add your next question by clicking on the '+' button in the top left-hand corner
The Set Editor automatically saves your work, so when you've finished adding your questions, you can either use the main menu in the top left-hand corner, or just close your tab. Then, back at your homepage, your newly created Set will be showing in Your Library.
We have a variety of ways to organize your content, and one of our favorites is an entity called a Pack, which we go through in detail here.
And that's content covered! Congratulations, your plickers.com account is now set up and ready to go.
There are now just two more things you need - our cards and the Plickers mobile app.
If you already have these to hand, you can skip ahead to our 'Using Plickers' step-by-step tutorial to discover how Plickers will work in your classroom. If not, feel free to take a look at our next article.
Comments
0 comments
Article is closed for comments.