Flash guide
- In the Editor at plickers.com, navigate to the question you'd like to edit
- Click the image icon in the Media Toolbar on the right, or select the Use Media Choices icon and click the image icon from there
- Copy and paste your image into the dialog box, or Select 'Upload...', or search the web using the search bar
Images can be a great way to add depth to your questions, and increase student engagement. So we've made it possible to add pictures to your Plickers content from a range of sources.
In this article:
You can choose to use images as part of your question prompt or as an answer choice (or even both). So in our main article below, we've included the steps for both options within each route - simply click on the relevant tabs to find out more.
Once you've added your image, it's also possible to edit it within Plickers. We go into this in detail in our How-to Guide linked here.
Access the Editor
The first thing you'll need to do is access the Editor, which is where you'll be creating and editing your content.
The Editor can refer to either the Set Editor (recommended) or the Question Editor, and it's where you create the questions that you'll be asking your students in class. For more info, follow this link.
The route to take depends on whether you'll be creating a new item, or making changes to an existing one. Click on the dropdown boxes below to find out how to move forward with each option...
-
-
Log in to plickers.com on your laptop/computer
You'll arrive at your Plickers homepage (specifically Your Library).
-
Select the 'New Set' button in the top left-hand corner
You'll be taken to the Set Editor, where you can start creating your questions.
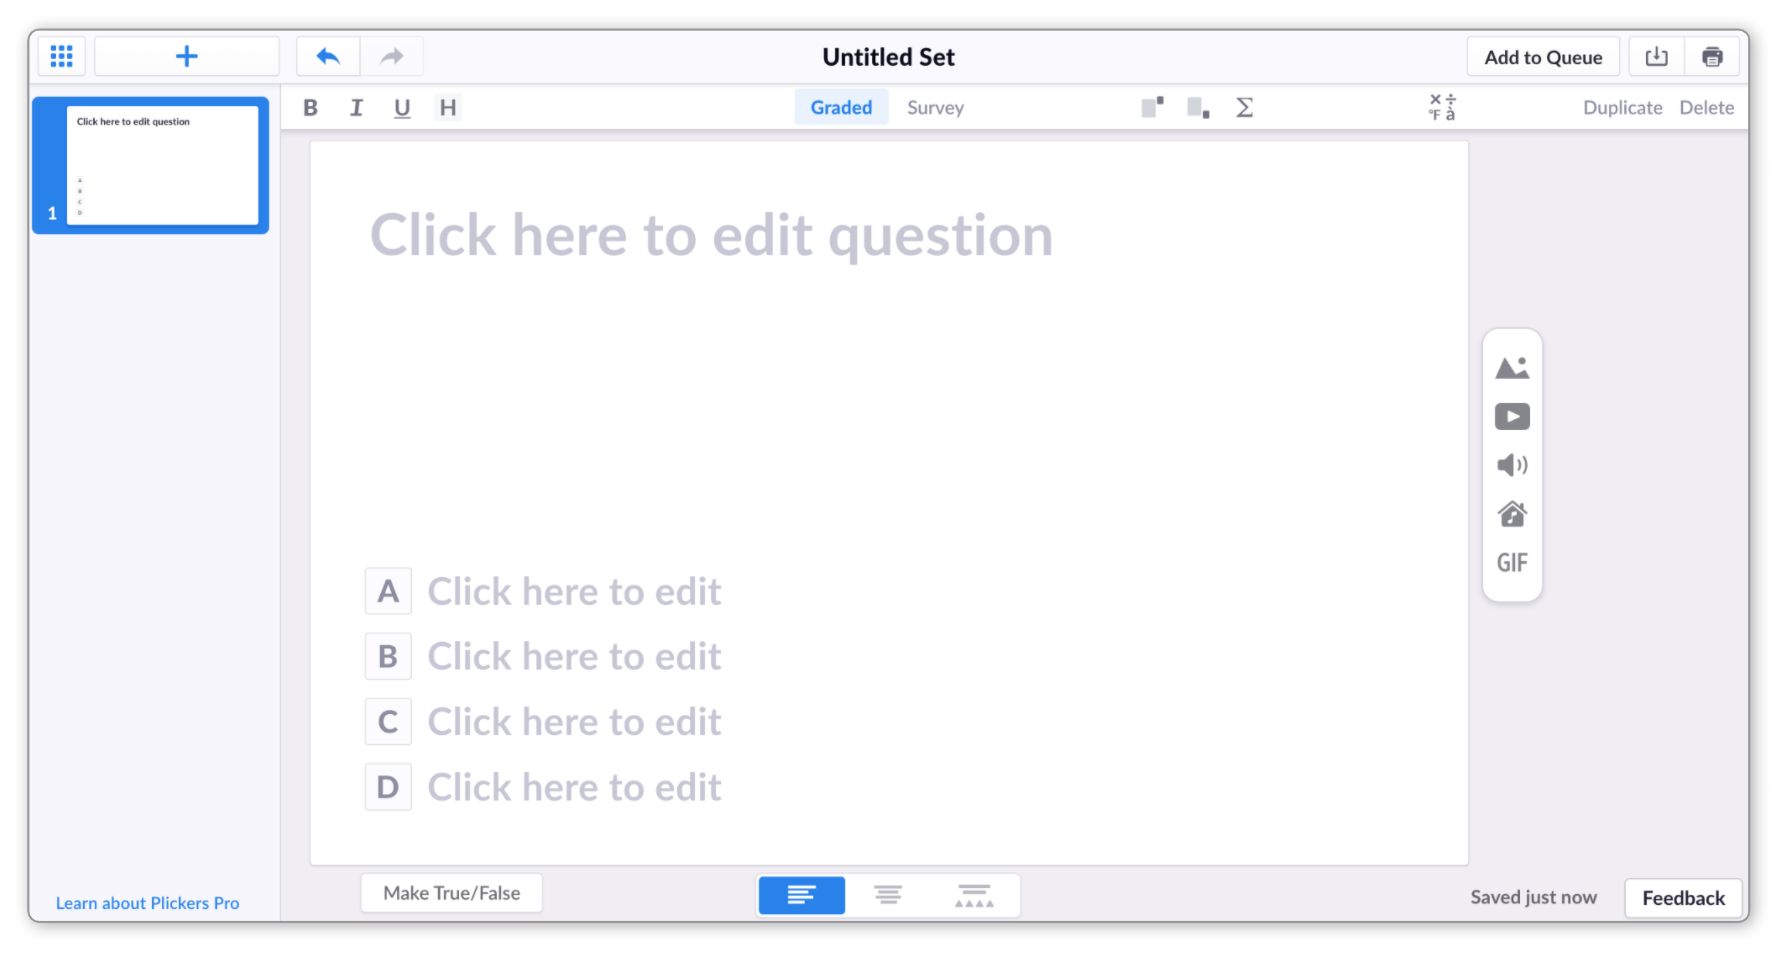
It's a good idea to name your Set straight away, using the textbox at the top of the Editor.
NoteWe recommend creating Sets for your content (click here for more info). If you'd rather create a Standalone Question, click on the 3-dot icon towards the right of your homepage.
-
-
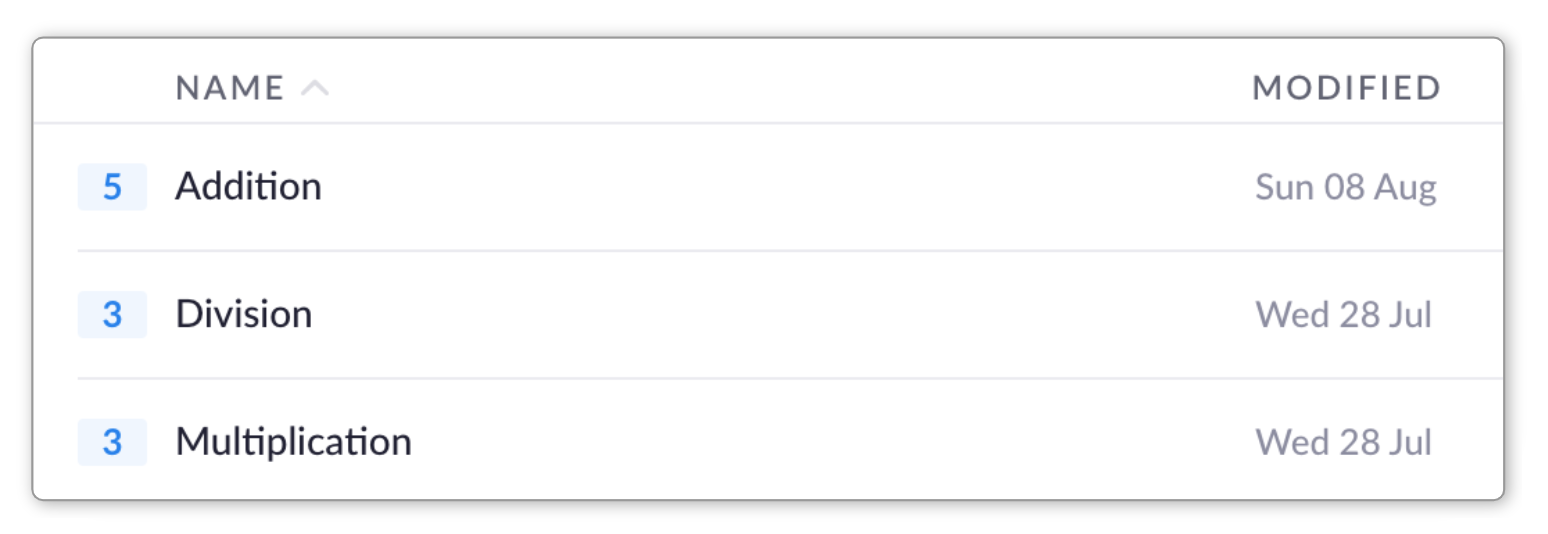
To access the Editor and make changes to your existing content, you just need to find the title of your item in Your Library, Recent or Pack page. Items look something like those shown in the image below:
You can then try one of the following things:
-
Double-click
Double-clicking on the title of your content item will take you straight to the Editor.
-
Right-click
A right-click on your content item's title will produce the following menu:
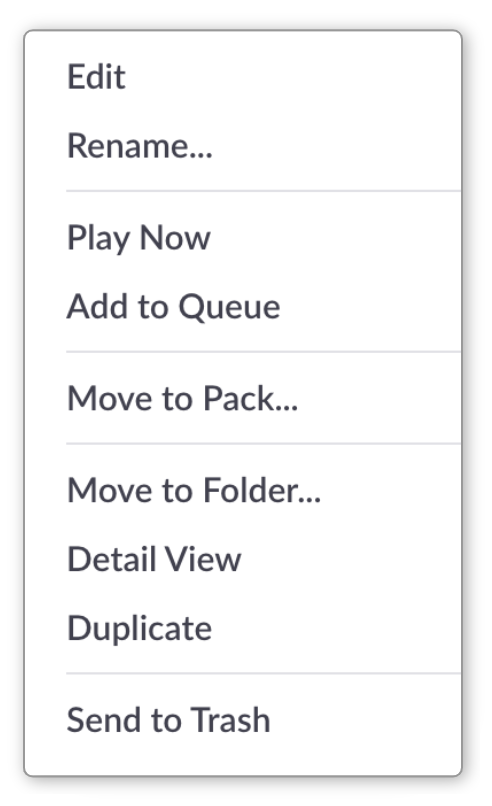
You can then select the Edit option at the top of the menu.
-
Use the preview panel on the right
If you select the content item with a single click, the item will be highlighted in blue and you'll see its information appear in the preview panel on the right (as shown below).

To access the Editor for that item, select the Edit button above the slide preview.
-
For each of the options above, the Editor will open in a new tab in your browser.
Option 1: Copy and paste images
It's possible to copy and paste images directly into your questions and choices. Click on the appropriate tab below for detailed instructions on how to do this.
-
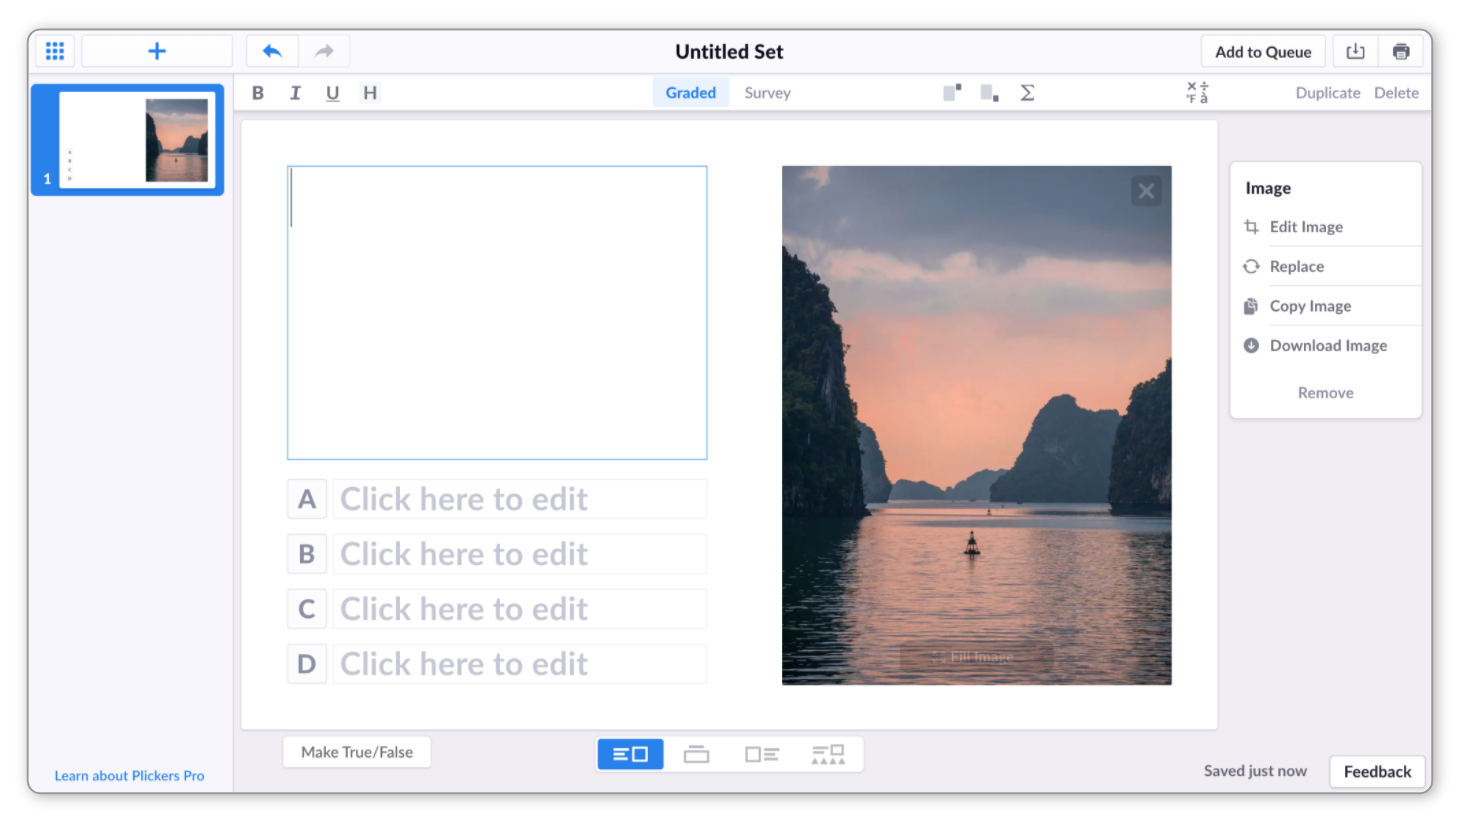
When you add an image to a question prompt, it'll appear to one side of your question text.
There are two ways you can do this:
-
-
Copy your desired image (cmd/ctrl + c)
-
Access the Editor
See the section above to find out more.
-
In the Editor, click the question text box
When you select the words 'Click here to edit question', the text box will be outlined in blue.
-
Paste your image (cmd/ctrl + v)
Your image will appear on your question canvas and you'll be free to write your question in the text box.
Head back up to find out about answer choices
-
-
-
Copy your desired image (cmd/ctrl + c)
-
In the Editor, select the image icon from the Media Toolbar
-
Paste your image (cmd/ctrl + v)
You'll effectively be pasting it into the text box in the window shown below:
Your image will appear on your question canvas, and you can click into the text box to write your question.
Head back up to find out about answer choices
-
TipUse the Layout and Image Fill functions to experiment with the design of your question slide - more info on this is available in our Explore article linked here.
-
-
There's just the one route available to paste images into your choices:
-
Copy your desired image (cmd/ctrl + c)
-
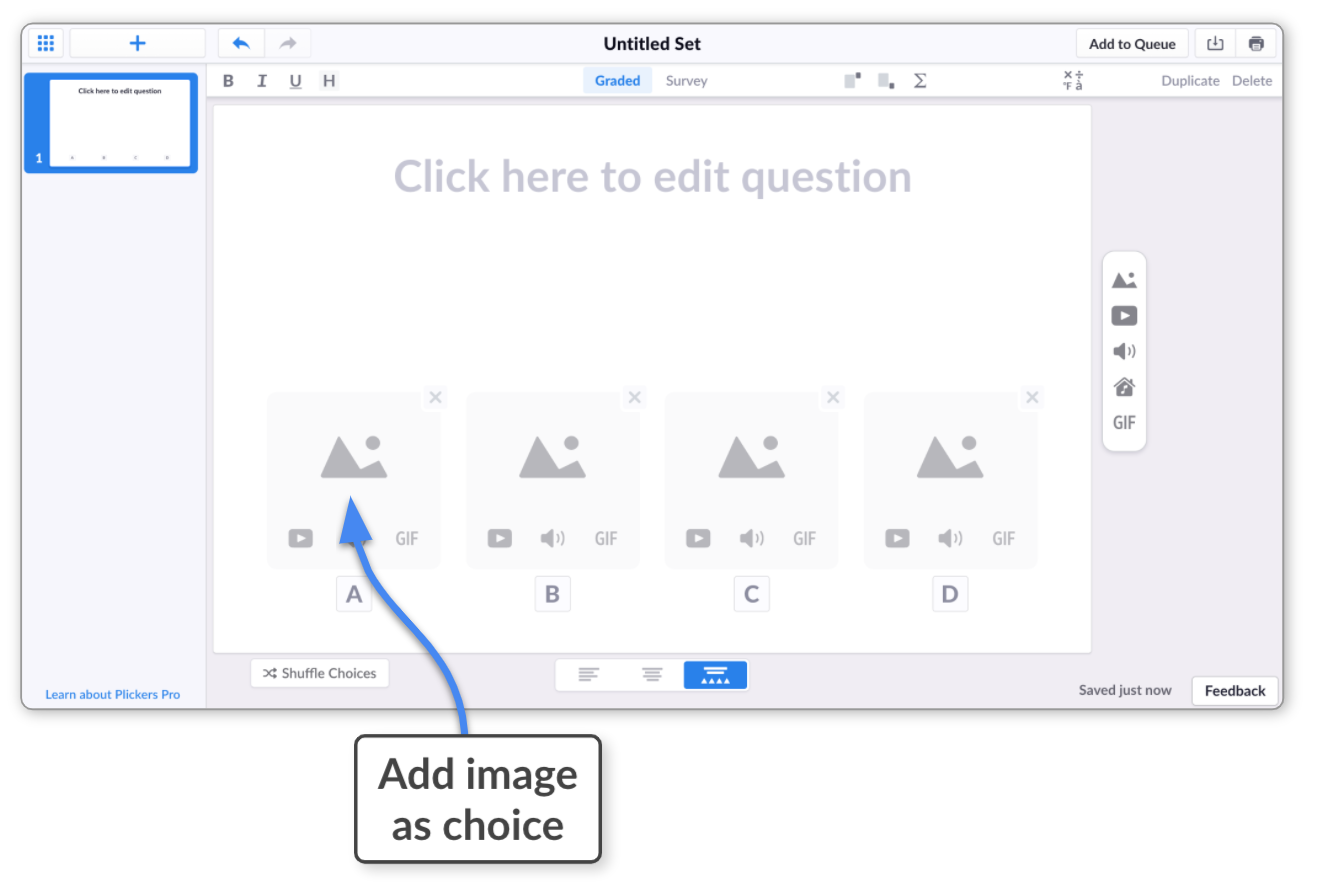
In the Editor, select the 'Media as Choices' button
 Tip
TipYou can also try selecting the Add Media Choices button that appears when you hover your cursor over each choice text box.
-
Click on the image icon for your desired choice letter
-
Paste your image (cmd/ctrl + v)
You'll be pasting it into the window shown below:
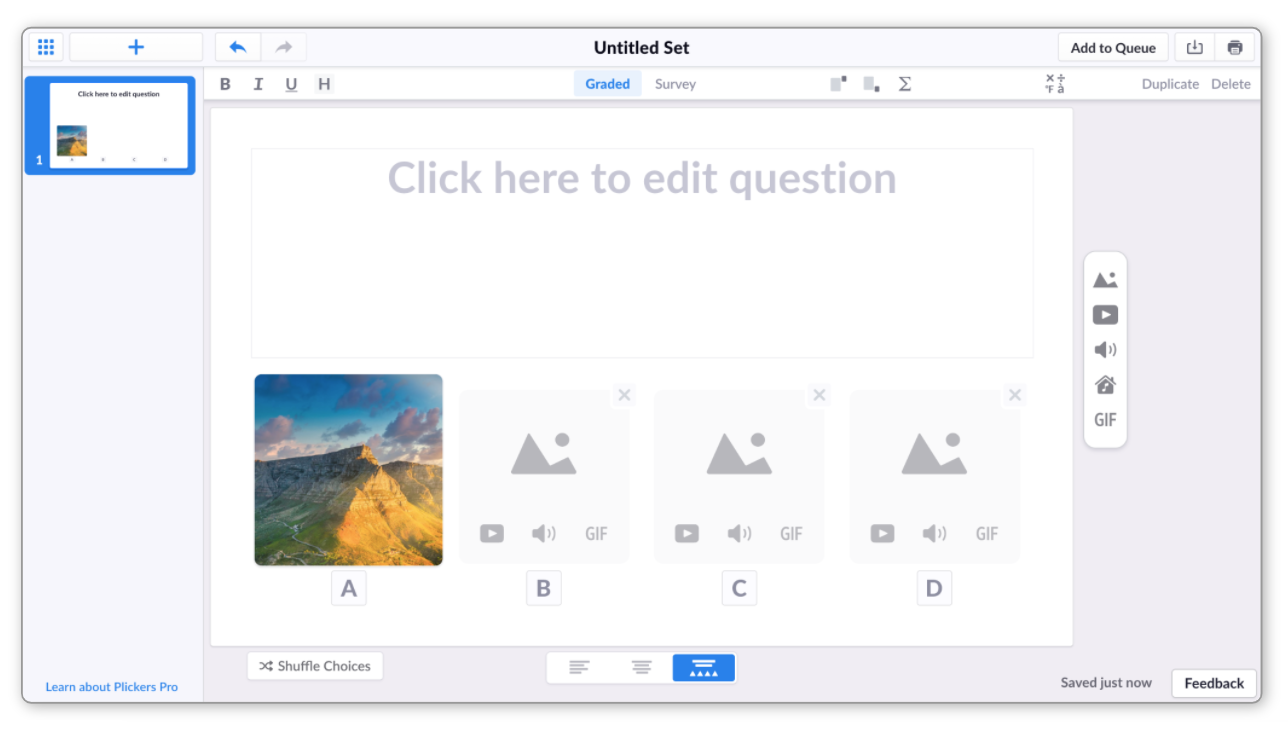
Your image will then appear as the choice that you selected - in this case choice A:
TipUse the Layout and Image Fill functions to experiment with the design of your question slide - more info on this is available in our Explore article linked here.
Head back up to find out about the question prompt
-
Back to top
Option 2: Upload images from your computer
If you've got a collection of images saved on your computer, ready to be included in your Plickers content, this is the option for you.
-
When you add an image to a question prompt, it'll appear to one side of your question text.
-
Access the Editor
See the section above to find out more.
-
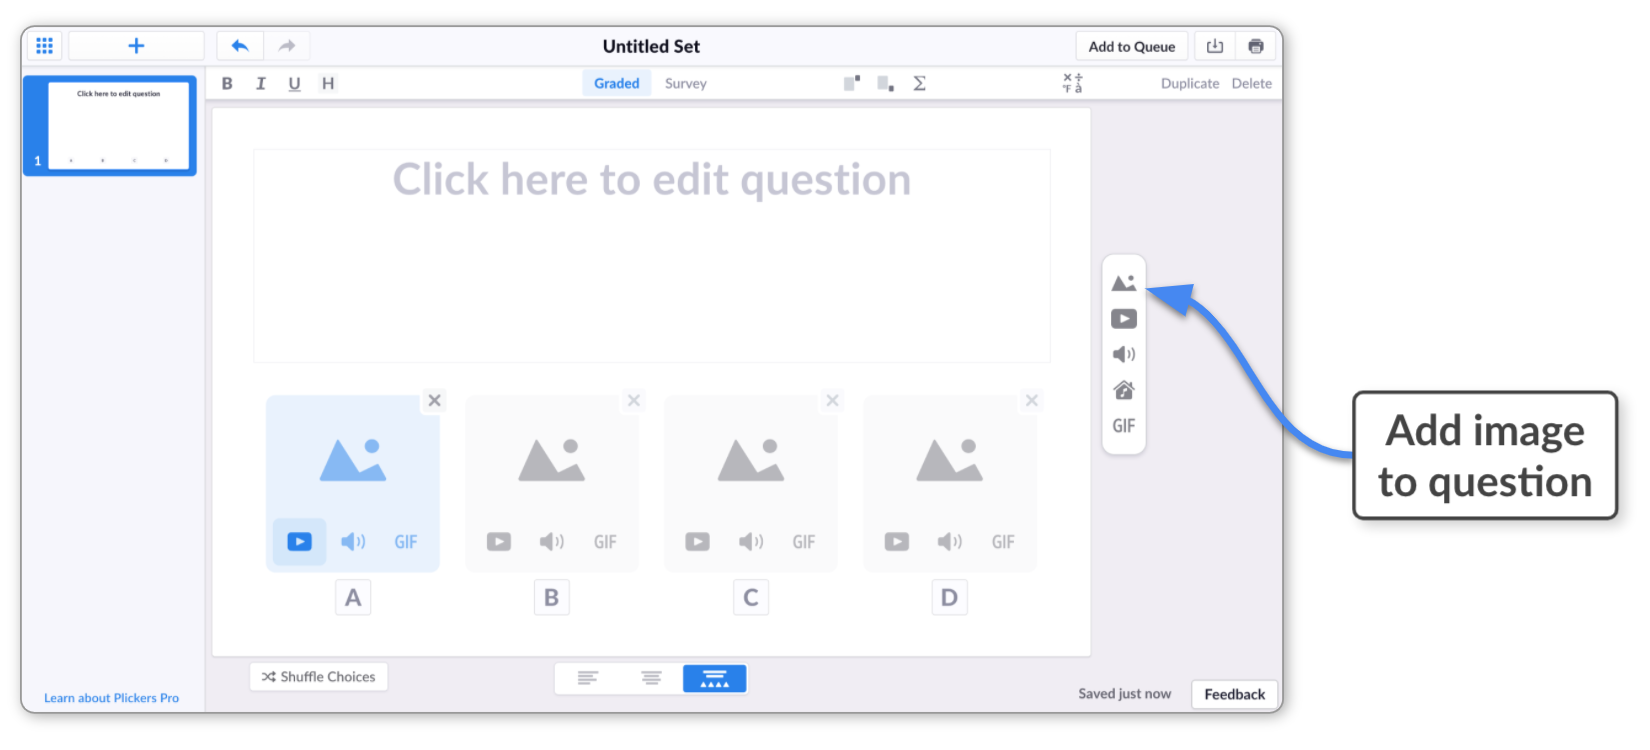
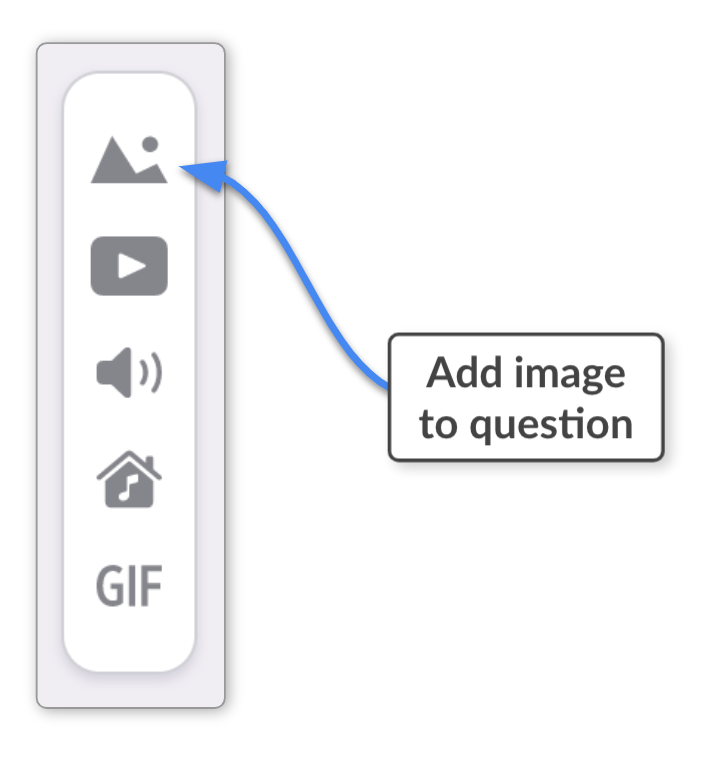
Click on the Image icon
 in the Media Toolbar on the right
The Media Toolbar is located on the right-hand side of the page, and looks like this:
-
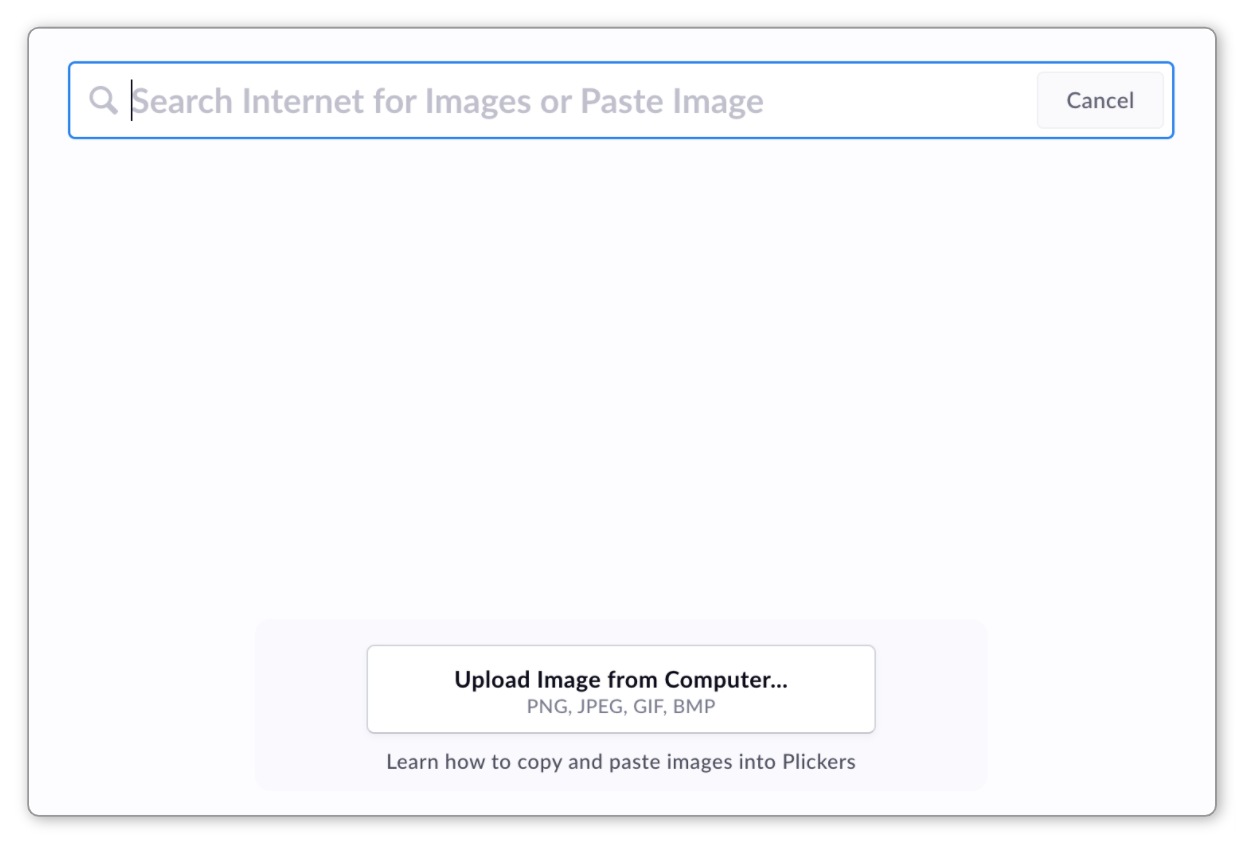
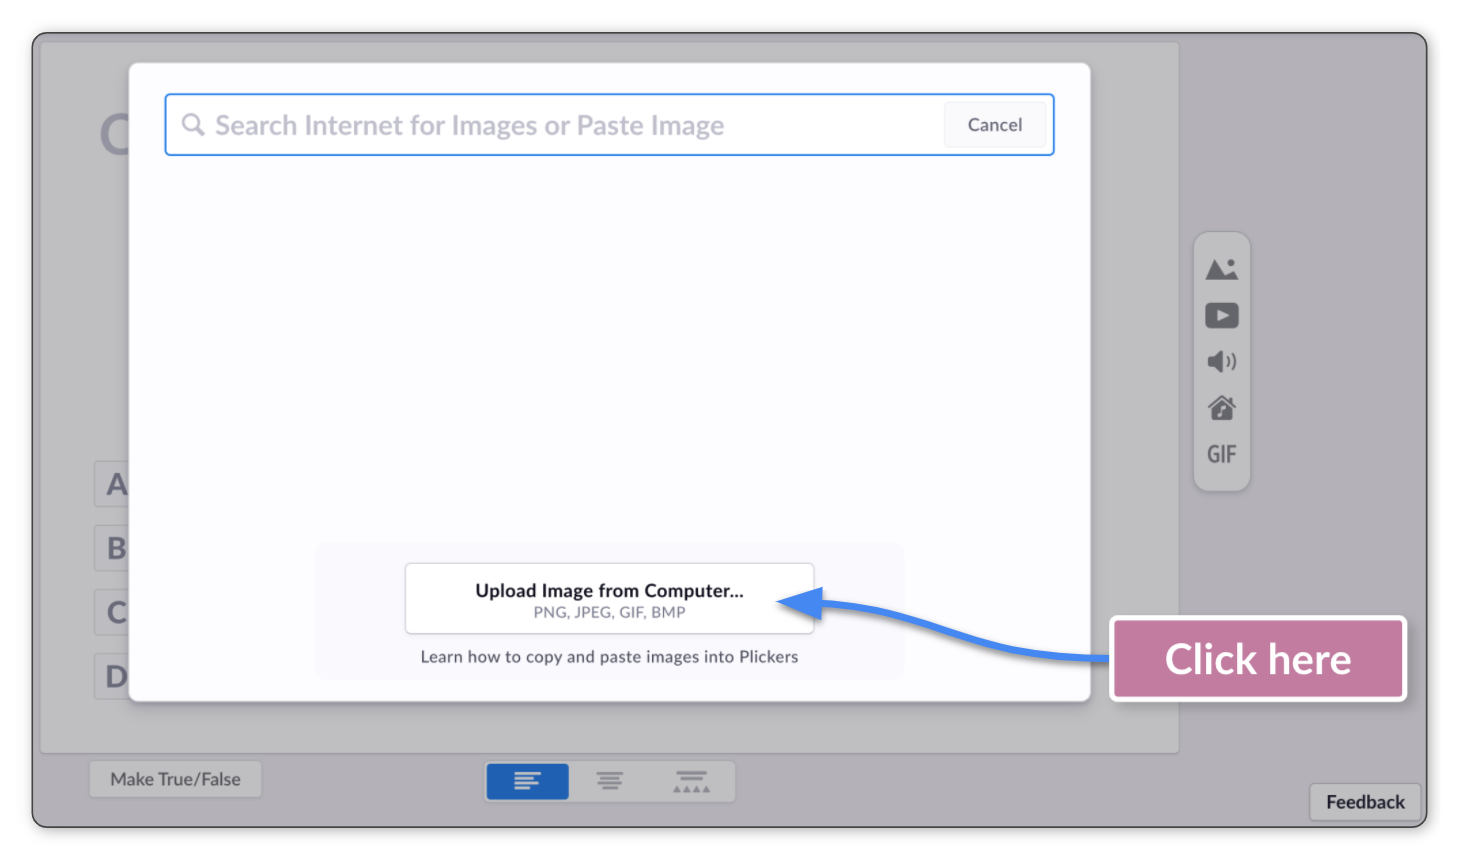
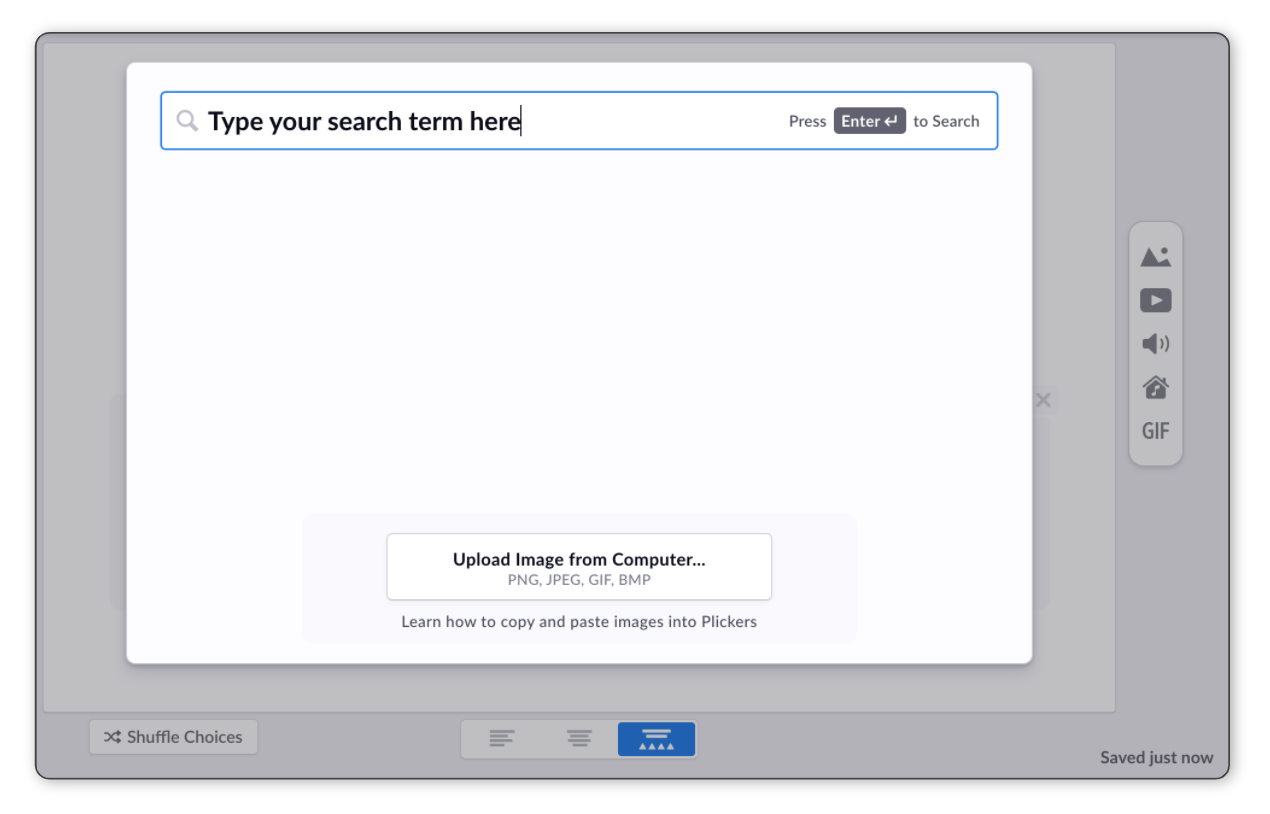
Click 'Upload Image from Computer...'
This button is located towards the bottom of the screen, as shown below:
-
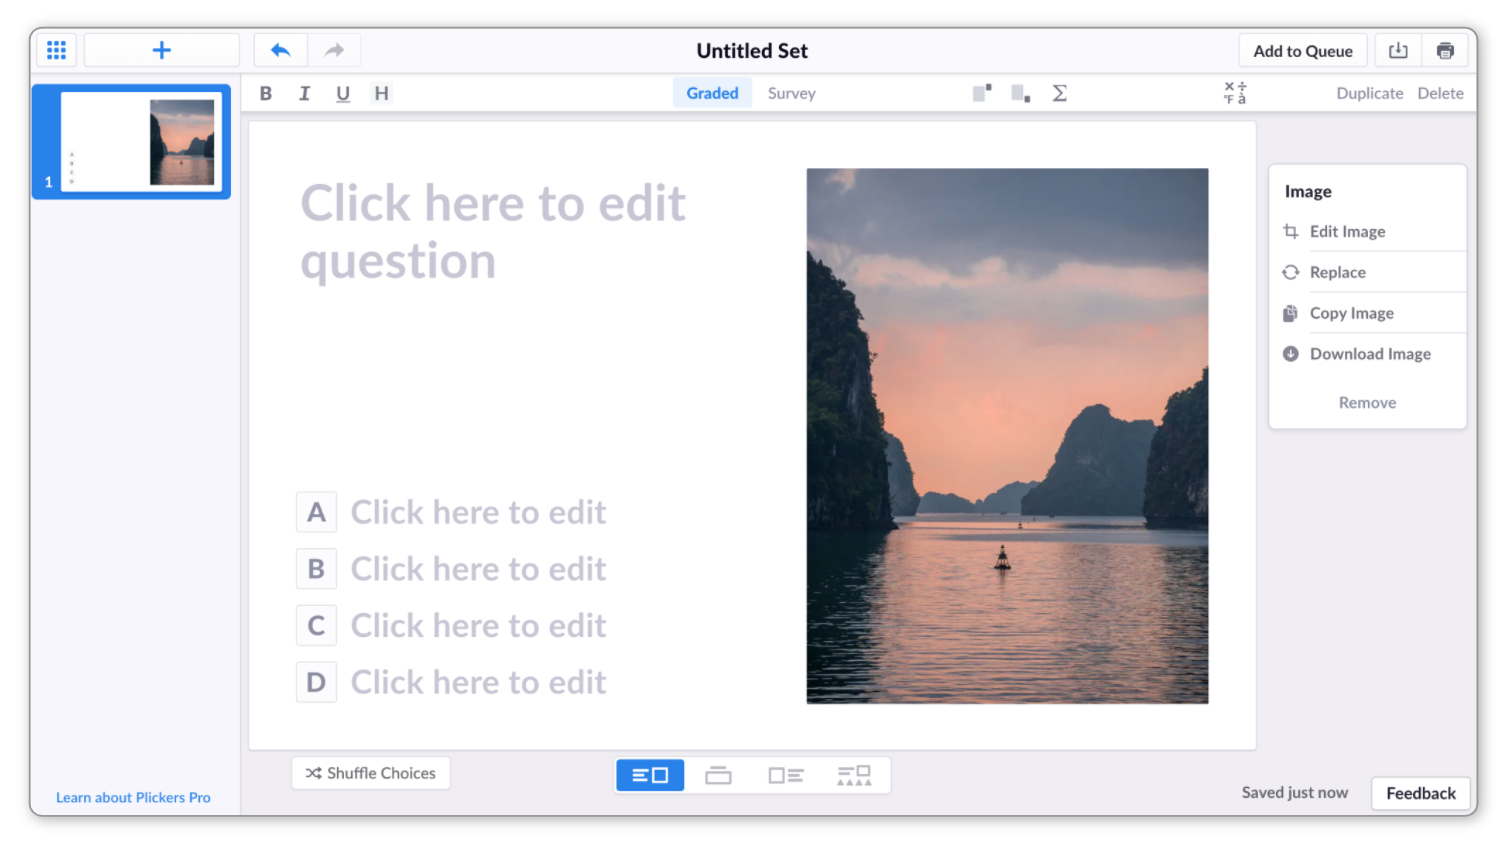
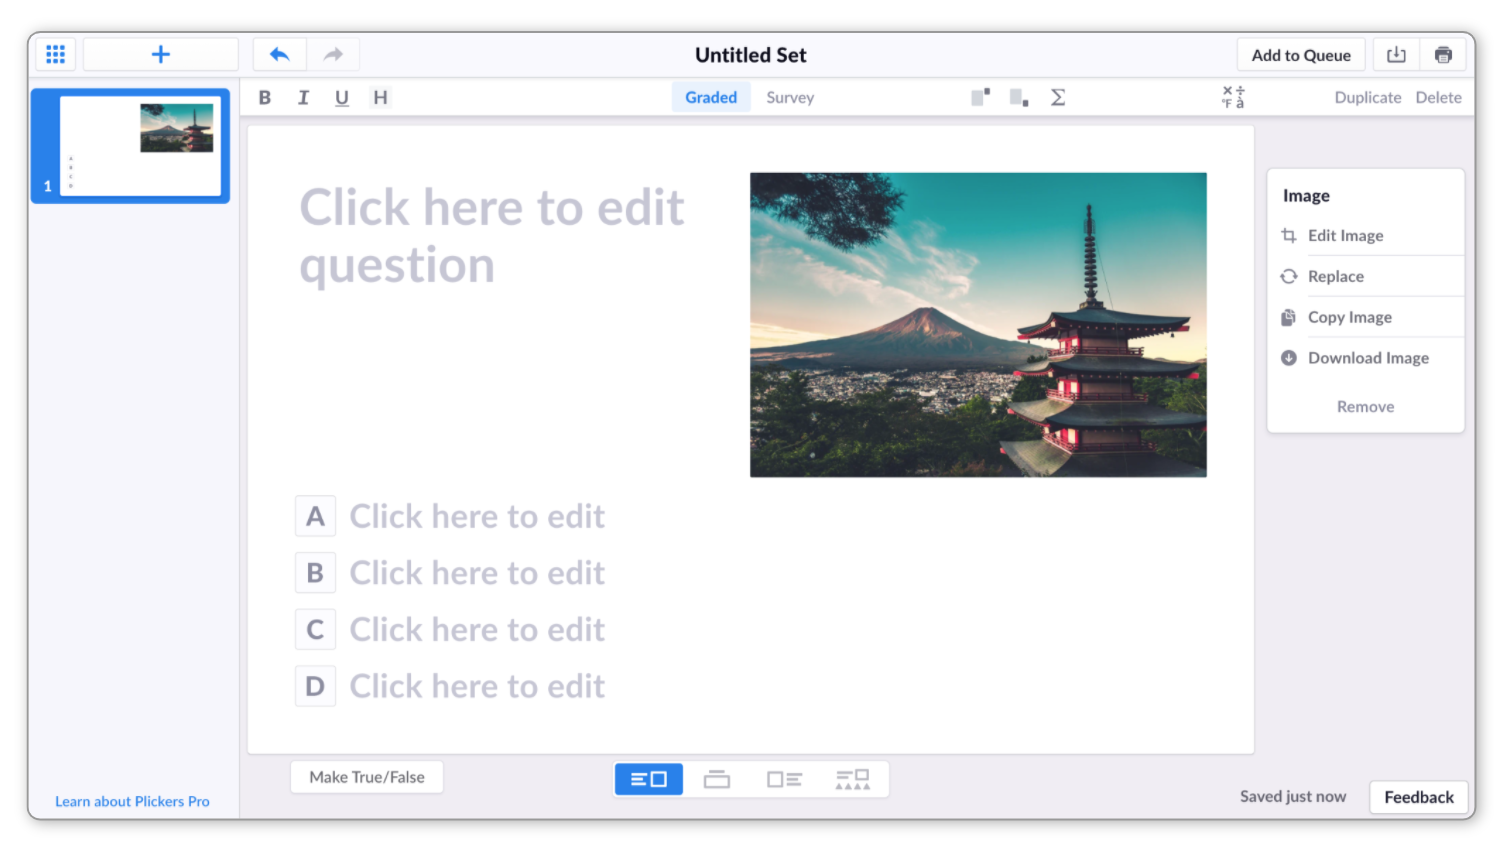
Select the file you need from your computer
It'll then appear on your canvas, to one side of your question text, as shown below:
 Tip
TipUse the Layout and Image Fill functions to experiment with the design of your question slide - more info on this is available in our Explore article linked here.
Head back up to find out about answer choices
-
-
When you add an image as an answer choice, it takes up the full choice area and serves as a substitute to a text-based choice.
-
Access the Editor
See the section above to find out more.
-
In the Editor, select the 'Media as Choices' button
 Note
NoteYou can also try selecting the Add Media Choices button that appears when you hover your cursor over each choice text box.
-
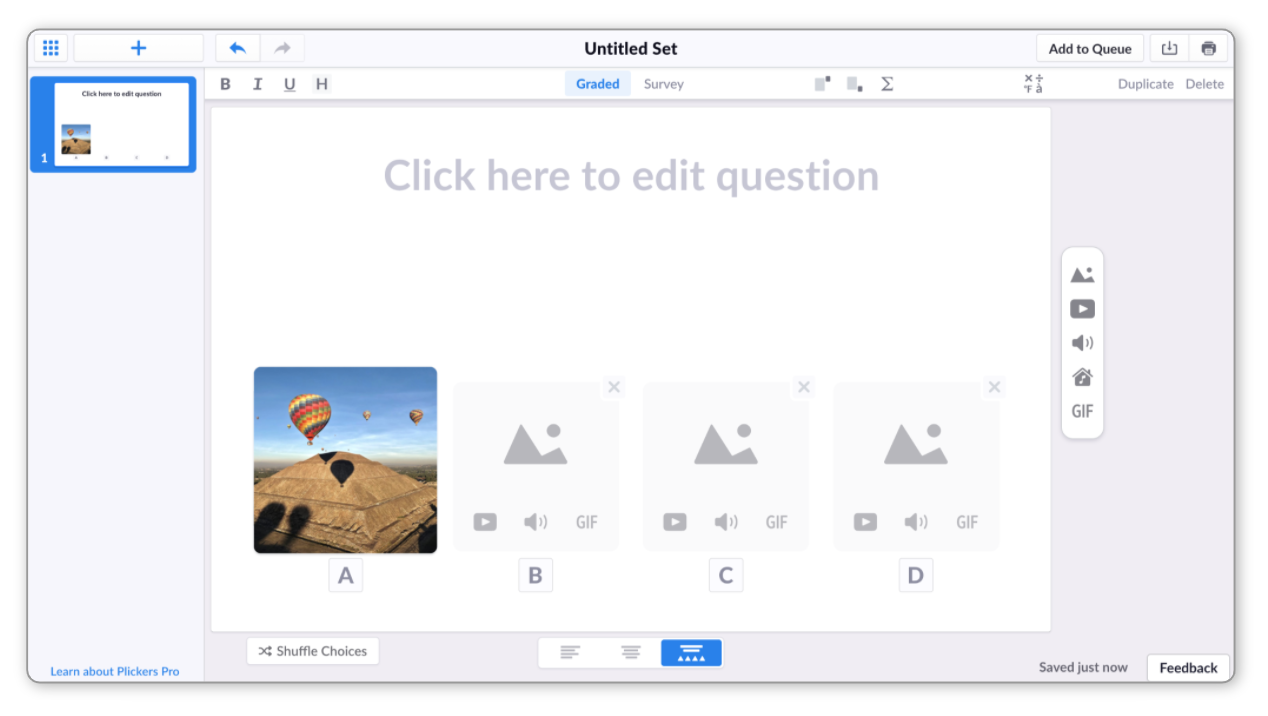
Click on the image icon for the appropriate choice letter
NoteIf you want to replace an image that's already there, you'll need to remove the original by clicking on the 'x' at the top-right of the picture.
-
Click 'Upload from Computer'
This button is located towards the bottom of the screen, as shown below:
-
Select the file you need from your computer
It'll appear as one of your answer options, and you can then move on to your next choice.
TipUse the Layout and Image Fill functions to experiment with the design of your question slide - more info on this is available in our Explore article linked here.
Head back up to find out about the question prompt
-
Back to top
Option 3: Search for an image online
Our image capability also contains an in-built search engine - you can quickly search the web for images and insert them straight into your question slides. Here's how:
-
When you add an image to a question prompt, it'll appear to one side of your question text.
-
Access the Editor
See the section above to find out more.
-
Click on the Image icon
in the Media Toolbar on the rightThe Media Toolbar is located on the right-hand side of the page, and looks like this:
-
Start typing to search for an image
You may need to click into the text box at the top first.
-
Select your desired image from the results
It'll then appear on your question, to one side of your question text, as shown below:
TipUse the Layout and Image Fill functions to experiment with the design of your question slide - more info on this is available in our Explore article linked here.
Head back up to find out about answer choices
-
-
When you add an image as an answer choice, it takes up the full choice area and serves as a substitute to a text-based choice.
-
Access the Editor
See the section above to find out more.
-
In the Editor, select the 'Media as Choices' button
NoteYou can also try selecting the Add Media Choices button that appears when you hover your cursor over each choice text box.
-
Click on the image icon for the appropriate choice letter
NoteIf you want to replace an image that's already there, you'll need to remove the original by clicking on the 'x' at the top-right of the picture.
-
Start typing to search for an image
You may need to click into the text box at the top first.
-
Select your desired image from the results
It'll appear appear as one of your answer options, and you can then move on to your next choice.
TipUse the Layout and Image Fill functions to experiment with the design of your question slide - more info on this is available in our Explore article linked here.
Head back up to find out about the question prompt
-
Back to top
Now that you've inserted your images, don't forget that you can also edit, crop and annotate them within the Editor. To find out how, head over to our How-to Guide linked here.
And if there's anything more that we can help with, both in terms of adding images to your Sets, and anything else Plickers-related, please don't hesitate to contact us by emailing support@plickers.com.
Comments
0 comments
Article is closed for comments.