Once you've added an image to a question within a Set, there are several edit options included within the Set Editor that you can use to edit your image. The contents list below lists the available features.
In this article:
To find out how to add an image in the first place, either to a question or your answer choices, head over to our How-to Guide here.
Intro: Access the Image Editor
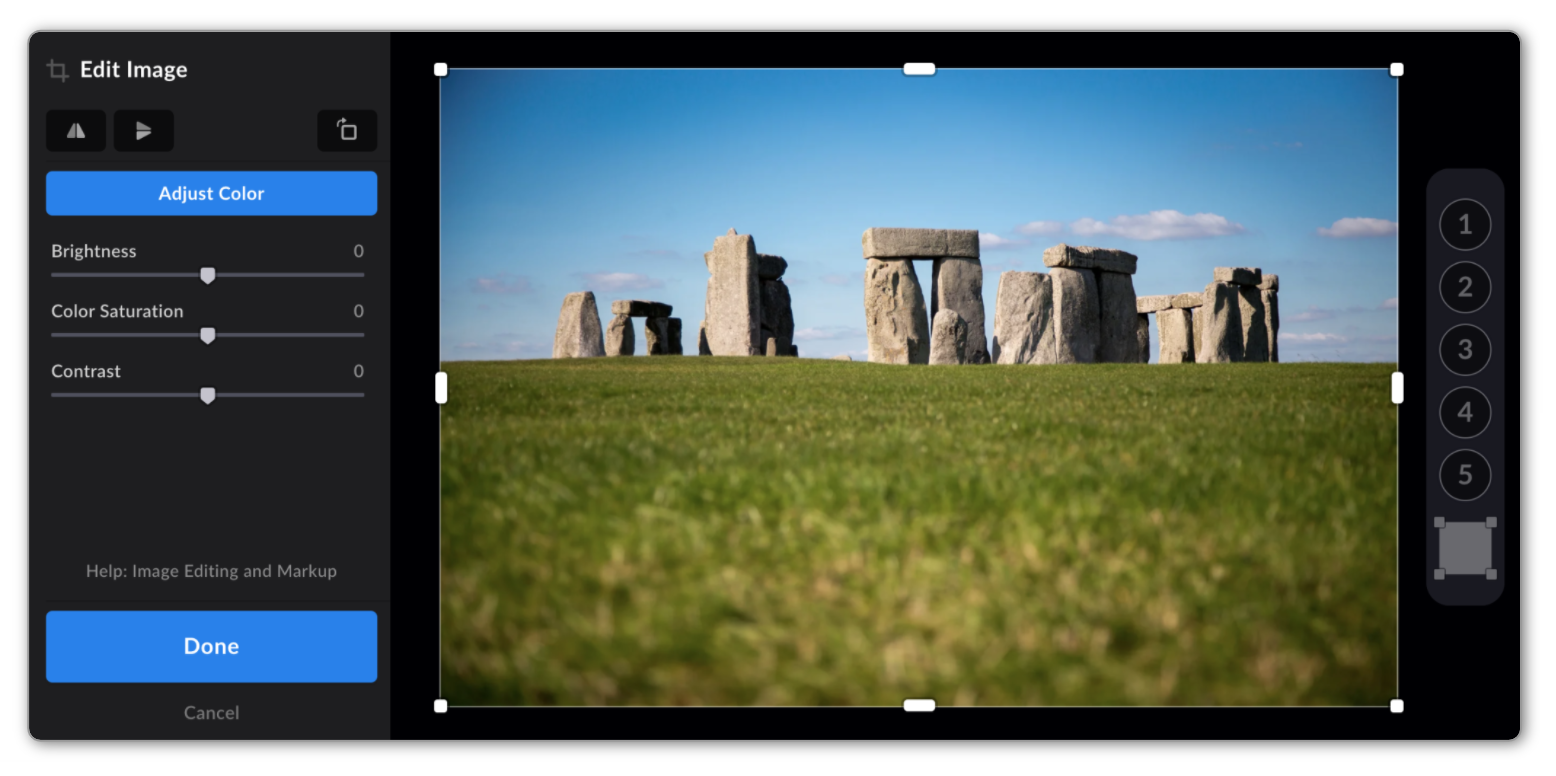
This is what the Image Editor looks like:
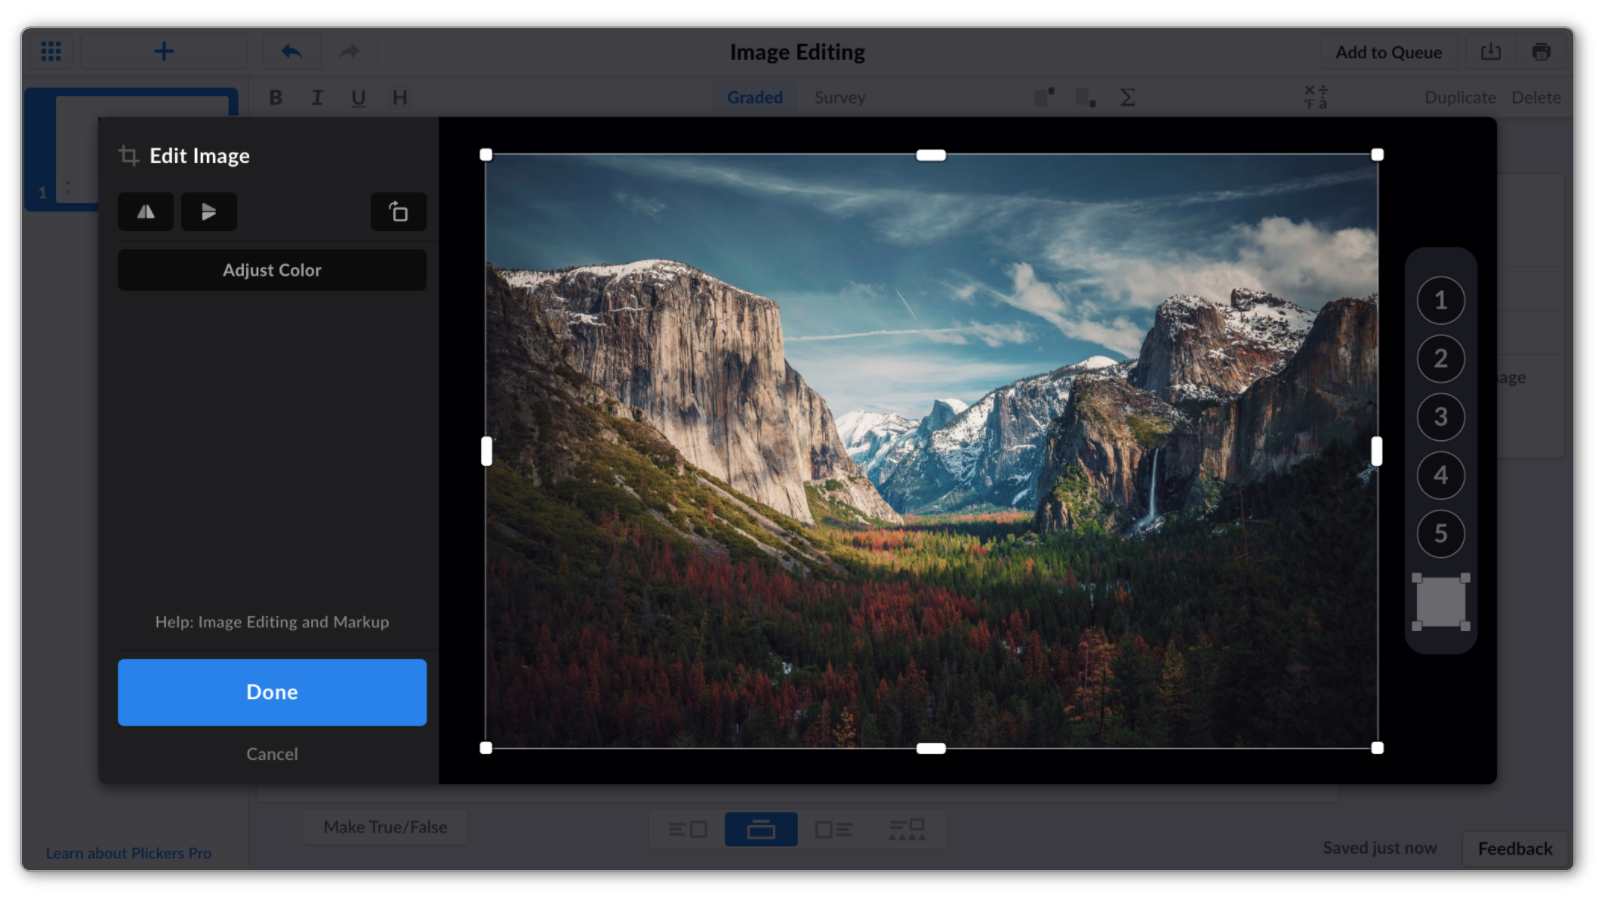
To get to the Image Editor, all you need to do is click on your image within the Set Editor. Click on the toggle box below for more detailed steps:
-
-
Sign in to plickers.com on your laptop/computer
You'll arrive at Your Library.
-
Double-click on the content item you'd like to edit
You can locate your Set or Standalone Question by using the Filter bar, or by scrolling through the Your Library or Recent page.
By double-clicking on your item title, you'll be taken to the Set Editor.
-
In the Set Editor, navigate to the question containing your image
-
Click on the image you'd like to edit
You'll be taken to the window shown in the screenshot above this toggle box.
-
If your image is part of your question prompt (rather than the answer choices), to get to the Image Editor you can also try clicking on Edit Image in the toolbar to the right of the Set Editor.
Crop your image
-
Enter the Image Editor by clicking on your image
See the first section for more details.
In the Image Editor, you'll see small white boxes dotted around the edge of your image.
-
Click and drag one of the white boxes to crop
This will move the edge of the image, so cropping it to your specification.
Check out the gif below for a visualisation:
 Tip
TipIf you need to start again, you can quickly revert to your original image by selecting Reset in the bottom right-hand corner of the Image Editor.
-
If you're finished editing, click the blue 'Done' button
Or you can hit Enter as a shortcut.
Before you enter the Image Editor, try our Fill Image function - it maximizes the space filled by the image on the question canvas. There's more information about this available at this link.
Back to top
Change the orientation of your image
In the Image Editor, it's possible to flip your image (either vertically or horizontally), and rotate your image (by 90°, 180°, or 270°). Here's how:
-
-
Enter the Image Editor by clicking on your image
See the first section for more details.
-
Click on the
 icon in the top left corner to flip the image horizontally
Click it again to un-flip the image.
-
Click on the
 icon in the top left corner to flip the image vertically
Click it again to un-flip the image.
-
If you're finished editing, click the blue 'Done' button
Or you can hit Enter as a shortcut.
TipIf you need to start again, you can quickly revert to your original image by selecting Reset in the bottom right-hand corner of the Image Editor.
-
-
-
Enter the Image Editor by clicking on your image
See the first section for more details.
-
Select the
 icon located to the left of the page
It will rotate the image clockwise 90°.
To rotate the image 180°, click the icon twice. And for 270°, click the icon three times.
-
If you're finished editing, click the blue 'Done' button
Or you can hit Enter as a shortcut.
TipIf you need to start again, you can quickly revert to your original image by selecting Reset in the bottom right-hand corner of the Image Editor.
-
Back to top
Adjust the color of your image
You also have the option to adjust the Brightness, Color Saturation and/or Contrast of your image within the Image Editor. Here's how:
-
Enter the Image Editor by clicking on your image
See the first section for more details.
-
Select 'Adjust Color' on the left-hand side
You'll see three different adjustment scales appear for Brightness, Color Saturation and Contrast.
-
Slide the controllers left or right to make adjustments
-
Click the blue 'Done' button
Or you can hit Enter as a shortcut.
TipIf you need to start again, you can quickly revert to your original image by selecting Reset in the bottom right-hand corner of the Image Editor.
Back to top
Add labels to your image
This feature is really useful if you have an annotated diagram that you'd like to test your students on.
You can blank out the annotations already on your image, and then add numbered labels to incorporate into your question prompt.
-
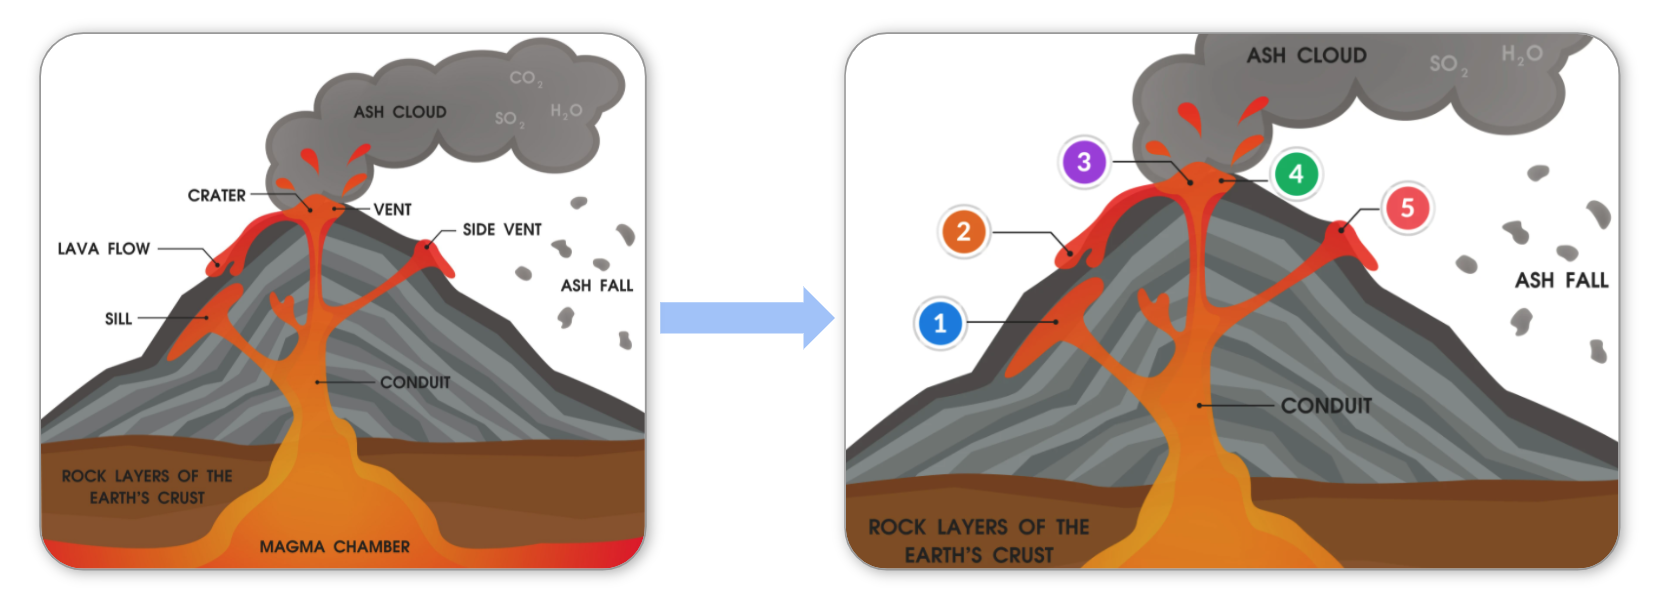
Lets's say you have a diagram of a volcano and you want to assess your students on how well they can identify the different features labelled within it.
The Plickers Image Editor makes it easy for you to try this. Here's how the image might be edited:
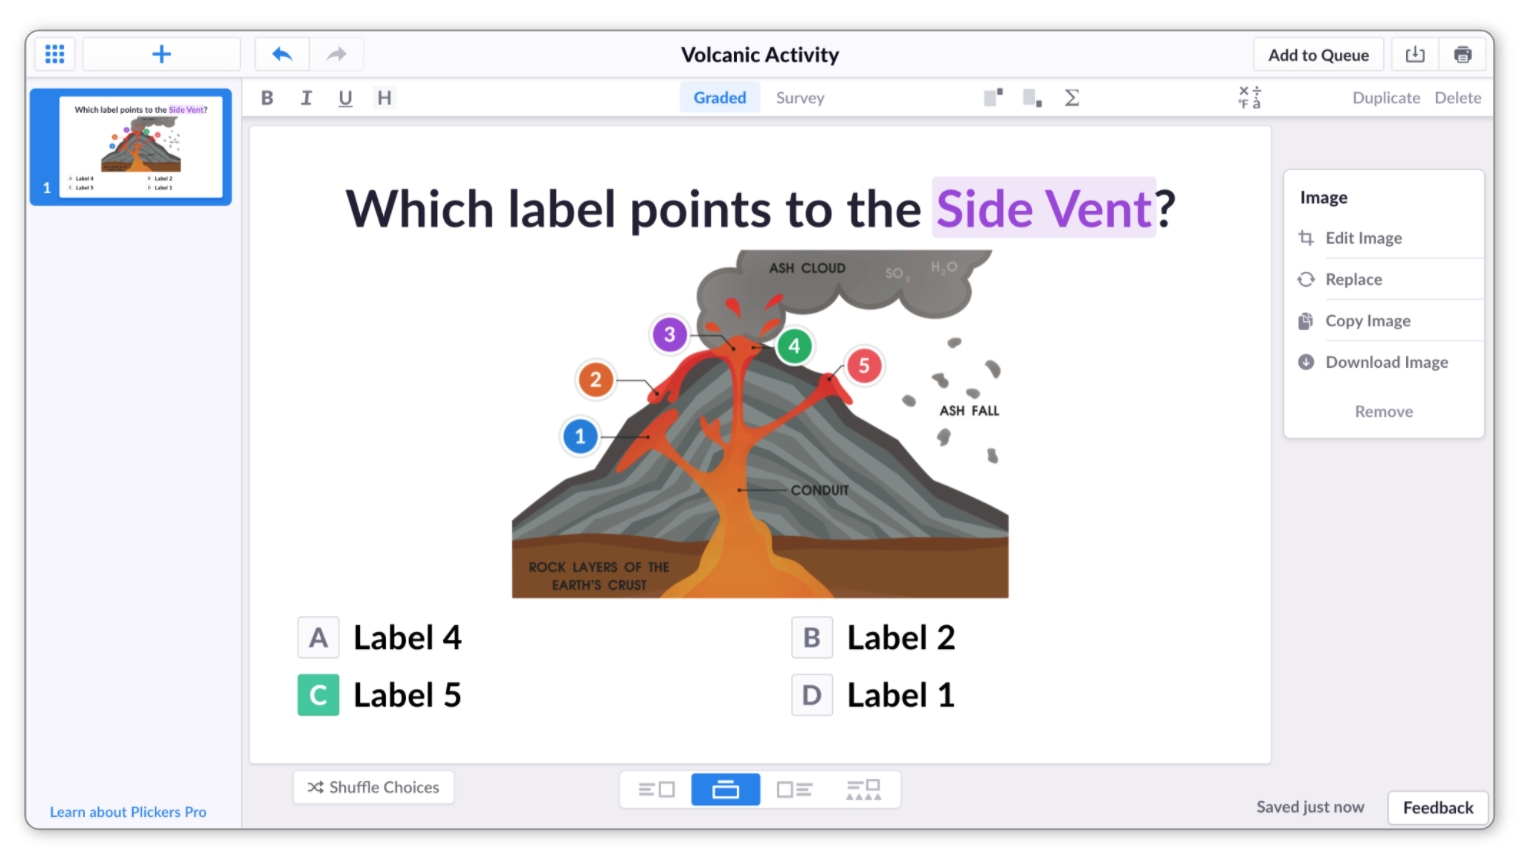
And this is how it might be used as part of a question:
We've included the steps below to take you through how to use this feature...
-
Enter the Image Editor by clicking on your image
See the first section for more details.
-
Locate the labels on the right-hand side
You'll see a column of labels 1-5 and a white square at the bottom.
-
Drag-and-drop a white cover from the bottom of the right-hand column
When you've moved a cover into position on your image, you can resize it to hide a label in the original image.
If you need to adjust a cover, simply hover your cursor over the outline and the options to move or resize it will appear.
Here's a gif to illustrate:
You'll notice that you can also try clicking the cover to add it to your image (to then drag it elsewhere).
-
Drag-and-drop the numbered labels from the right-hand side
There's a maximum of 5 labels available (this also means it's only possible to use 5 white covers in the above step).
You can reposition your labels and covers at any time.
-
Click the blue 'Done' button
Or you can hit Enter to as a shortcut.
TipIf you need to start again, you can quickly revert to your original image by selecting Reset in the bottom right-hand corner of the Image Editor.
Back to top
That covers the different editing options you have available for the images in your content items. You may also be interested in the other types of media that can be added into questions to make your content as engaging as possible. If so, here are a few guides to get you started:
Comments
0 comments
Article is closed for comments.