Recording sound clips in Plickers requires plickers.com to access your computer's microphone.
Permission is normally requested the first time you try to make a recording. But if the message doesn't come through for you, don't worry, we've included the steps you'll need to follow below.
Simply select the tab that corresponds to the browser you're using.
The guides below assume that you're currently attempting to record a sound clip in the Plickers Editor. To find out how to get there in the first place, click here.
-
There are a couple of routes you can take to change your microphone permissions within Google Chrome. The first toggle box below takes you through the quickest method, but we've also included the full route for you, just in case.
-
-
In Chrome, select the padlock icon
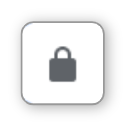 to the left of the address bar
You can see its location in the image below:

-
Click the Microphone dropdown menu in the dialog box
This is what the dialog box will look like:
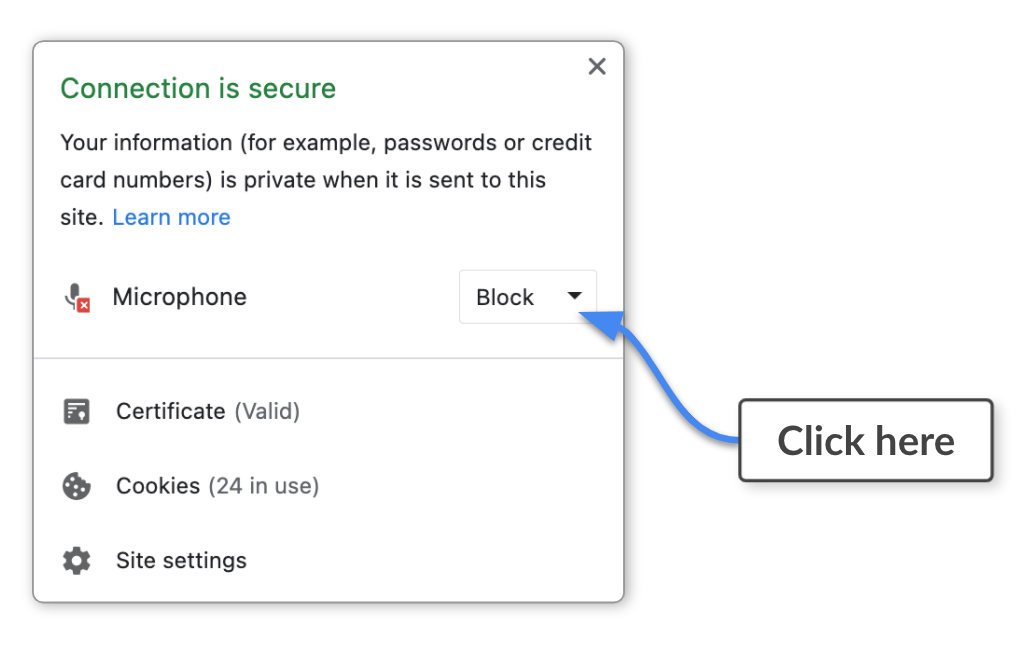
The Microphone menu will currently say 'Block'. Click on this to reveal more options.
-
Select 'Allow'
You can also choose 'Ask (default)' instead, if that's your preferred setting.
-
Refresh the Editor page and select the Sound Clip icon
You should now be able to use the Sound Recorder.
-
-
-
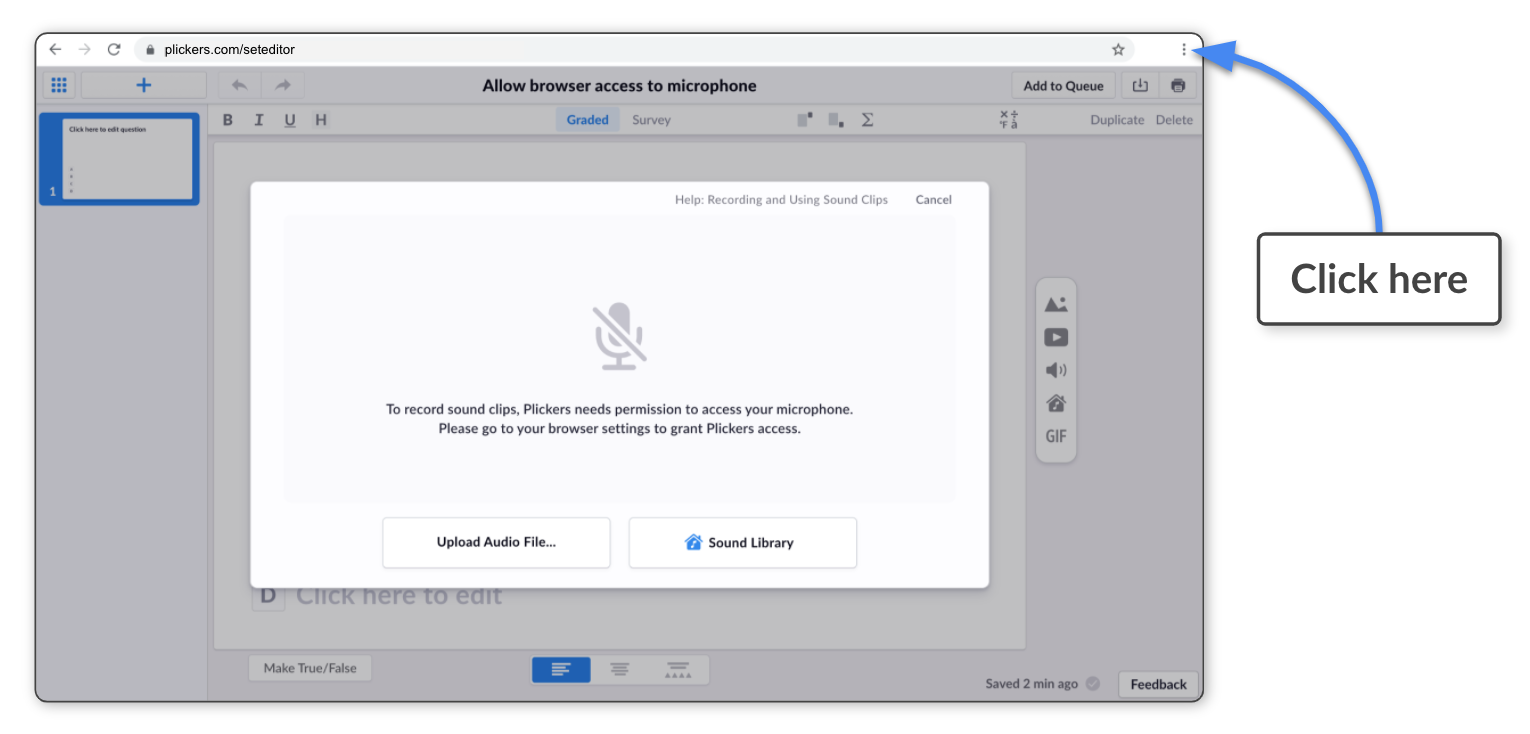
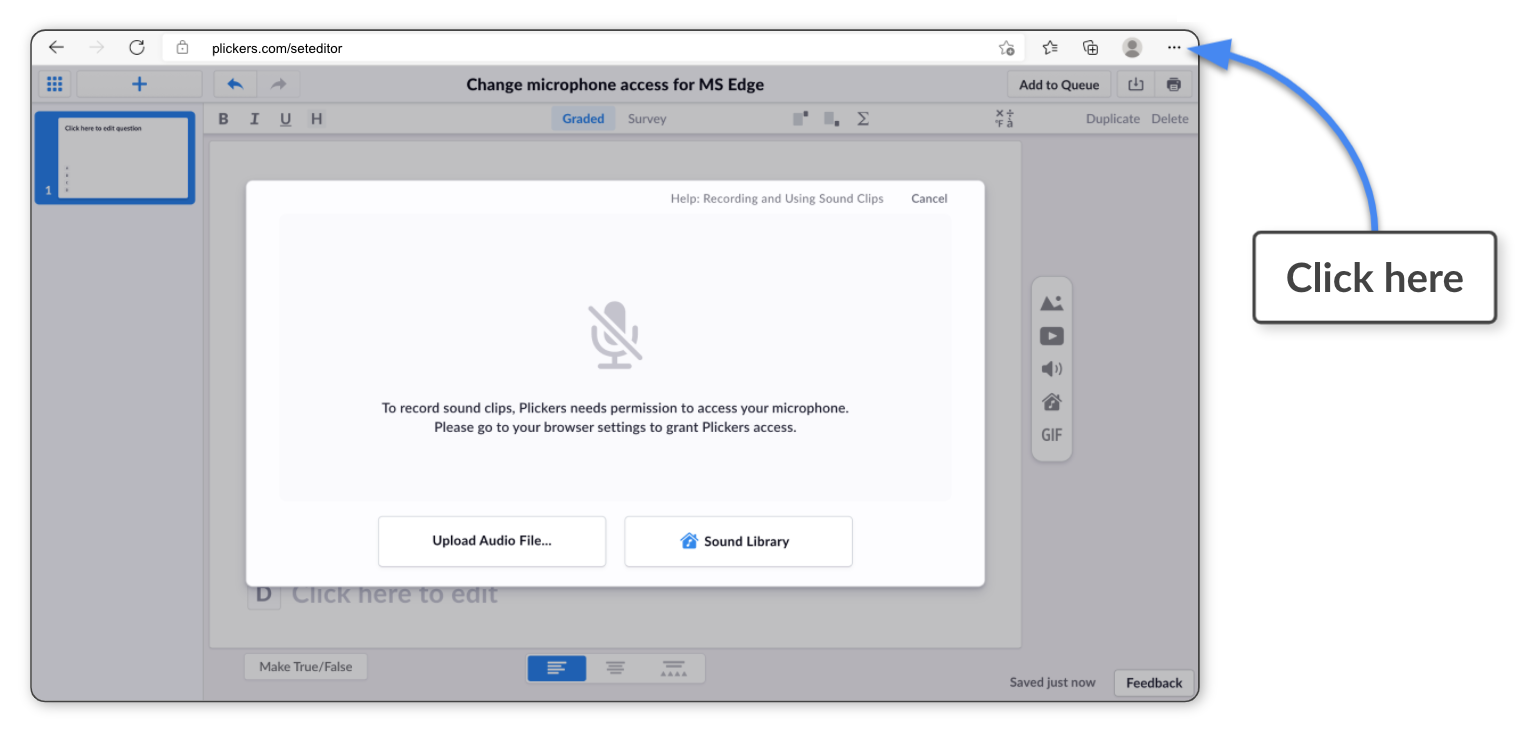
In Chrome, select the 3-dot icon
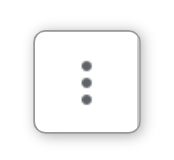 in the top right-hand corner
You can see its location in the image below:
-
Select 'Settings' from the drop-down menu
The Chrome Settings page will open in another tab.
-
Select 'Privacy and Security' in the left-hand sidebar
-
Select 'Site Settings' in the main window
-
Under the 'Permissions' heading, select 'Microphone'
-
Locate the 'Not allowed to use your microphone' heading
Plickers should be showing as one of the websites listed under that heading.
-
Select the trashcan icon
 adjacent to 'plickers.com'
plickers.com will then be removed from the list.
-
Go back to your Plickers Editor tab and refresh the page
-
Select the Sound Clip
icon -
Select the Microphone
 icon in the middle
 -
Select 'Allow' in the dialog box that appears in the top left
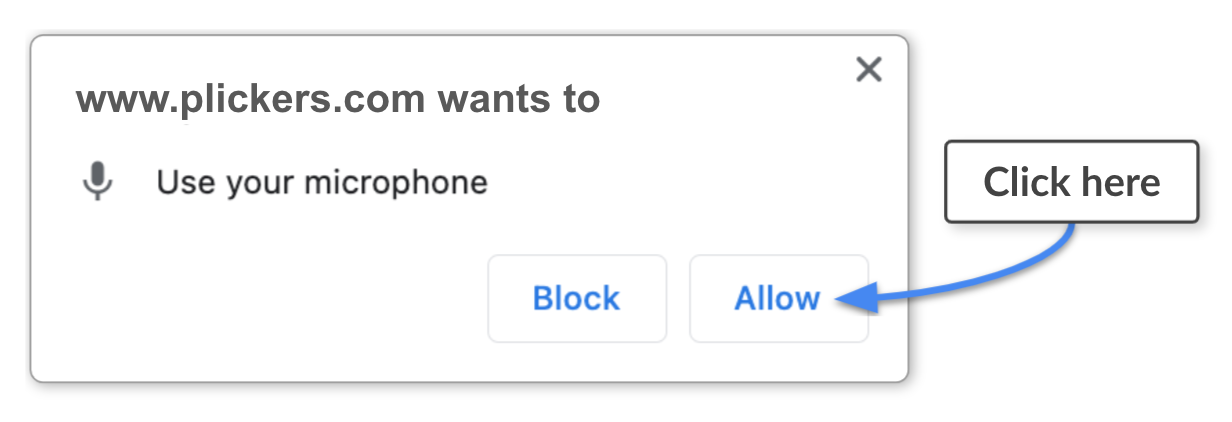
You'll see the timecode in the main window start counting upwards, meaning you can start recording your sound.
-
-
-
There are a couple of routes you can take to change your microphone permissions within Microsoft Edge. The first toggle box below takes you through the quickest method, but we've also included the full route for you, just in case.
-
-
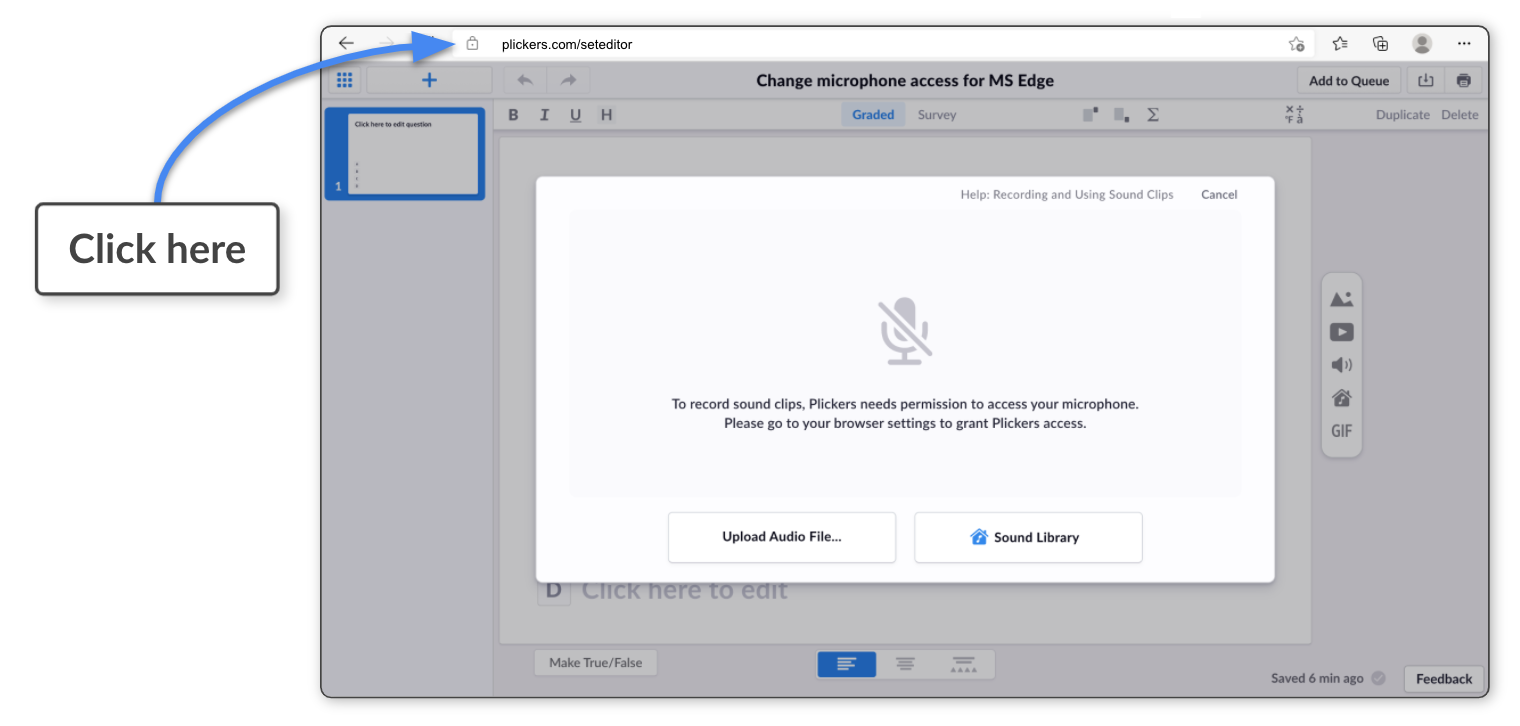
In MS Edge, select the padlock icon
 to the left of the address bar
You can see its location in the image below:
-
Click the Microphone dropdown menu in the dialog box
This is what the dialog box will look like:
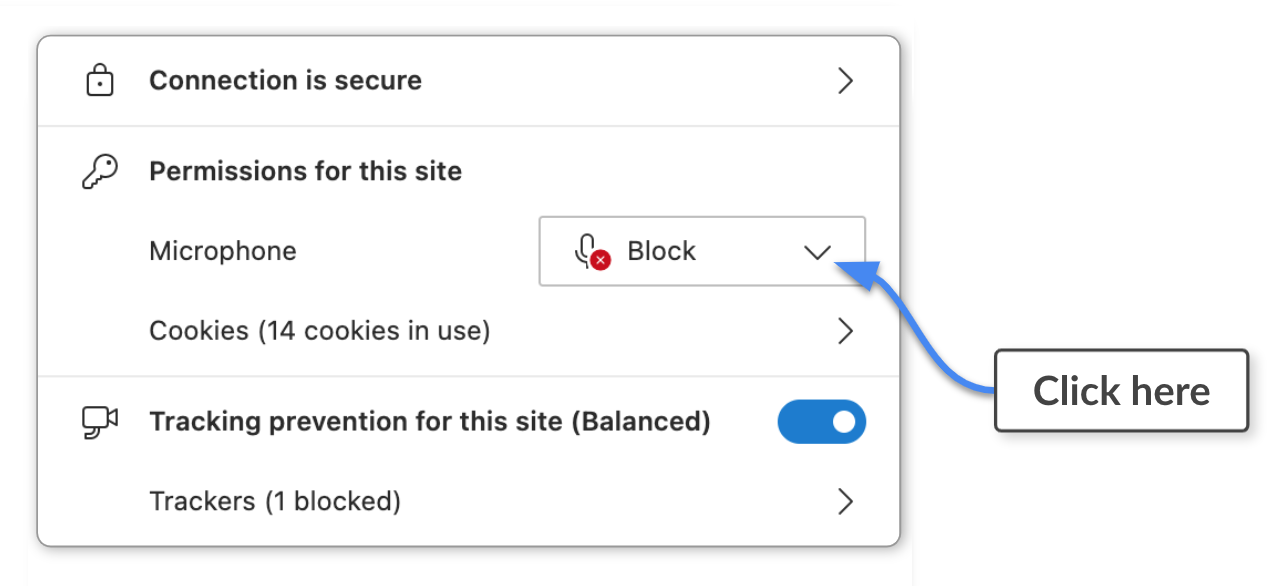
The Microphone menu will currently say 'Block'. Click on this to reveal more options.
-
Select 'Allow'
You can also choose 'Ask (default)' instead, if that's your preferred setting.
-
Refresh the Editor page and select the Sound Clip icon
You should now be able to use the Sound Recorder.
-
-
-
In MS Edge, select the 3-dot icon
 in the top right-hand corner
You can see its location in the image below:
-
Select 'Settings' from the drop-down menu
The MS Edge Settings page will open in another tab.
-
Select 'Cookies and Site Permissions' in the left-hand sidebar
-
Under the 'All Permissions' heading in the main window, select 'Microphone'
-
Locate the 'Block' heading
Plickers should be showing as one of the websites listed under that heading.
-
Select the trashcan icon
 adjacent to 'plickers.com'
plickers.com will then be removed from the list.
-
Go back to the Plickers Editor and refresh the page
-
Select the Sound Clip
icon -
Select the Microphone
icon in the middle -
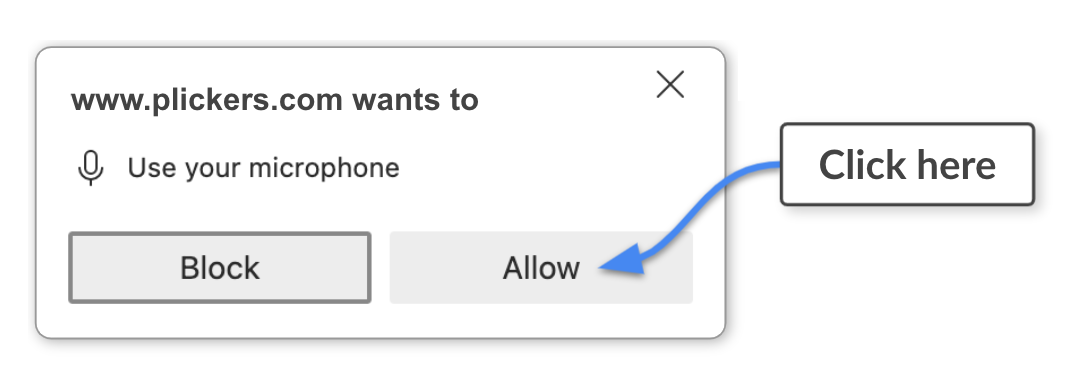
Select 'Allow' in the dialog box that appears in the top left
You'll see the timecode start counting upwards in the main window, meaning you can start recording your sound.
-
-
-
If the Sound Clip window disappears when you try to record a sound, it's likely you'll need to give Firefox permission to use your microphone.
There are a couple of routes you can take to do this within Firefox. The first toggle box below takes you through the quickest method, but we've also included the full route for you, just in case.
-
-
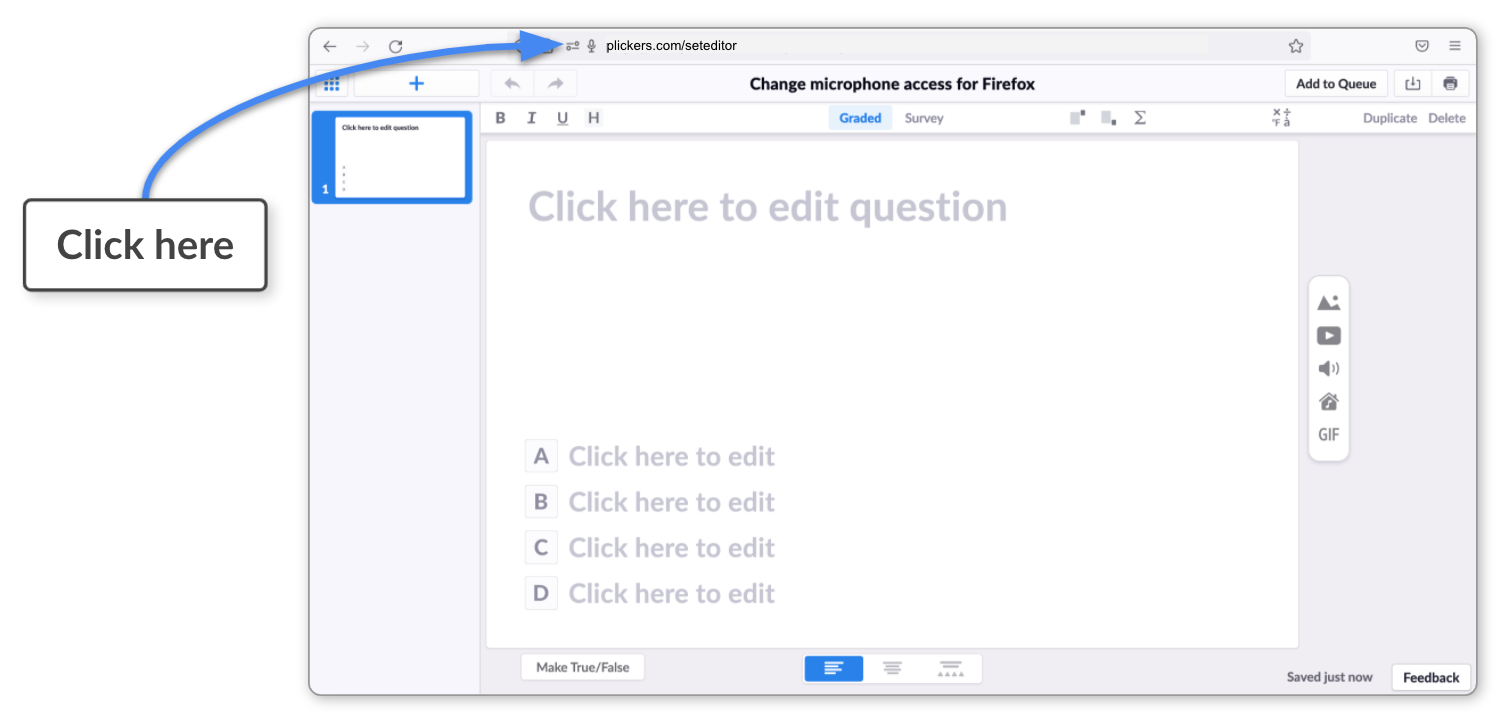
In Firefox, select the Permissions icon
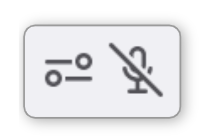 to the left of the address bar
You can see its location in the image below:
-
Click the 'Blocked' box adjacent to 'Use the microphone'
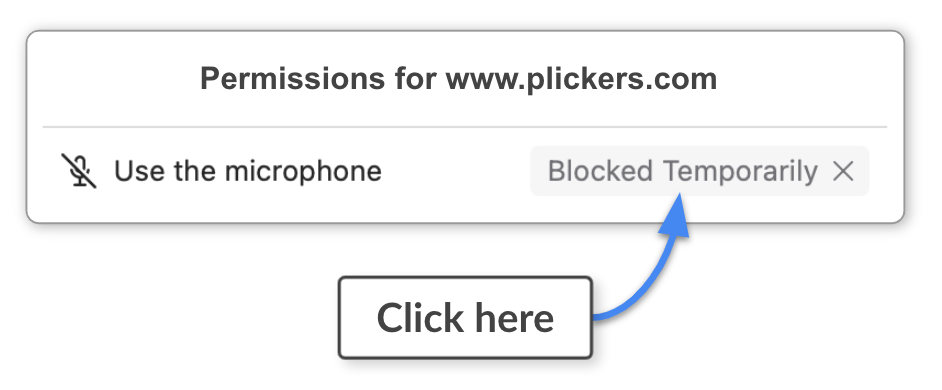
The 'Use the microphone' entry will disappear from view.
-
Refresh the Editor page and select the Sound Clip icon
You should now be able to use the Sound Recorder.
-
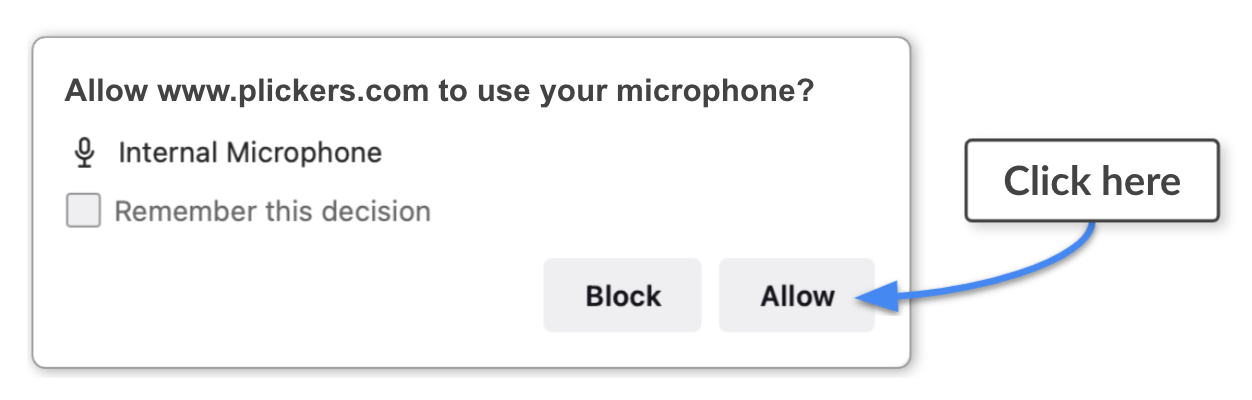
Select the Microphone
icon in the middle -
Select 'Allow' in the dialog box that appears in the top left
You'll see the timecode start counting upwards in the main window, meaning you can start recording your sound.
-
-
-
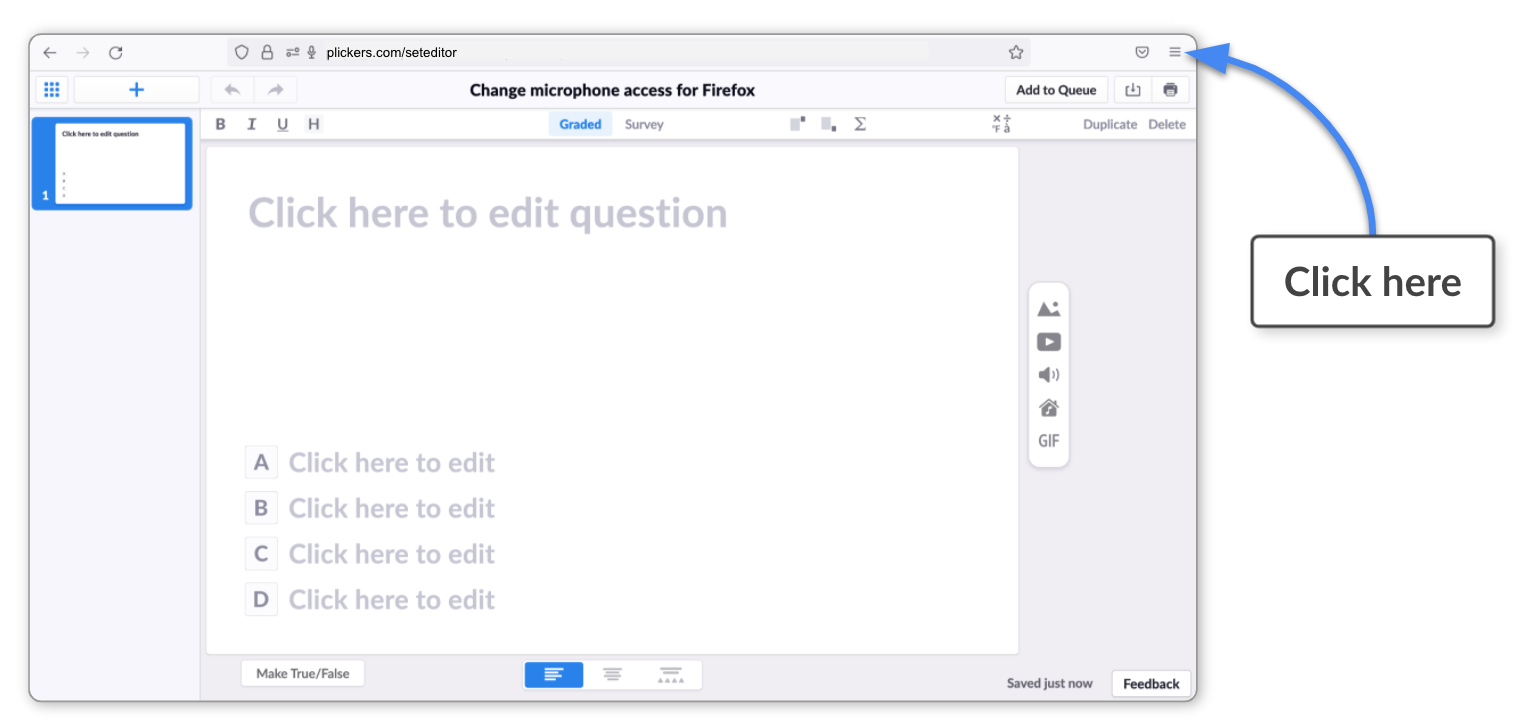
In Firefox, select the 3-line icon
 in the top right-hand corner
You can see its location in the image below:
-
Select 'Settings' from the drop-down menu
The Firefox Settings page will open in another tab.
-
Select 'Privacy and Security' in the left-hand sidebar
-
Scroll down to the 'Permissions' heading
-
Select the 'Settings' button adjacent to 'Microphone'
The Microphone Permissions Settings dialog box will appear.
-
Click the dropdown menu adjacent to plickers.com
The menu initially displays 'Block' (as you can see in the image below).
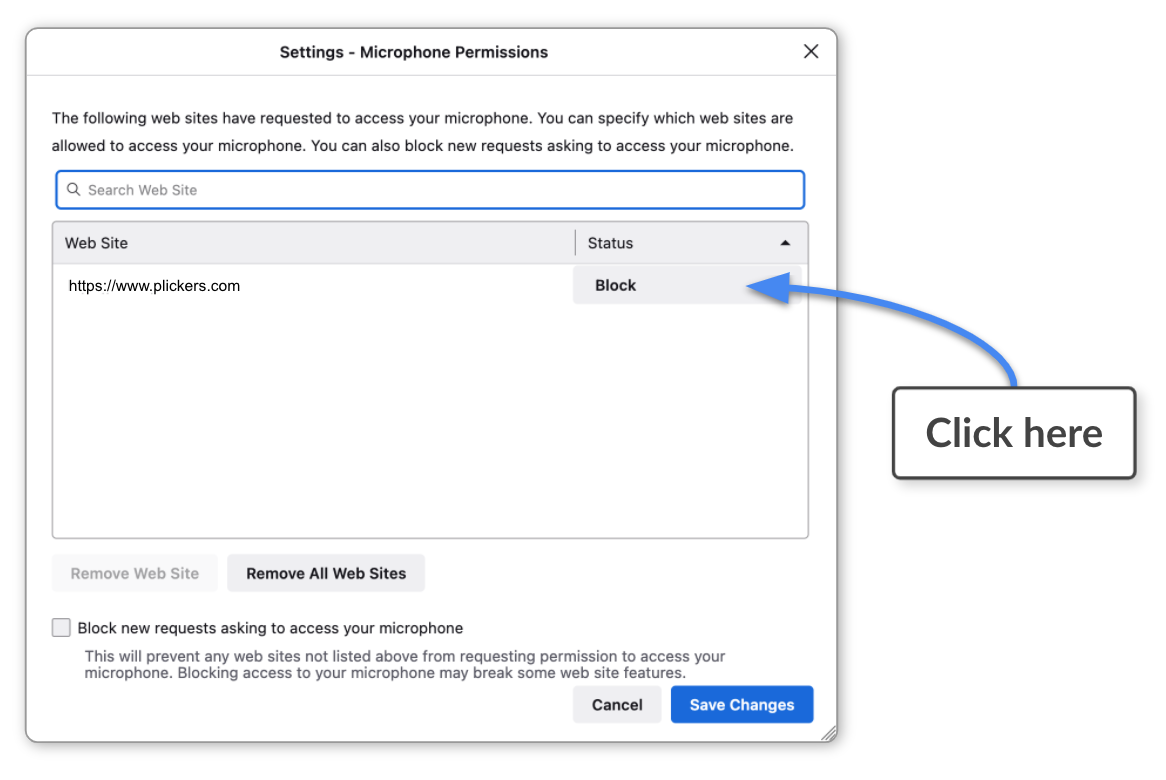
-
Select 'Allow' and press 'Save Changes'
-
Go back to the Plickers Editor and refresh the page
-
Select the Sound Clip
icon -
Select the Microphone
icon in the middleThe button should turn red, and the timecode will start counting upwards, indicating that your microphone is now recording.
-
-
-
If Safari doesn't automatically ask you to provide permission for recording sound (when you click the record button in the Editor), you can use the following steps to manually do so:
-
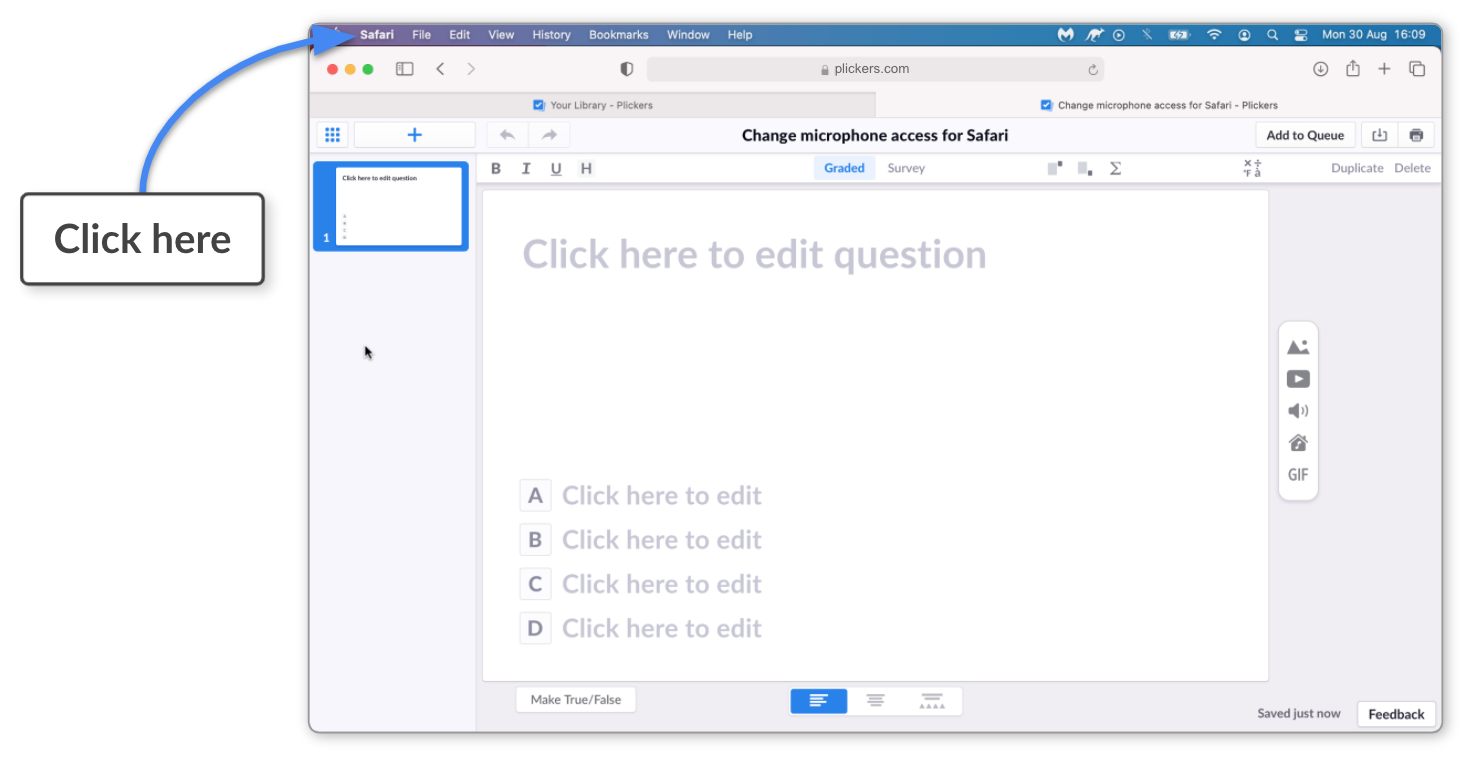
Select the 'Safari' menu in the far top left-hand corner of your screen
You can see its location in the image below:
 Tip
TipYou can also try right-clicking the address bar and you'll see a similar menu.
-
Select 'Settings for plickers.com...' in the dropdown menu
You'll see the following menu appear underneath the address bar.

The status of 'Microphone:' will probably be showing as 'Deny', as is the case in the image above.
-
Click on the status of Microphone and select 'Allow'
Just like the image shows below:
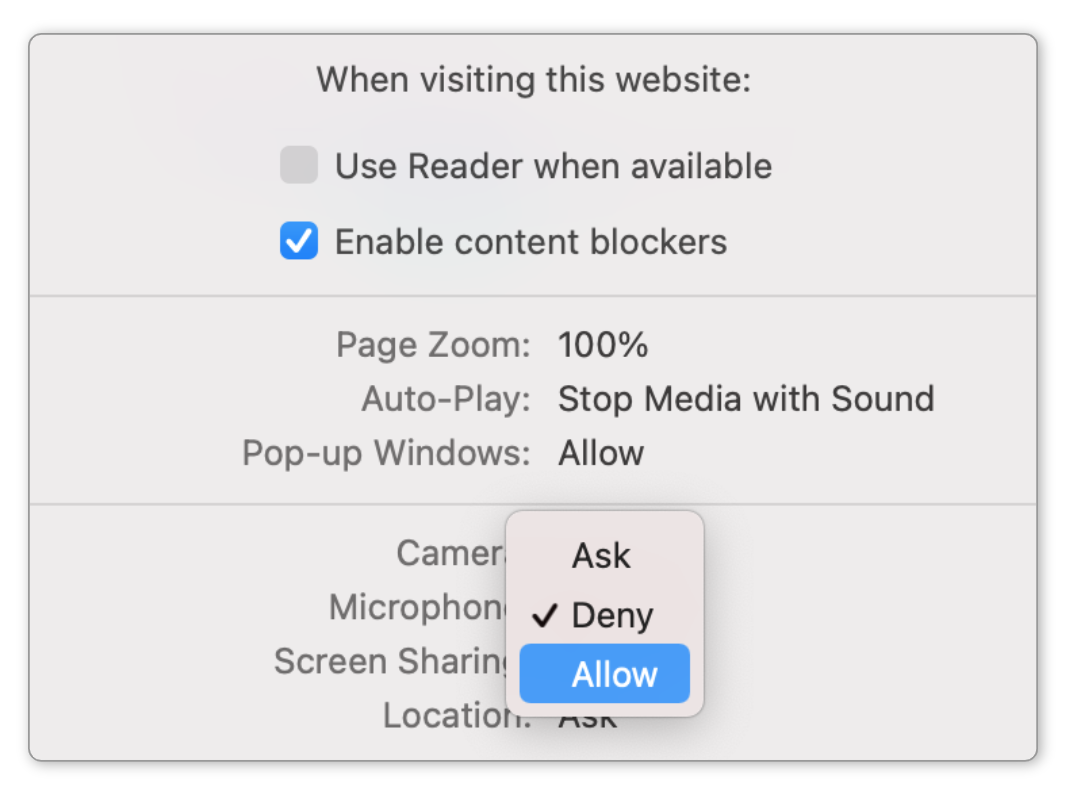
You can also try selecting 'Ask', which means that every time you start recording a sound, Safari will ask your permission to use the microphone.
-
In the Plickers Editor, select the Sound Clip
icon -
Select the Microphone
icon in the middleThe button should turn red, and the timecode will start counting upwards, indicating that your microphone is now recording.
-
Of course, if any of the above doesn't go smoothly for you, please feel free to email us at support@plickers.com and we'll endeavor to help you out as soon as we can.
Comments
0 comments
Article is closed for comments.