There are plenty of options available to modify your Scoresheet so it shows exactly what you need. These are all listed in the toggle boxes further down this article.
For each one, you'll first need to access your Scoresheet, by doing the following:
-
Sign in to plickers.com on your laptop/computer
-
Select 'Scoresheet...' from the left-hand sidebar
-
Select the Class you're working with from the left-hand side of the page
-
Select the date of your session from the calendar in the bottom left-hand corner
Once you've followed the steps above, you can try out any of the below modifications...
-
By default, the Scoresheet includes just the first names of students. You can easily change this though, by following the two steps below:
-
Select the 3-dot
 icon in the top right-hand corner
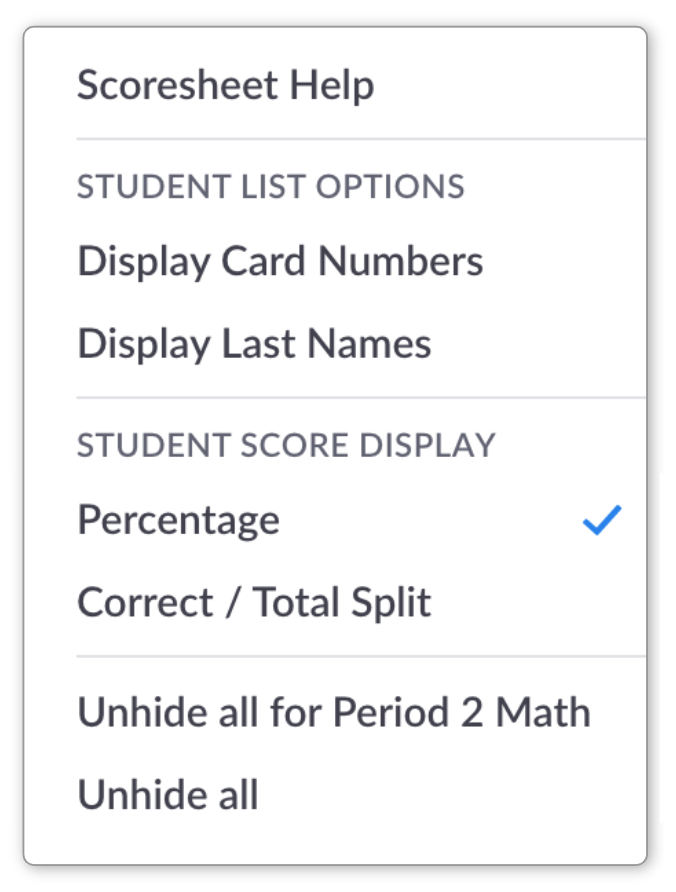
You'll see the following menu:
-
Click 'Display Last Names'
Student last names will then appear to the right of their first names in the Scoresheet.
-
-
By default, the Scoresheet includes just the first names of students. It's also possible to show their card numbers, by following the two steps below:
-
Select the 3-dot
icon in the top right-hand cornerYou'll see the following menu:
-
Click 'Display Card Numbers'
Student card numbers will then appear in the first column of the Scoresheet.
-
-
You can sort the results within your Scoresheet by any of the following, provided that they are displayed (see the two options above to find out how to display last names and card numbers):
- First Name
- Total Score
- Last Name
- Card Number
All you need to do is click on the appropriate column heading. An arrow will appear next to it, and your results will be sorted. For example, the Scoresheet below is sorted by First Name.
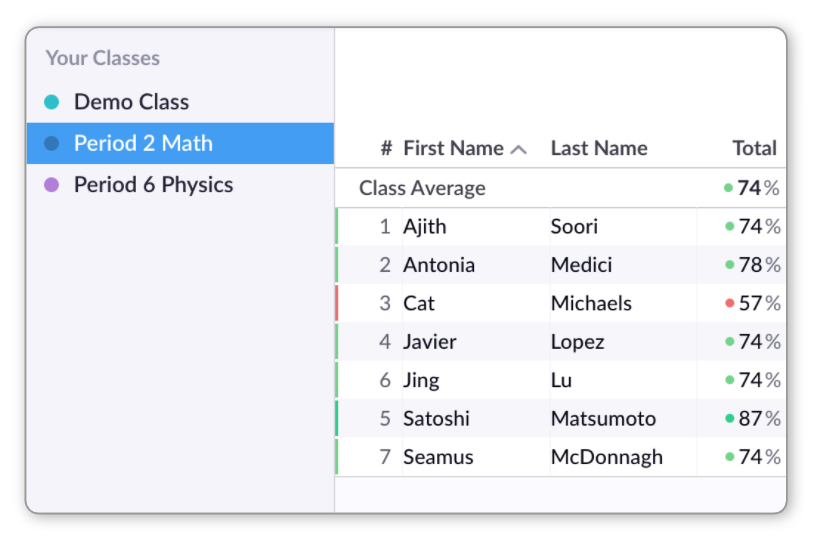
By clicking the heading once, the column will sort in ascending order. A second click will change it to descending order.
-
The Scoresheet supports two types of scores for the Total column. By default, it shows the average percentage score across all questions included in the Scoresheet.
If desired, you can change this to display the number of correct answers alongside the number of questions (aka the Correct/Total Split). Here's how:
-
Select the 3-dot
icon in the top right-hand cornerYou'll see the following menu:
-
Click 'Correct / Total Split'
The Total column will then change from percentage to absolute scores. The diagram below shows the percentage option at the top, and the Correct/Total Split option below it.
NoteIn the example above, the total scores combine two Sets because they were played on the same day. You can use the functions described in the toggle boxes below to change the content items that are included in the total scores.
-
-
This function is useful if you've played several Sets to your students in one session and you want to quickly see each student's score for complete Sets.
It also allows you to quickly exclude a whole Set from the total scores (there's more info available on this in the last toggle box below).
To collapse your Sets, you just need to follow one step:
-
Select the
 icon in the top right-hand corner
You'll see the following change in your Scoresheet:
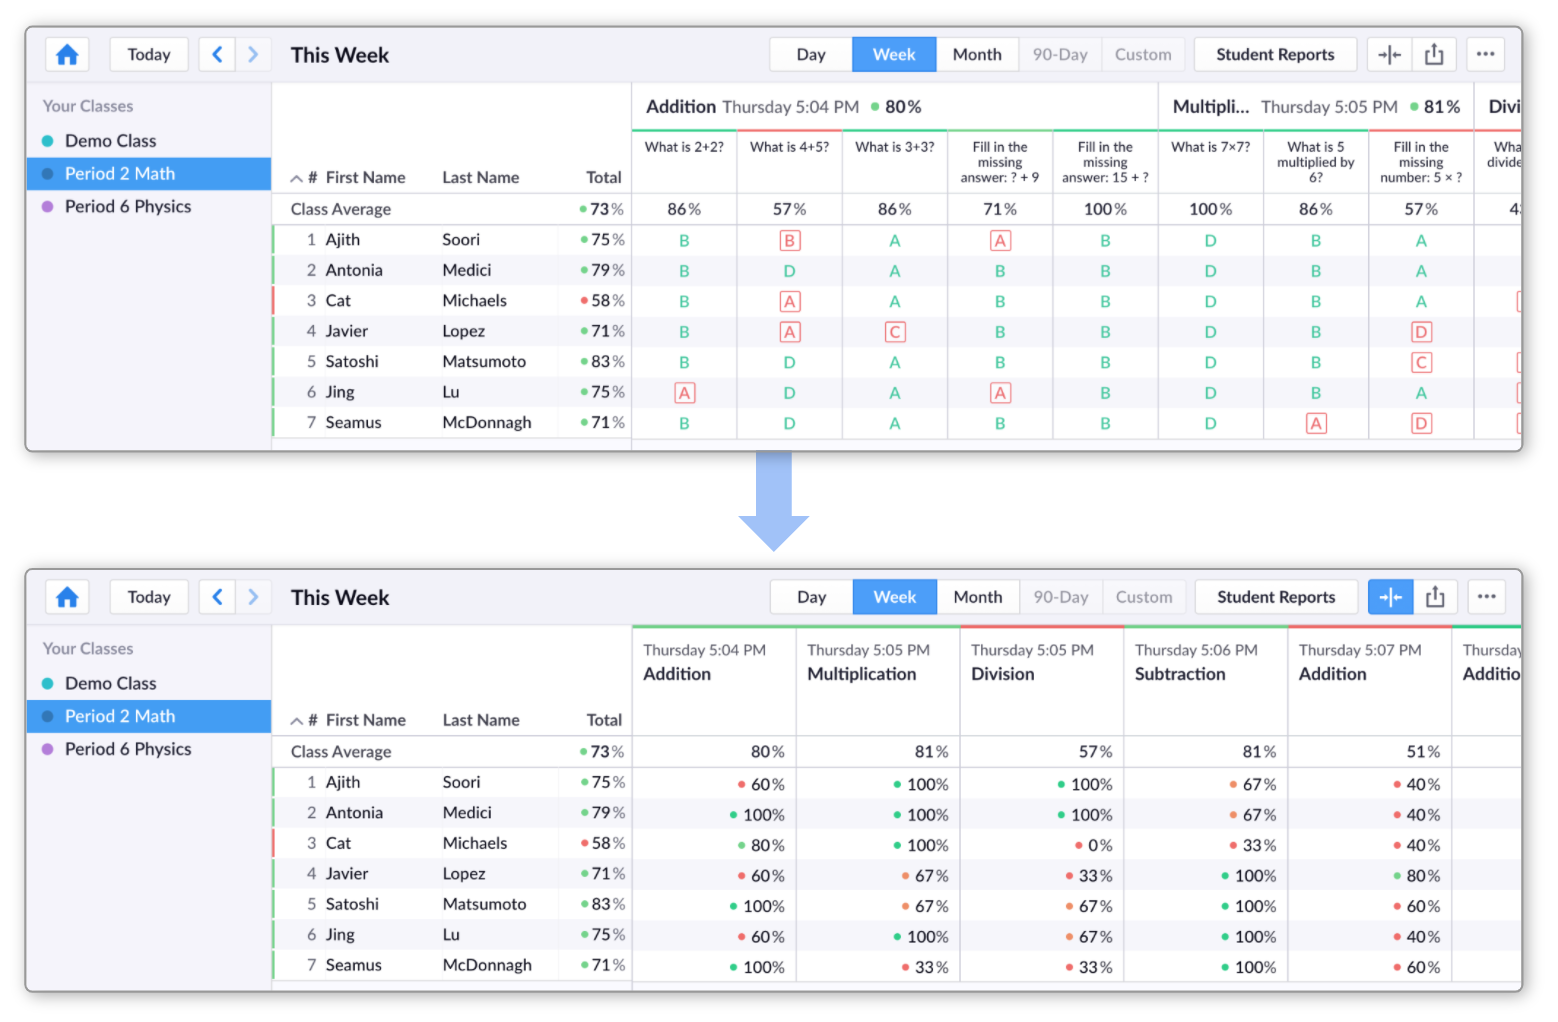
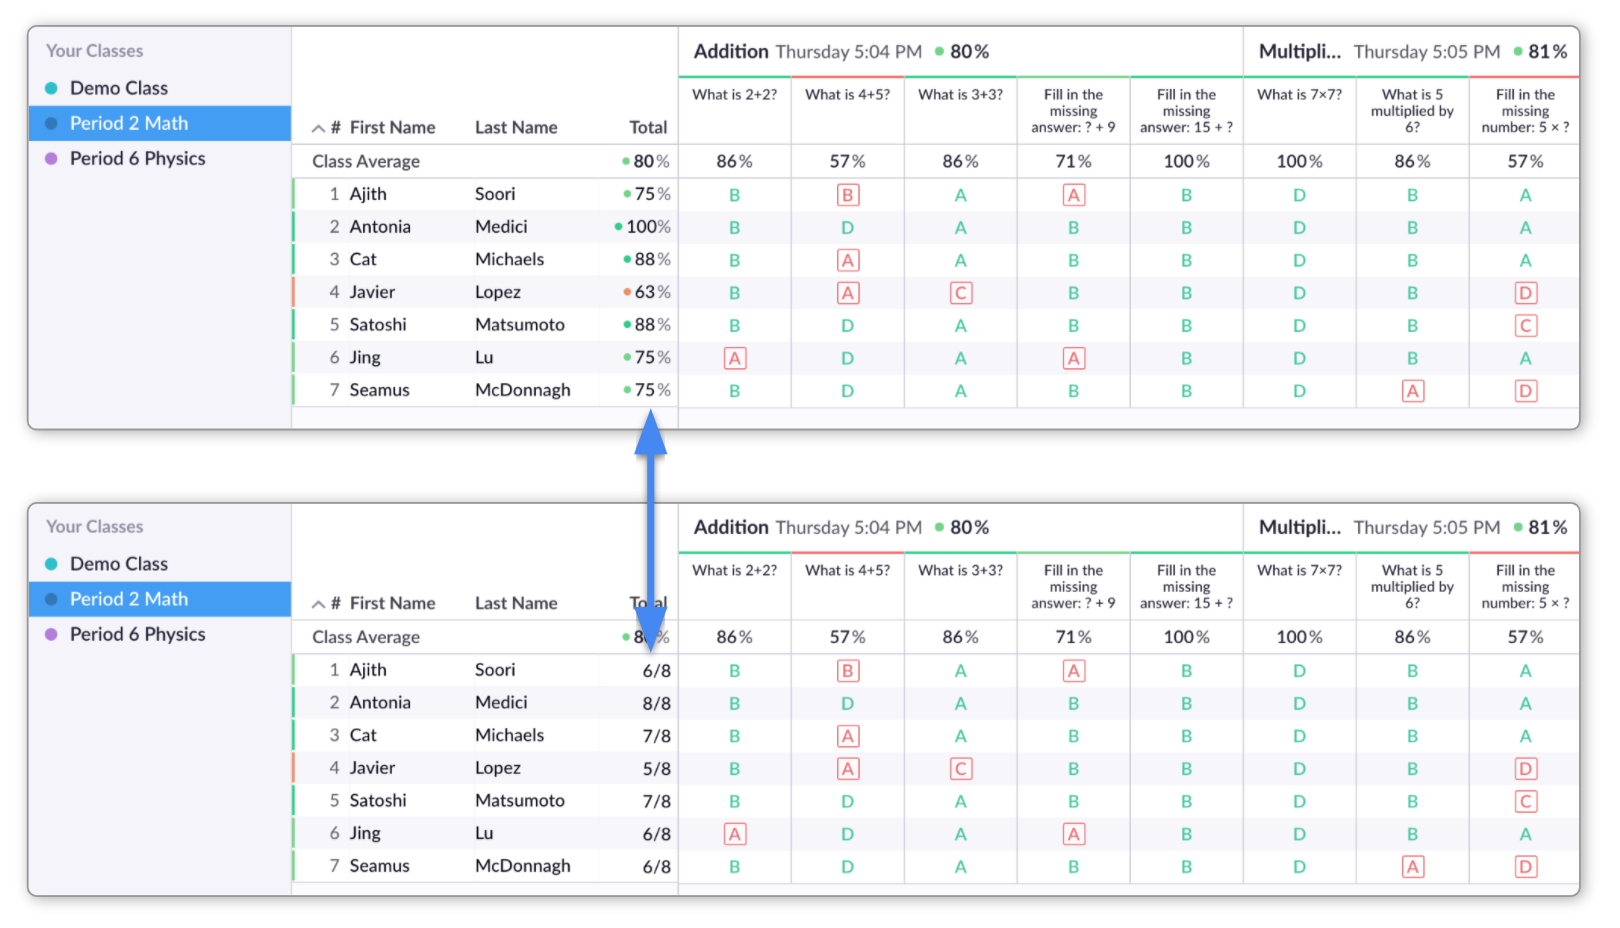
The top Scoresheet shows the individual answers given by each student. After collapsing the Sets, it's then possible to quickly see the overall Set scores for each student (as shown in the bottom image).
For example, let's look at Ajith's scores for the Set called Addition:
- In the top image, you can see he got 3 correct answers out of the 5 questions within the Set, which is a score of 60%.
- Hence, after collapsing the Sets, his 60% score can be seen in the first 'Addition' column in the bottom image.
-
-
One of the ways you can determine which content items are included in your Scoresheet is by changing the Date Range.
This is done simply by selecting Day, Week, Month, 90-day or Custom from the options at the top of the screen. The buttons look like this:
 Note
NoteThe 90-day and Custom options are available for Pro subscribers. To find out more about this, please click on this link.
The option you select will determine how the calendar works in the bottom left-hand corner.
For example, if you select a date range of a month, then no matter where you click on the calendar, the whole month will be selected, as shown below:

All the content items played in that month will then show up in the Scoresheet for your Class (you may need to scroll to the right to browse through them all).
If you'd like to select specific days or weeks in the calendar, you would need to select 'Day' or 'Week' from the top of the Scoresheet window.
-
You may not want to include all the content items from a given time period when totting up your scores.
Or it might be the case that you've spotted a mistake in a question, which makes the results null and void.
This is where the option to exclude questions and/or Sets becomes useful, and it can be done with just one click of the mouse:
-
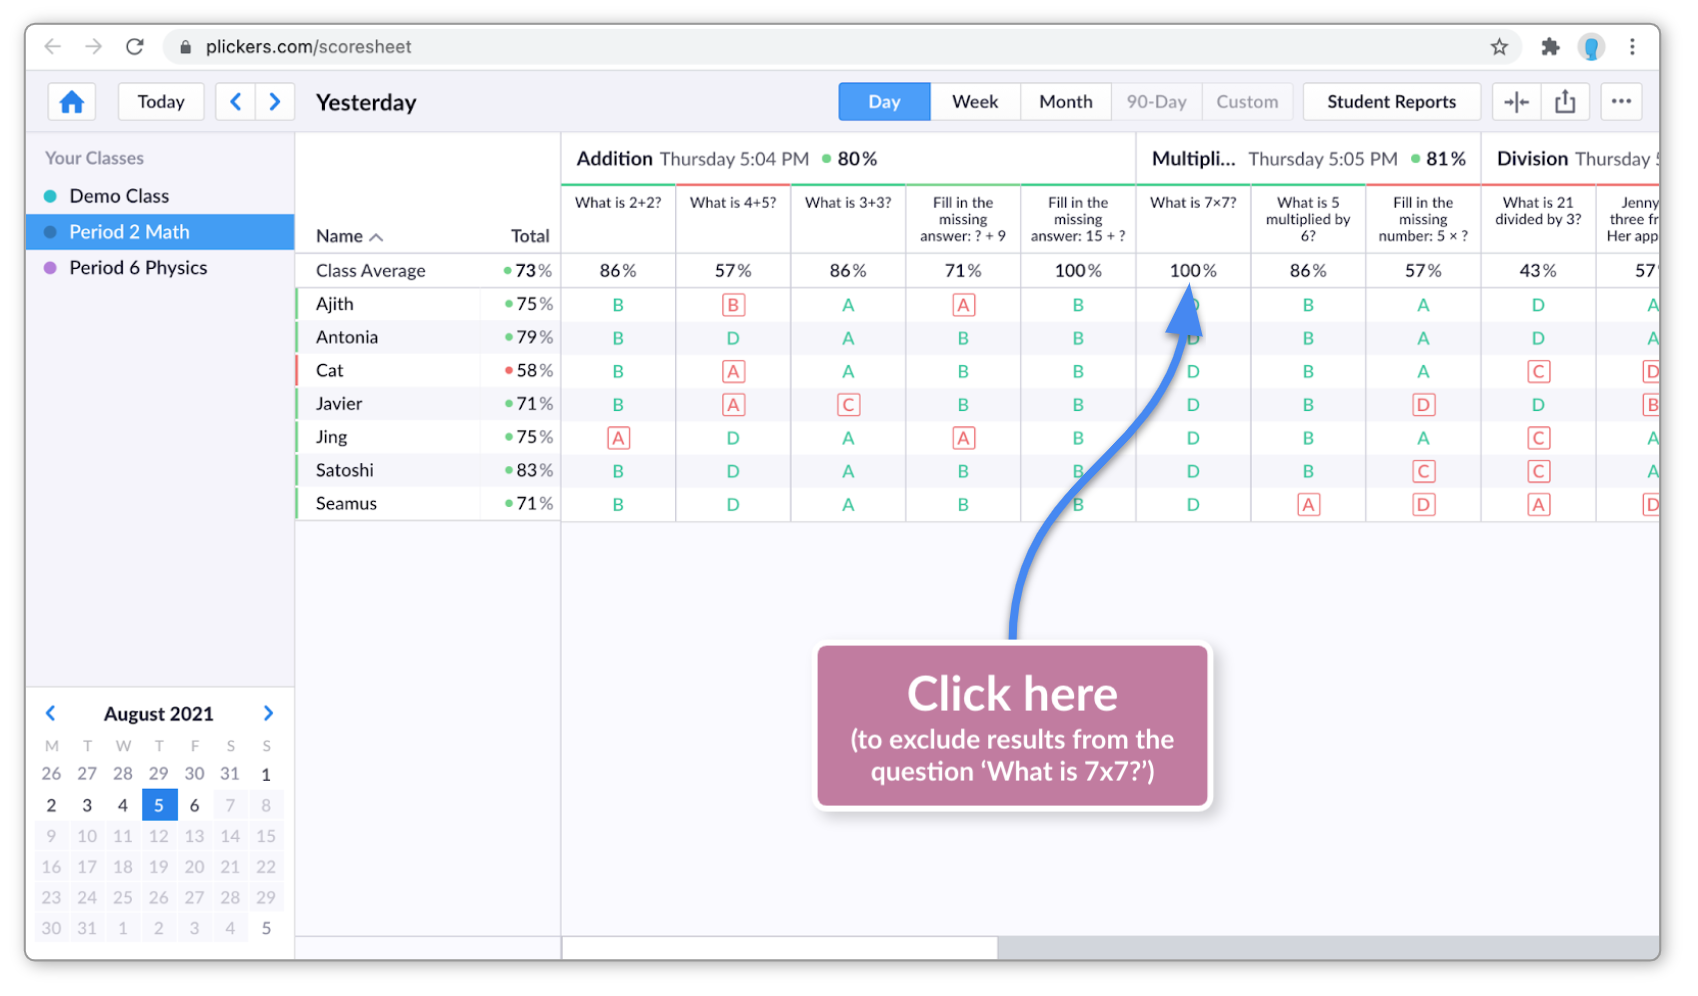
Click on the percentage score of the content item you want to hide
To demonstrate, let's say we want to exclude the results from our question 'What is 7×7?' in our 'Multiplication' Set. The image below shows where we should click:
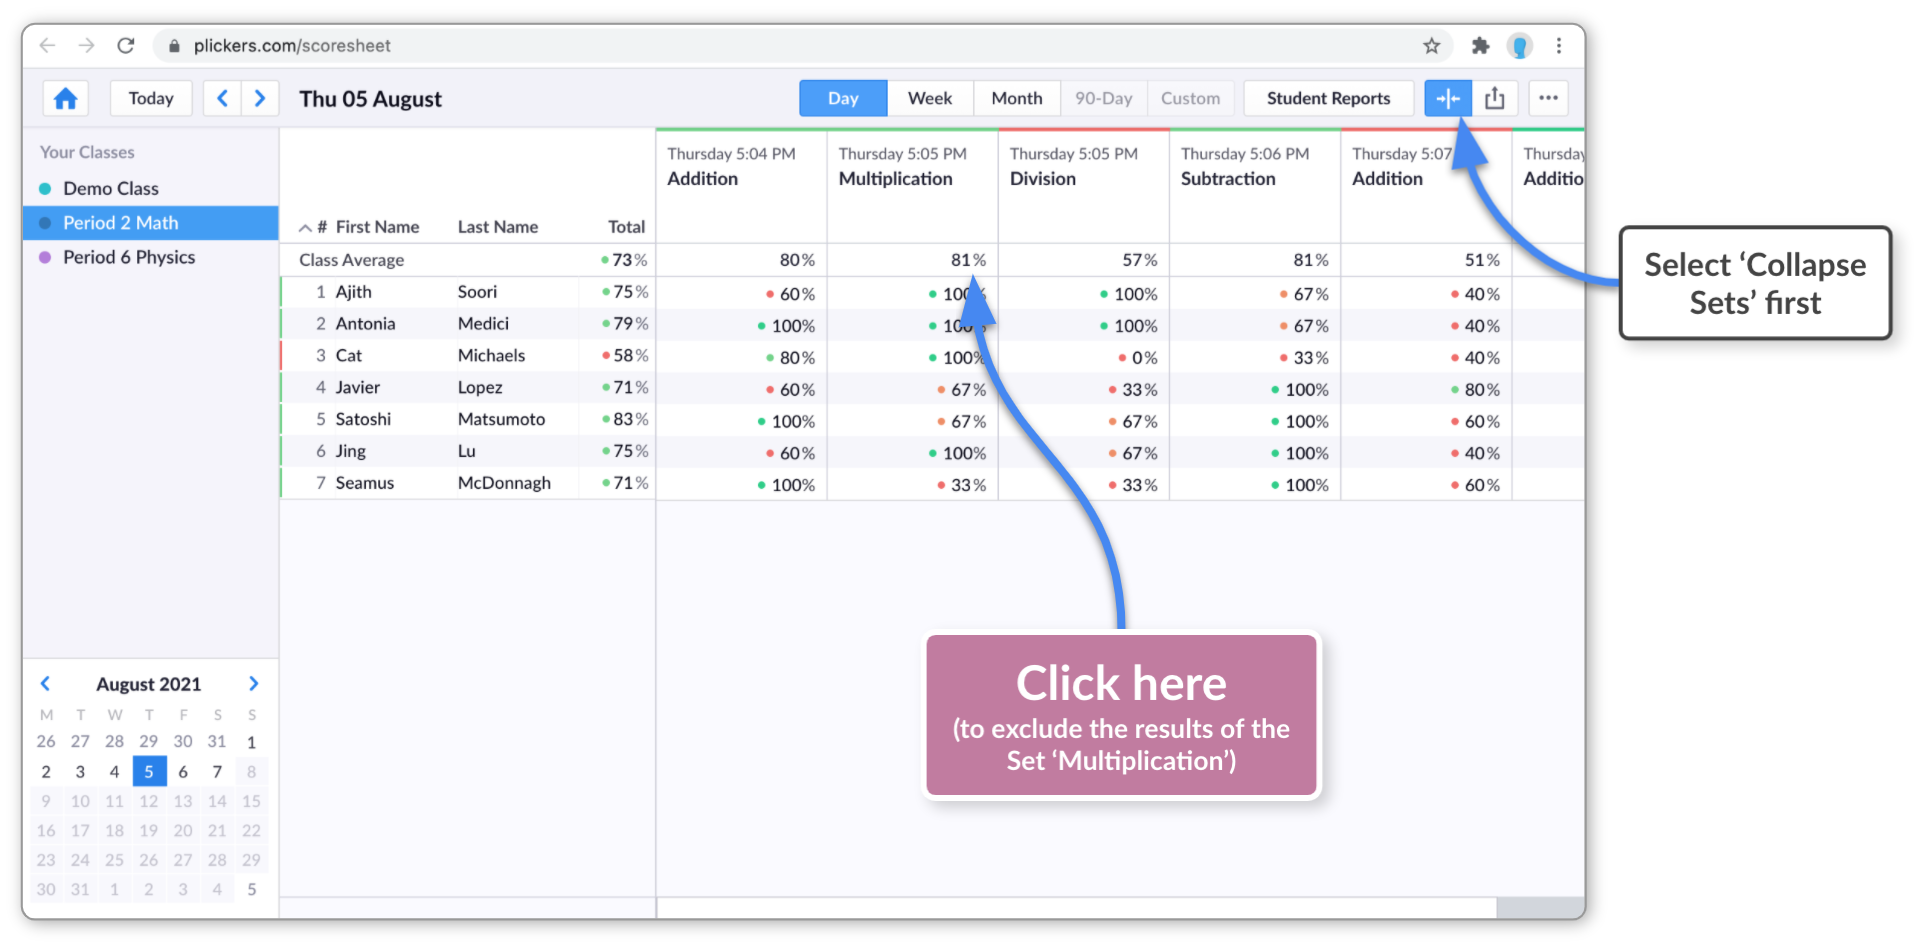
This can also be done for full Sets. We'd first just need to select the Collapse Sets button
in the top right-hand corner (there's more info about this in the 'Collapse Sets...' toggle box above).It's then possible to click on the corresponding average score for the Set you want to hide. For example, the image below shows where we would click to exclude the score for our 'Multiplication' Set.
To demonstrate this further, the images below show how hiding a score can affect student totals:
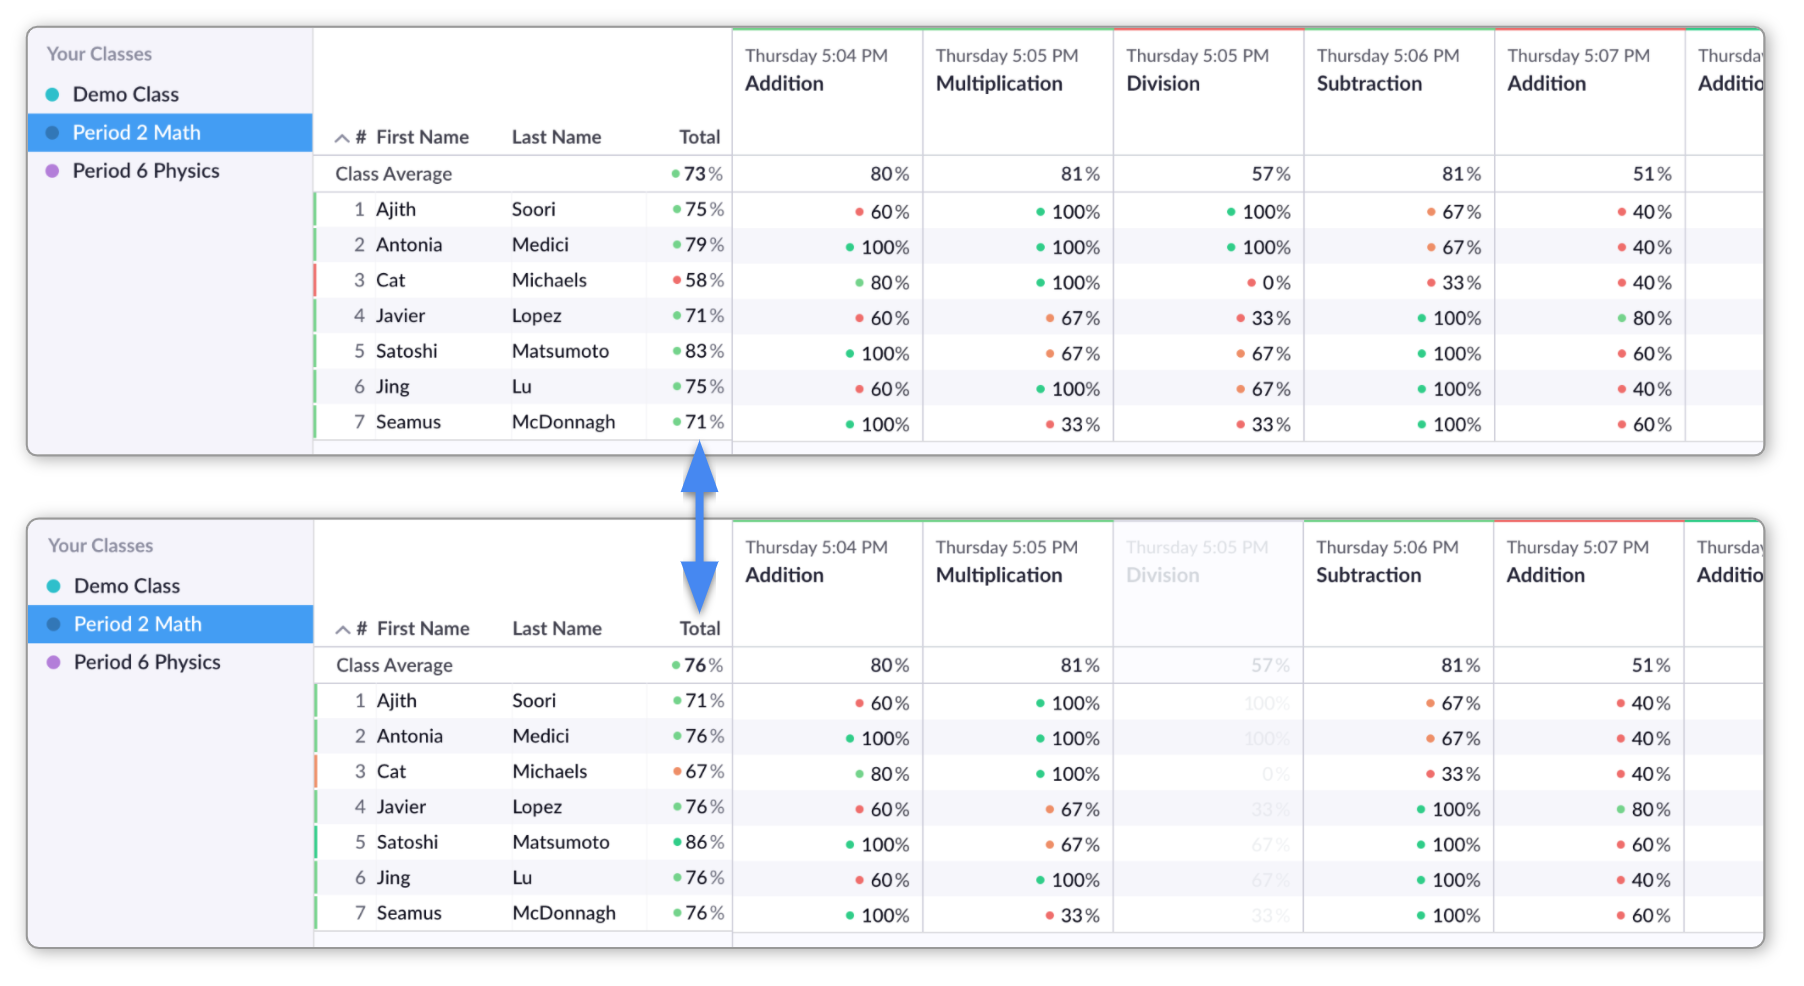
In the bottom image, we've hidden the results of our Set on 'Division', and you can see that the scores in the Total column have been adjusted accordingly for each student.
-
And there you have it - that covers all the options available to customize your Scoresheet and display the scores that are most useful to you and your students.
You might now be interested in learning how to print, save and/or download your students' results. If so, feel free to head over to our next article to find out more.
Comments
0 comments
Article is closed for comments.