After creating your new Classes, you can move on to adding your students to each Class.
Note that this guide is only necessary if you used plickers.com to manually add a Class (rather than using Google Classroom).
If you're yet to create a Class, we'd recommend browsing through this link. And to add additional students to an existing Class, please follow this link.
Flash guide
- At plickers.com, select your Class from the left-hand sidebar
- Click on the button called Add Students
- Enter your student names, then click Next
- Sort your students as desired, then click Done
Using Plickers to add students
Here's a gif demonstrating how to add students after you've created your Classes:

And for a little more detail, we've included the step-by-step instructions below:
-
At plickers.com, navigate to the Class you'd like to work with
You can do this by clicking on the name of your Class in the left-hand sidebar.
-
Click on the 'Add Students' button
The pop-up window shown below will appear, and you'll be able to enter your students into the left-hand text box.
 More Info
If you don't see the Add Students button, you can find out how to add students to an existing Class here.
-
Enter your students' names
There are two ways you can do this:
-
It's possible to use two different formats here:
-
First name then last name - if you use a 'space' when inserting names, we assume the forename appears first e.g. Alex Sanchez
-
Last name then first name - if you use a comma, we assume the surname appears first e.g. Sanchez, Alex
-
-
You'll just need to make sure that each student shows on a new line, and their first names and last names are ordered consistently (as described in the toggle box above).
-
-
Check your student names
All your students will appear on the right-hand side of the window as they're entered. Have a quick check of these to make sure they all look correct. Then click Next.
-
Sort your student names
In the next window (shown below), you'll be given the opportunity to sort your student names alphabetically (either by first name or last name) or to keep the order as originally entered.
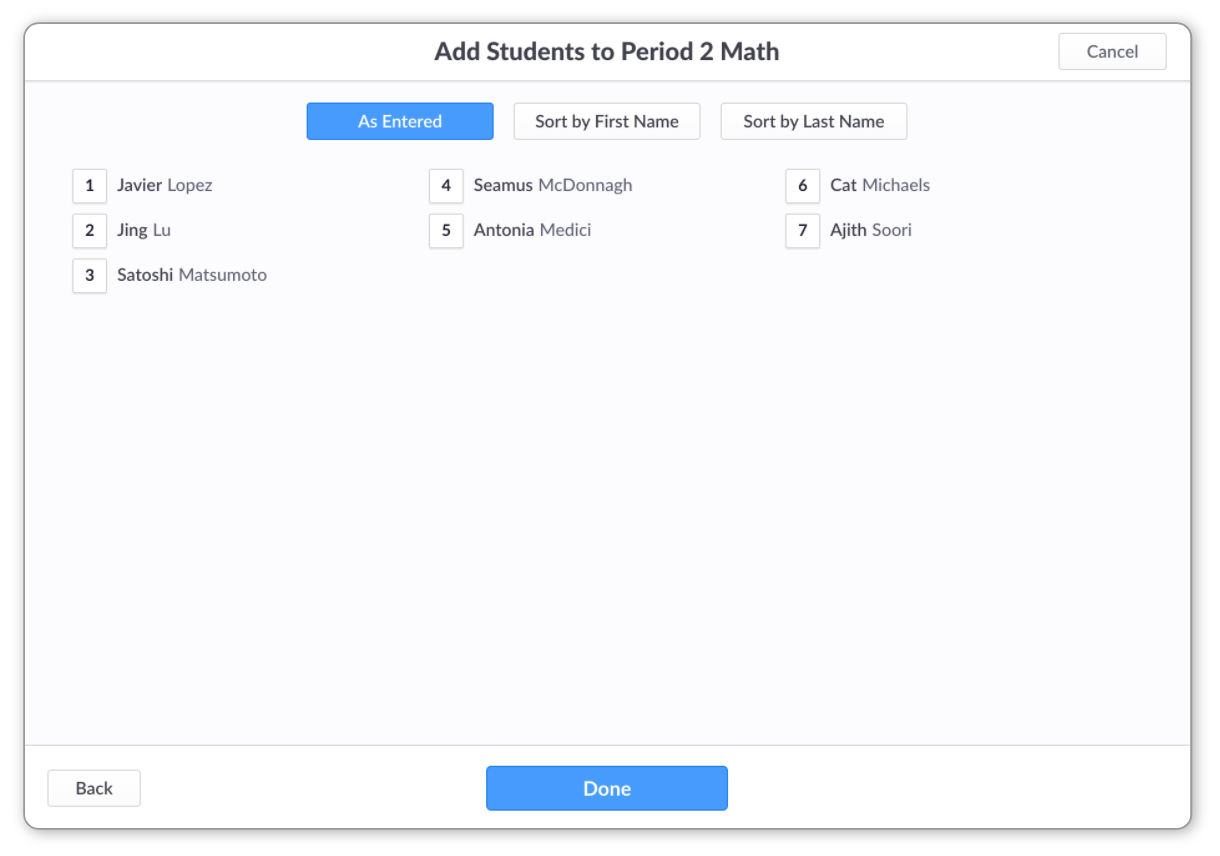
Note the numbers on the left-hand side of each name - these will be your students' card numbers. Further details on cards can be found here.
TipIt is possible to change card numbers for each student - click here to find out how.
-
Click 'Done' and review your new Class Homepage
At this point, you'll arrive at your Class Homepage, where you'll see your list of student names at the bottom of the page.
More InfoFor further details on what's possible within your Class Homepage, click here.
Comments
0 comments
Article is closed for comments.