Flash guide
- At plickers.com, select your Class from the left-hand sidebar
- Click on the graduation cap icon in the top right-hand corner of the page
- Double click on your student's name in the roster
- Make your changes and select Update Name
It's a quick and easy process to change student names within Plickers. You can see how it's done by watching the gif below, or by following the steps written underneath.

-
Sign in to plickers.com on your laptop/computer
-
Navigate to the Class that contains your student
You can find your Class in the left-hand sidebar of your Plickers homepage.
-
Click on the graduation cap icon

The graduation cap icon is located in the top right-hand corner of your Class Homepage.
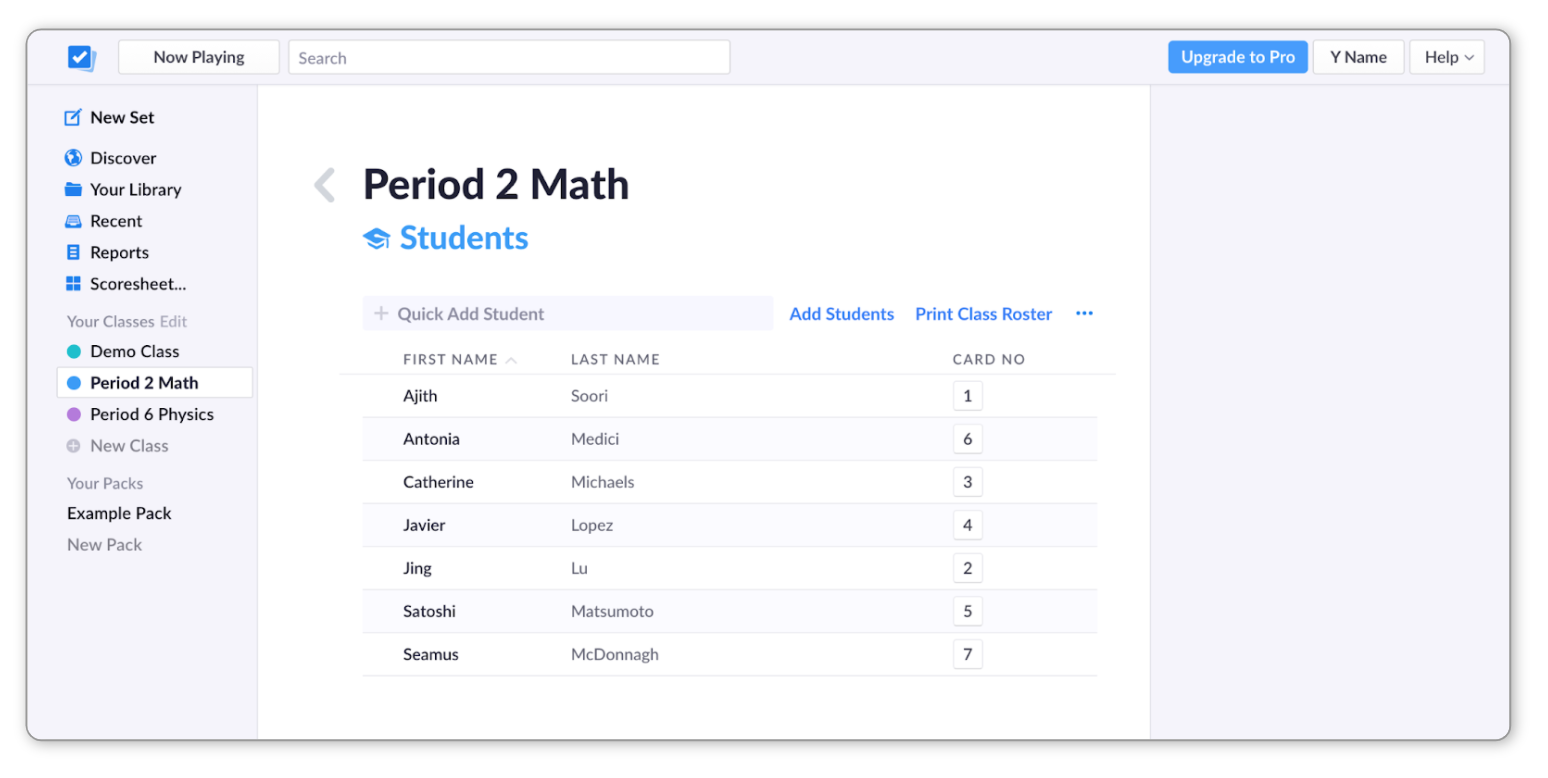
When you click on it, you'll be taken to the Students page, which contains a list of your student names and card numbers. It looks like this:

-
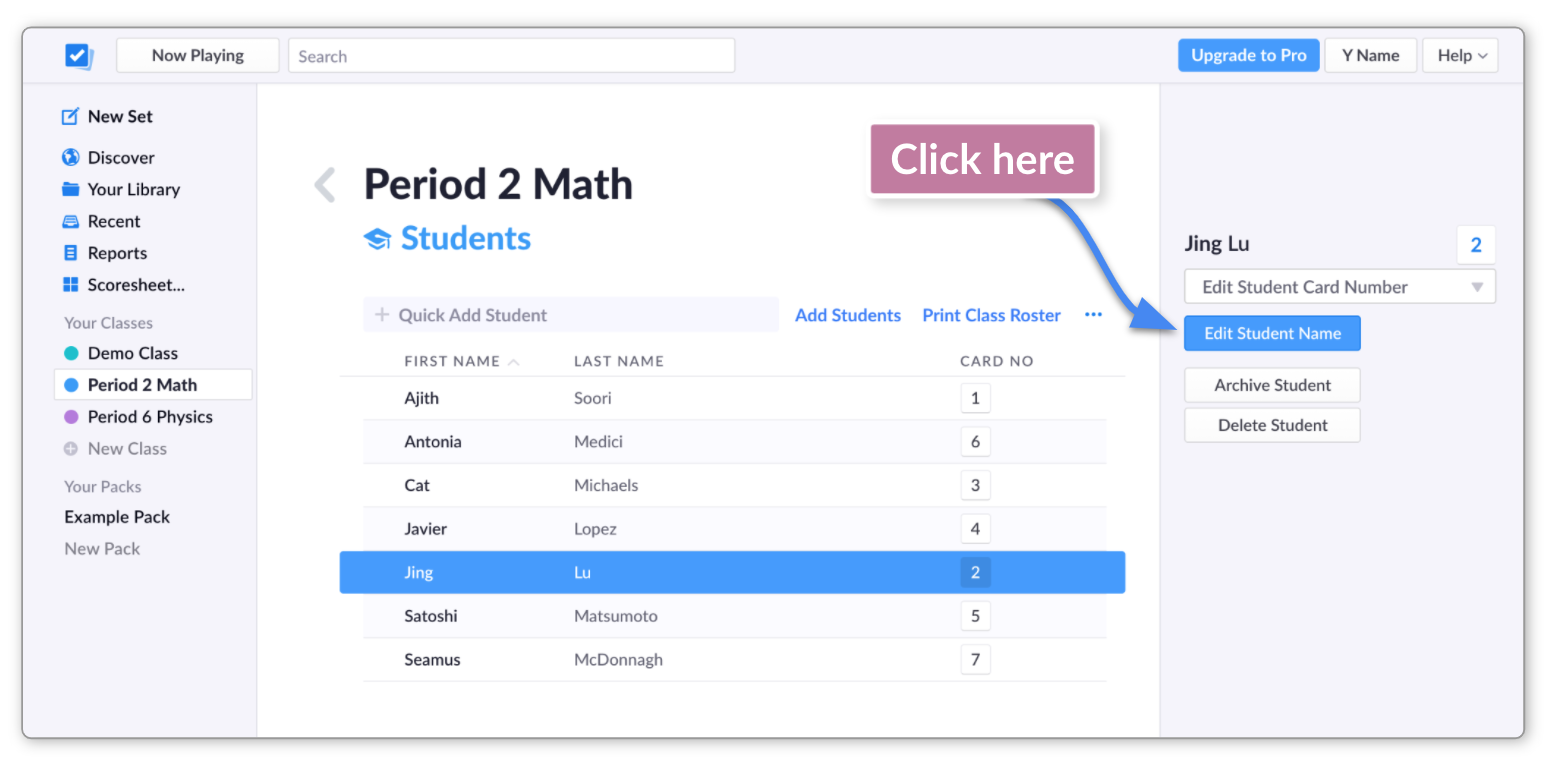
Select the name of the student you'd like to edit
Their name will be highlighted in blue, and you'll see the edit options appear in the right-hand sidebar (you can see what this looks like in the next step).
TipDouble-click on your student's name for an even quicker way to edit their name (you'll skip out step 5 below).
-
Click the blue 'Edit Student Name' button

-
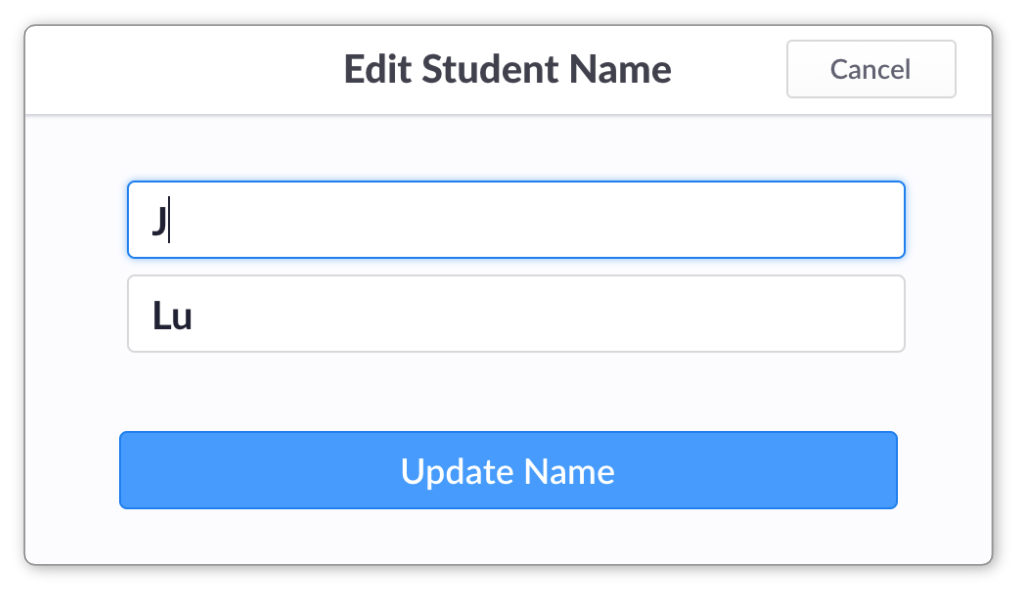
In the following pop-up window, make your desired updates
This is what the pop-up window looks like:

-
Click on 'Update Name'
You'll be returned to the Students page, and the updated name of your student will be included in the roster.
You'll have noticed that the right-hand sidebar mentioned above contains other edit options too, for instance to change a card number. We've included a couple of links to the relevant How-to guides below:
And if you'd like to add students to your roster, you can find out how at this link.
Comments
0 comments
Article is closed for comments.