Once you've set up Plickers E-Learning, you can follow our tutorial below on how to use it with your students during a remote class.
Remember, there's also a full video tutorial available on our E-Learning Overview page.
Step-by-step guide
There are two parts to the guide below.
The primary section is located in the Teacher view tab.
The steps in the Student view tab are designed to give you an idea of what your students will experience during an E-Learning session.
-
-
Create your Class Queue as normal for your Plickers session
-
Instruct your students to click on their unique individual link for your Class
You can follow their parallel process in the adjacent tab on this page called Student view.
TipIf your students have previously used their link, they can go directly to my.plickers.com, but each time they use a different device, they'll need to use their original link again.
-
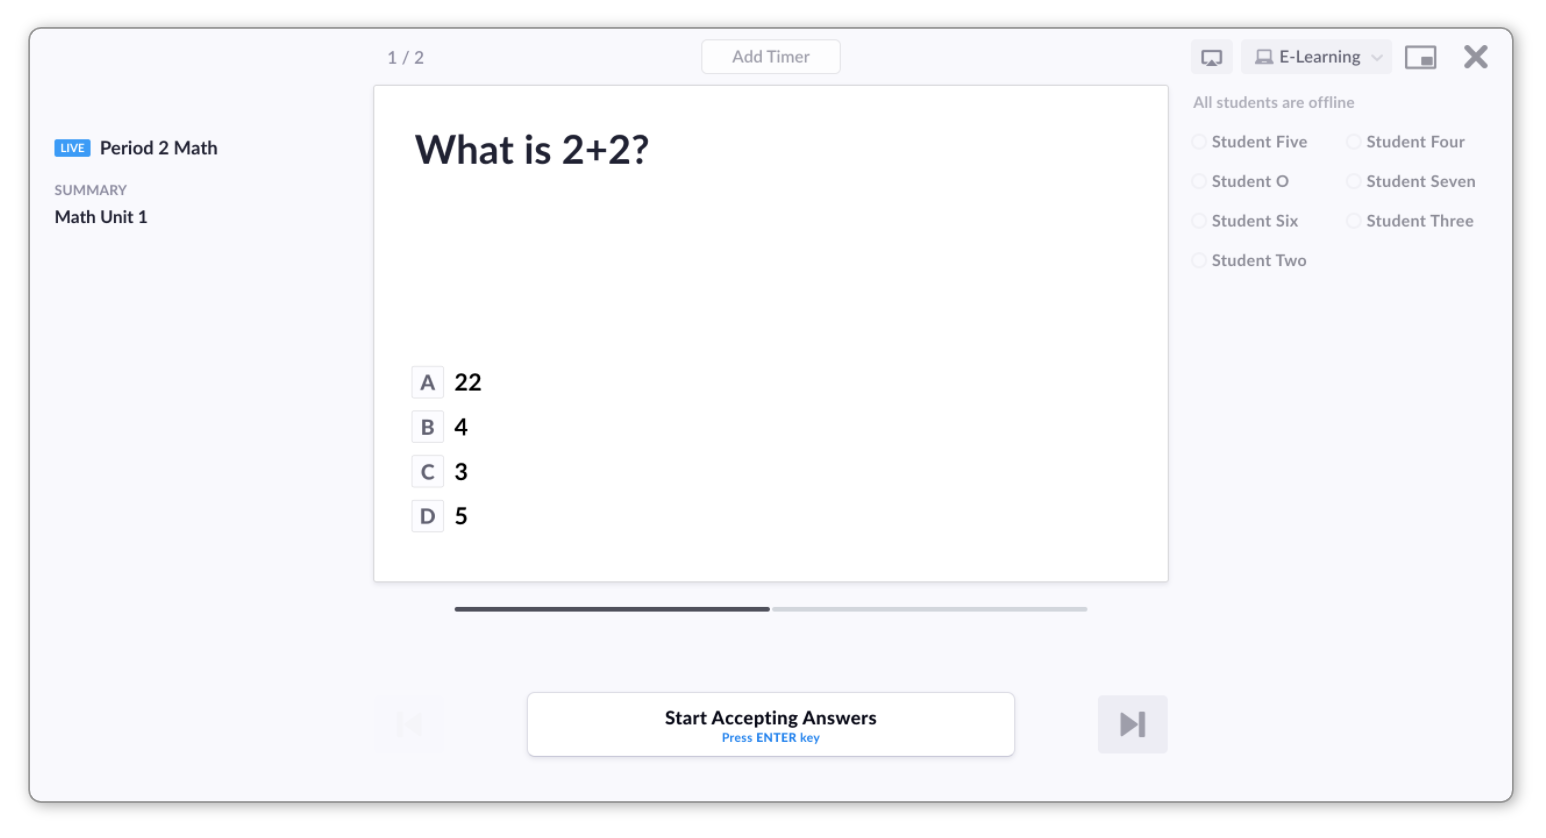
In your Class homepage at plickers.com, click 'Play Now' on the first Queue item
This will take you to your Now Playing screen.
Remember that you won't be using the app for this session; you only need plickers.com on your laptop/computer.
More infoIf you have students both in the classroom and remote, you can use our Hybrid view for Now Playing, for which you will need the mobile app. More info is available here.
As E-Learning has been switched on for your Class, the Now Playing screen will look like this:
-
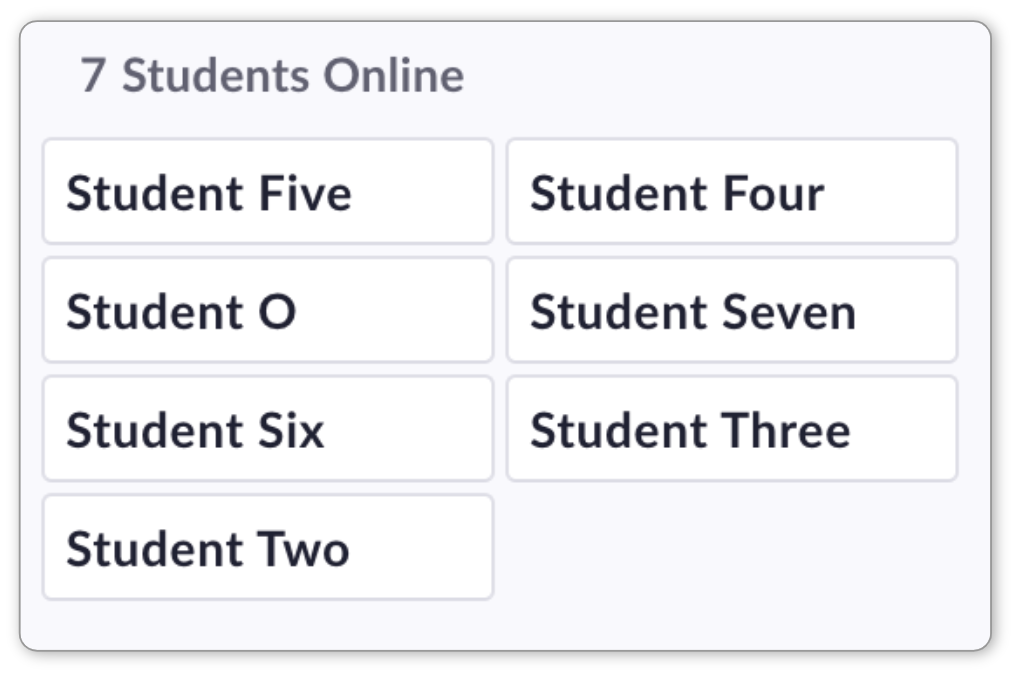
Ask your students to click on the Class that appears on their device's screen
This will register them as online (you'll be able to keep track of their attendance within your Now Playing window).
A list of online students looks like this, at the top right of your screen:
At this point your students will have moved from step 1 to step 2 in the adjacent student view tab.
-
Select 'Start Accepting Answers'
Your students will be able to select their answer to the first question.
-
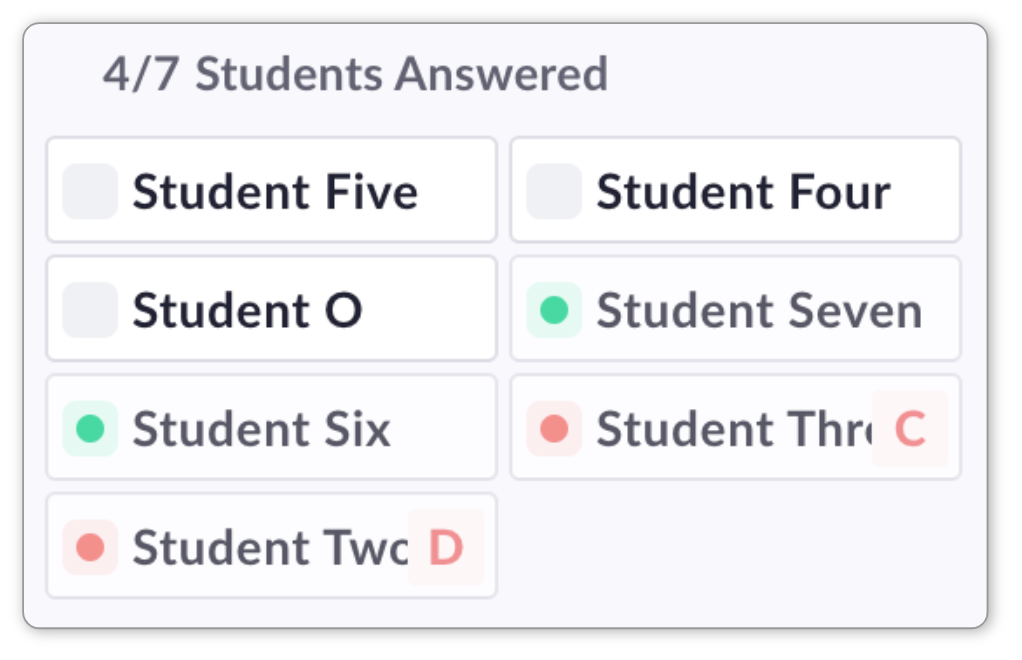
Monitor the progress of your students
You'll see that the student list will be updated as they select their answers, like in the image below:
-
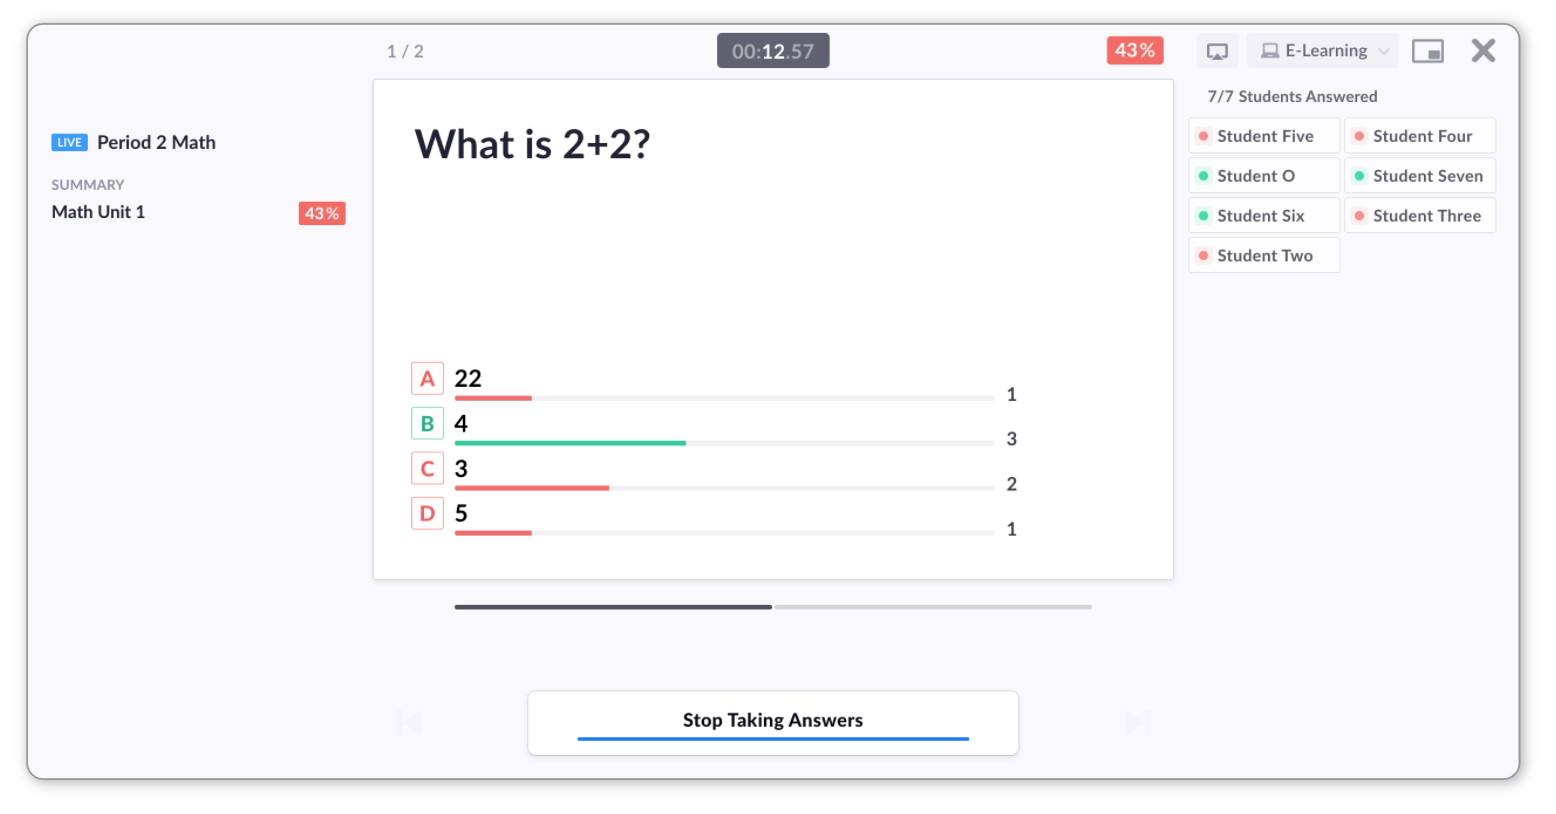
When all students have answered, select 'Stop Taking Answers'
-
Select 'Reveal Answer to Students'
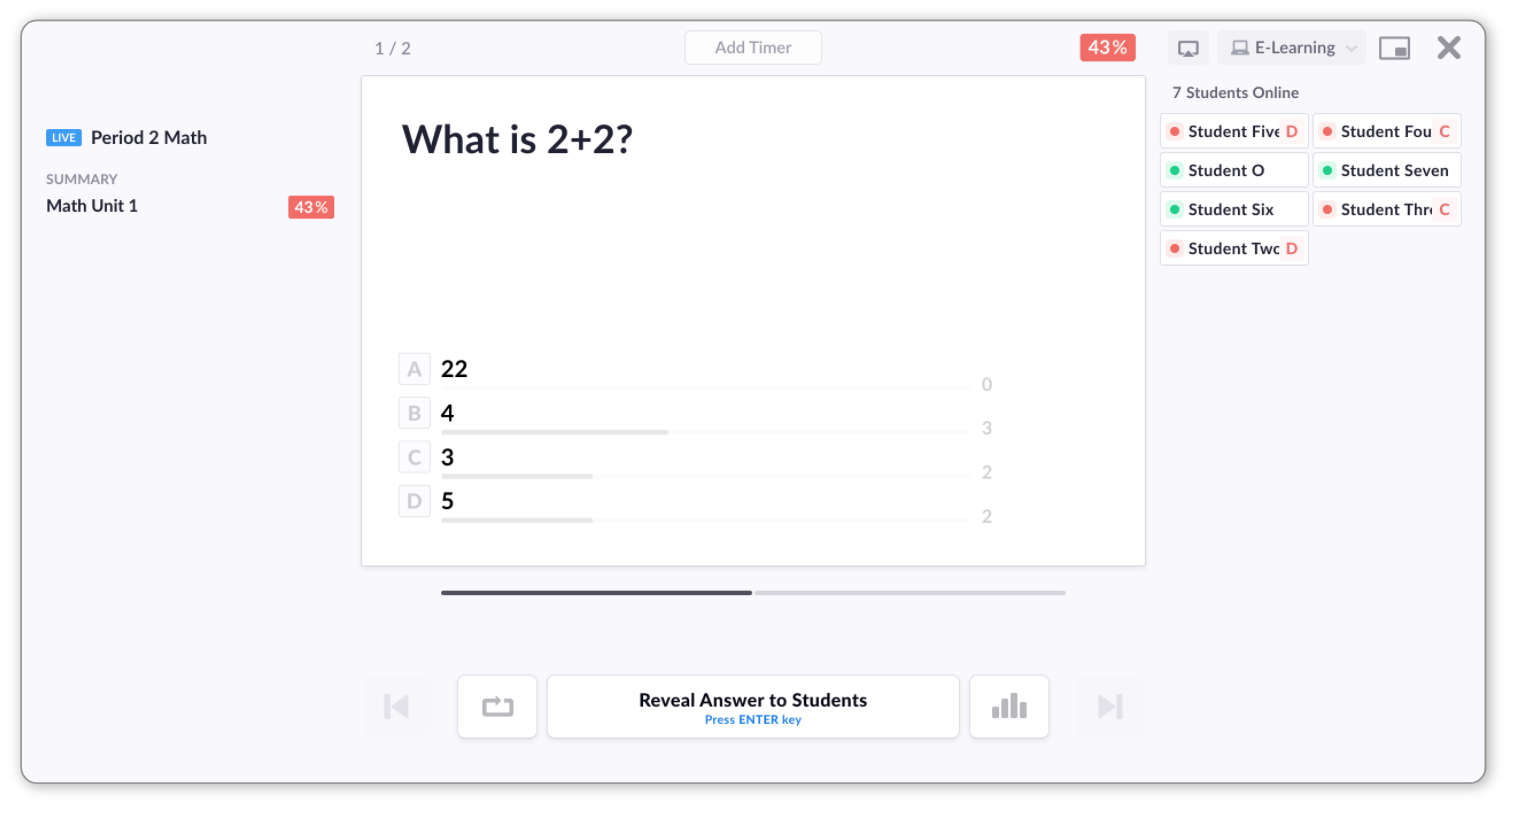
Your students will see the answer and you'll be able to discuss the question together. To show them the full class results, select the graph icon (
 ).
). -
Move on to your next question
Click on the 'next question' arrow (
 ) to move on to the next question within your Set.Note:
If you're using an individual Question in your Queue, rather than a Set, then you'll need to exit Now Playing and select your next Question in the Queue to continue.
-
Continue until the end of your Set
When you've reached the end, you can select the 'x' in the top right-hand corner of the Now Playing screen, and you'll be back to your Plickers homepage.
More infoThere are several features available to use within the E-Learning Now Playing screen, including student progress info and a screenshare mode. To find out more, click here.
-
-
-
Upon clicking on their link, your students will move to the following page:
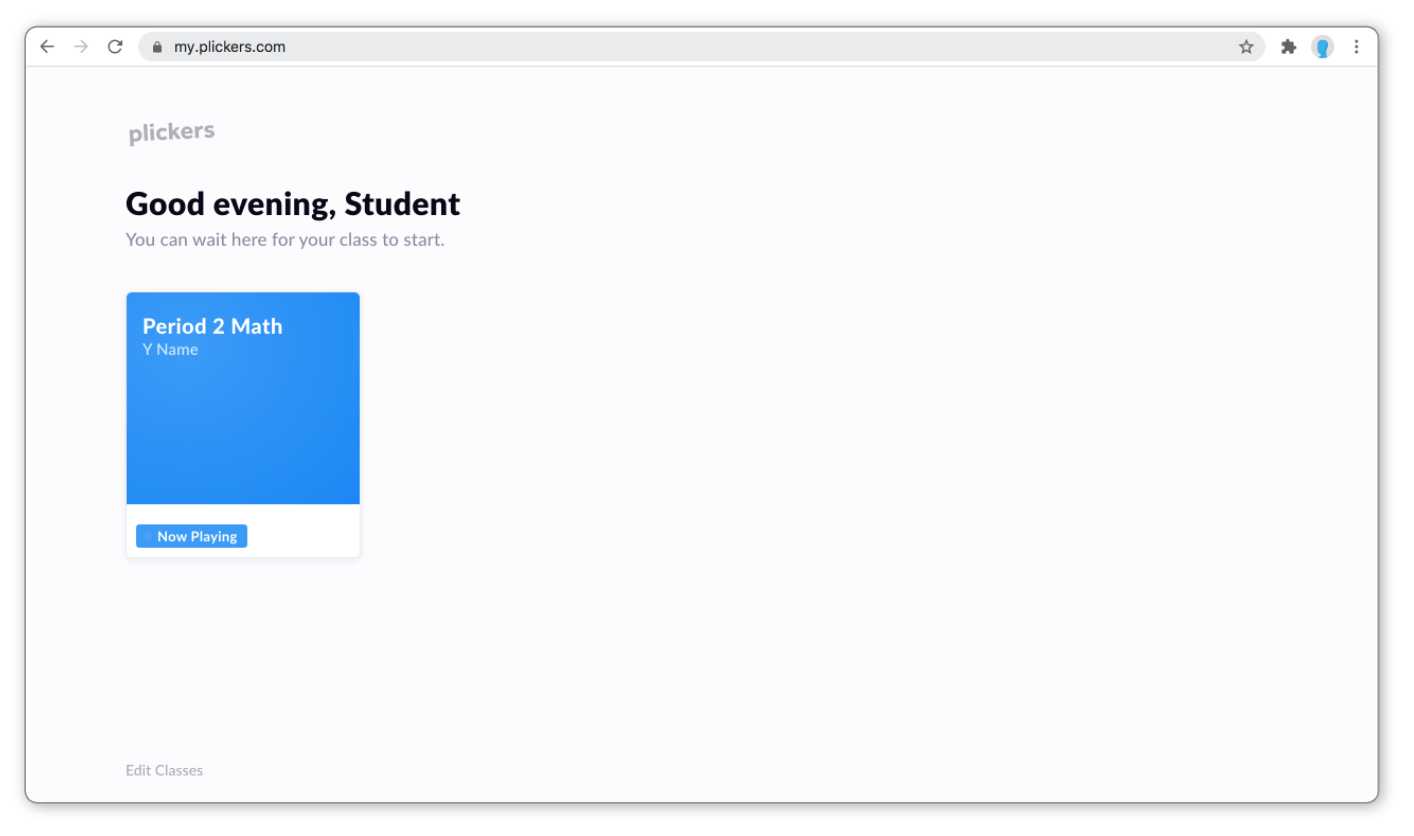
Note that the words 'Now Playing' are only shown if you've started playing your Queue and entered your Now Playing screen (step 3 in the teacher view tab).
If you haven't yet entered the Now Playing screen, your students will see 'Offline' instead of 'Now Playing'.
-
After clicking the blue box for their Class, students will see the first question:
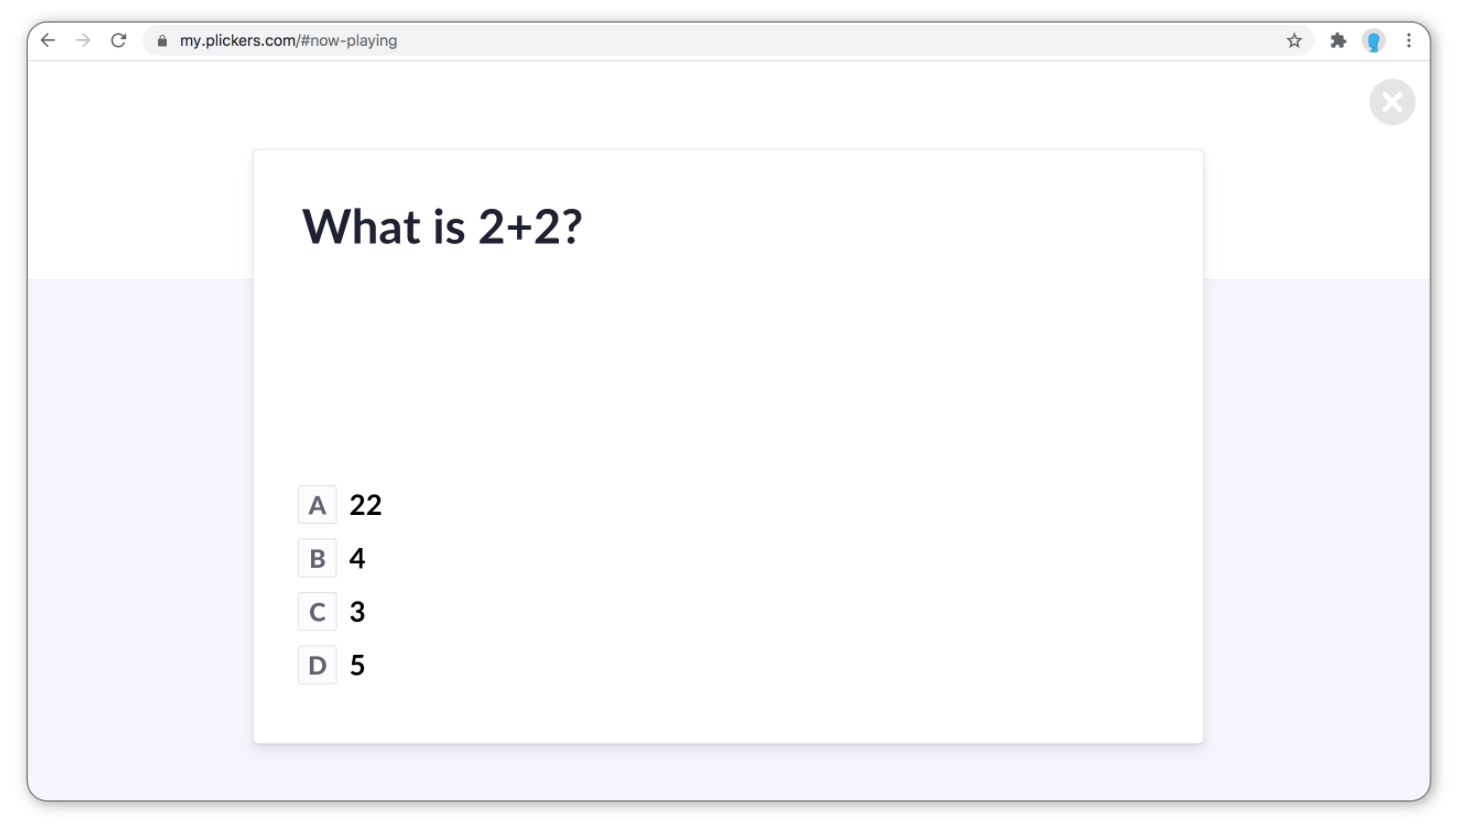
At this stage, your students won't be able to select an answer just yet.
-
When you click on 'Start Accepting Answers', your students will see the below:
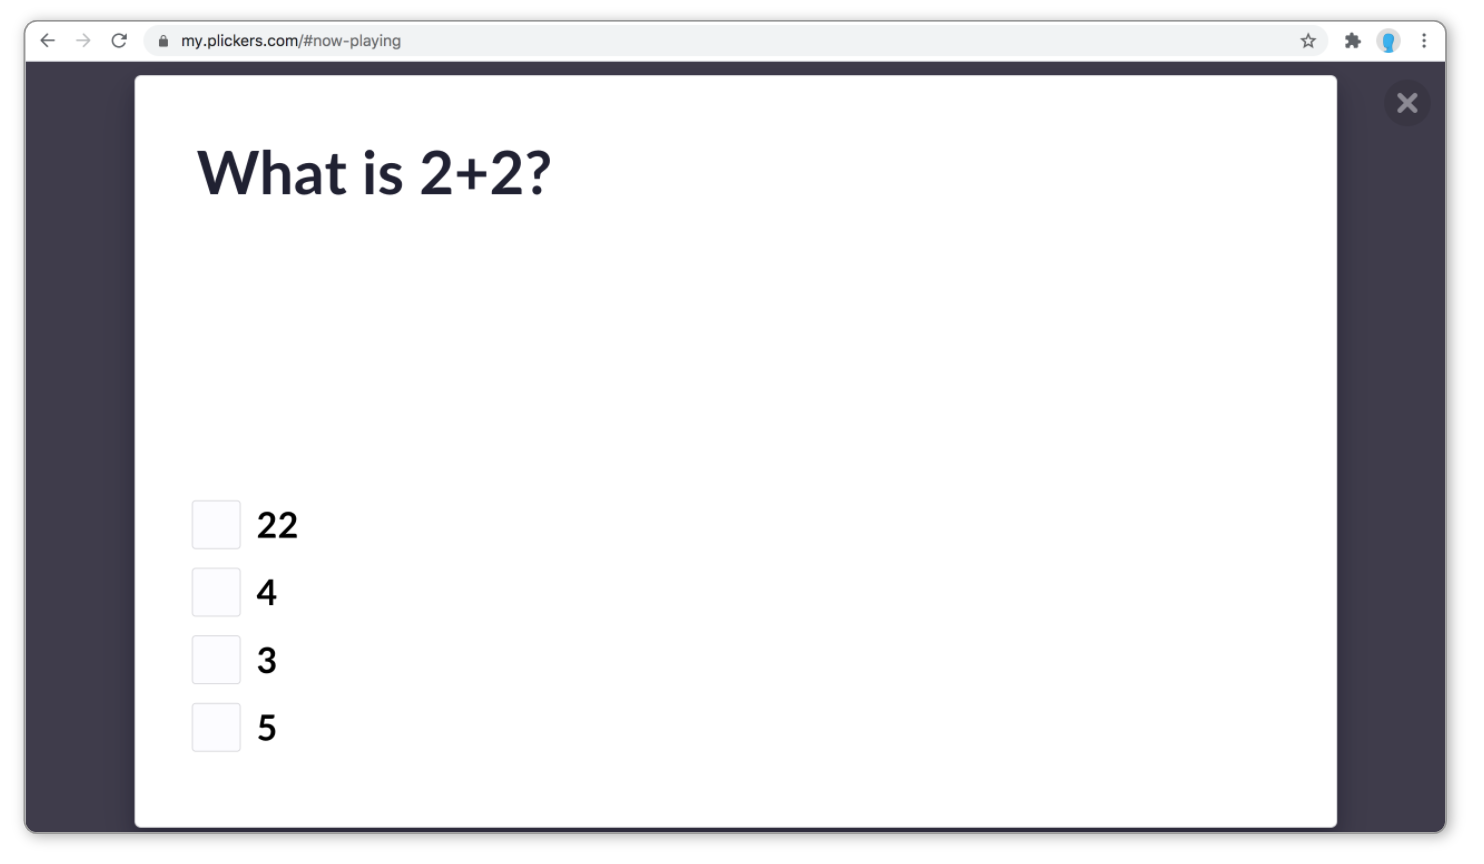
They can now select their preferred choice.
-
When you select 'Reveal Answer to Students', they will see the following:
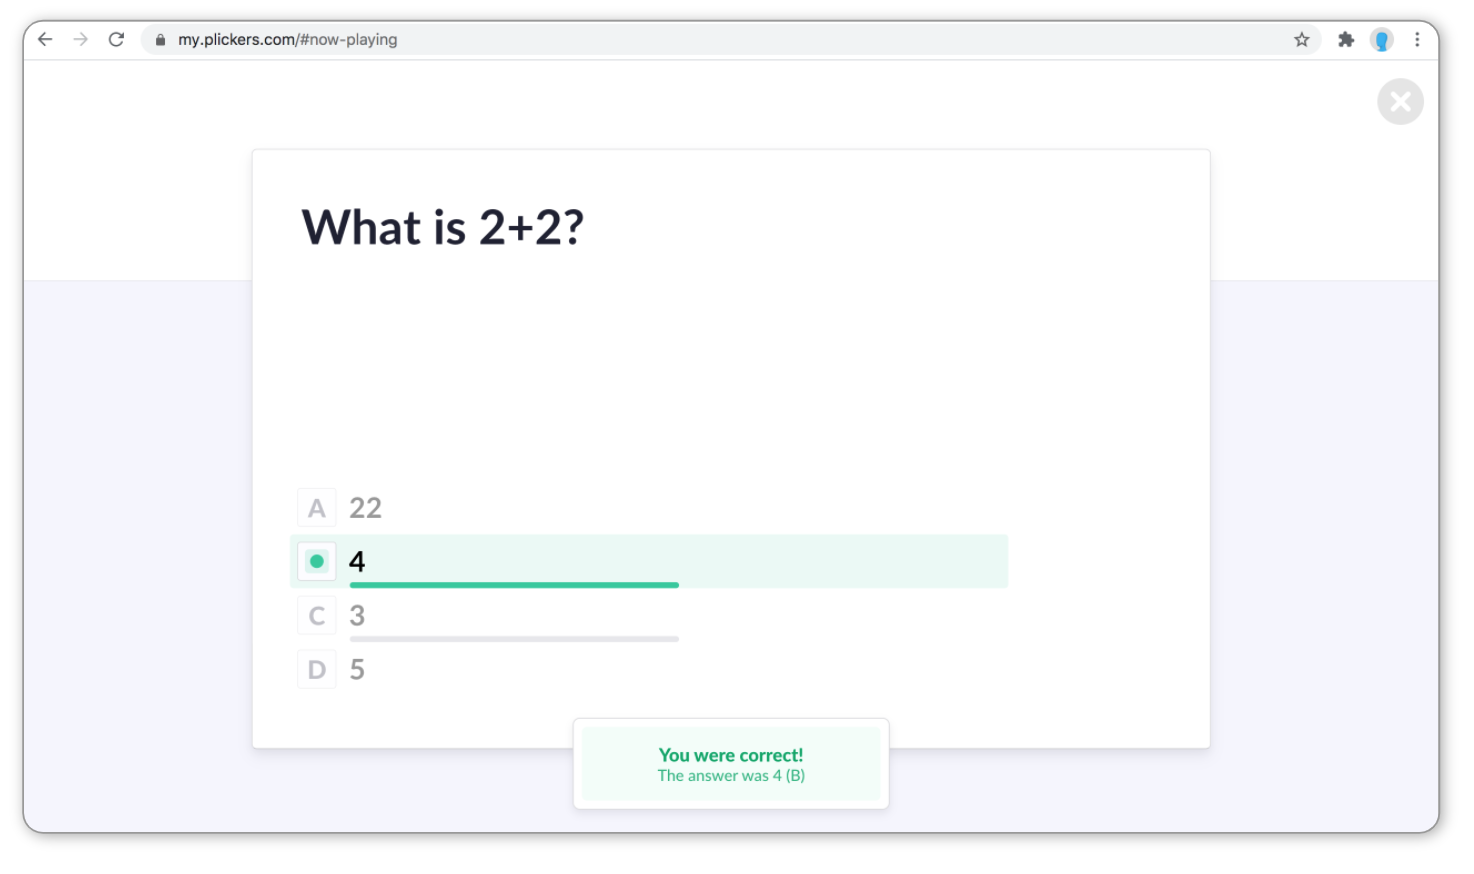
Please note that your students will only see the graph showing the full class results if you've selected that function (
 ) on your Now Playing page (step 8 of the teacher view tab).
 -
Your students will then see the next question when you click on the
button
-
And that's everything! Hopefully E-Learning will be a useful tool for you during those times when in-person teaching isn't possible.
If you have any questions about the process, please don't hesitate to let us know by emailing support@plickers.com - we'll be more than happy to help.
Comments
0 comments
Article is closed for comments.