The Plickers Set Editor contains an Import Questions feature that allows you to add an external batch of questions quickly and easily.
It can be done from a variety of sources, including websites, word processing documents, spreadsheets, other quiz web apps (like Kahoot) - anywhere you can copy text from really!
Flash guide
- Sign in to Plickers on your laptop/computer at plickers.com
- Select New Set from the top left-hand corner of your homepage
- Click on the Import Questions icon
 in the top right-hand corner of the Set Editor
 - Read through the intro details and click Get Started
- Choose the number of answer choices you want to use in the top right-hand corner
- Copy and paste all your material into the first line of the main window
- Use the tools in the right-hand window to make any necessary edits
- Mark your correct answers by selecting the appropriate letters in the far left column
- Preview your slides and select Import Questions
Detailed instructions on how to use this feature are available after you initially select the Import Questions icon from the Set Editor, but we've also included the steps below for you.
-
Sign in to plickers.com on your laptop/computer
You'll arrive at Your Library (aka the Plickers homepage).
-
Enter the Set Editor
You can do this by either clicking New Set in the top left-hand corner of plickers.com, or by double-clicking on any of your existing content in Your Library (or Packs).
-
Select the
 icon in the top right-hand corner of the Set Editor
You'll see a Getting Started window that takes you through the main steps involved.
-
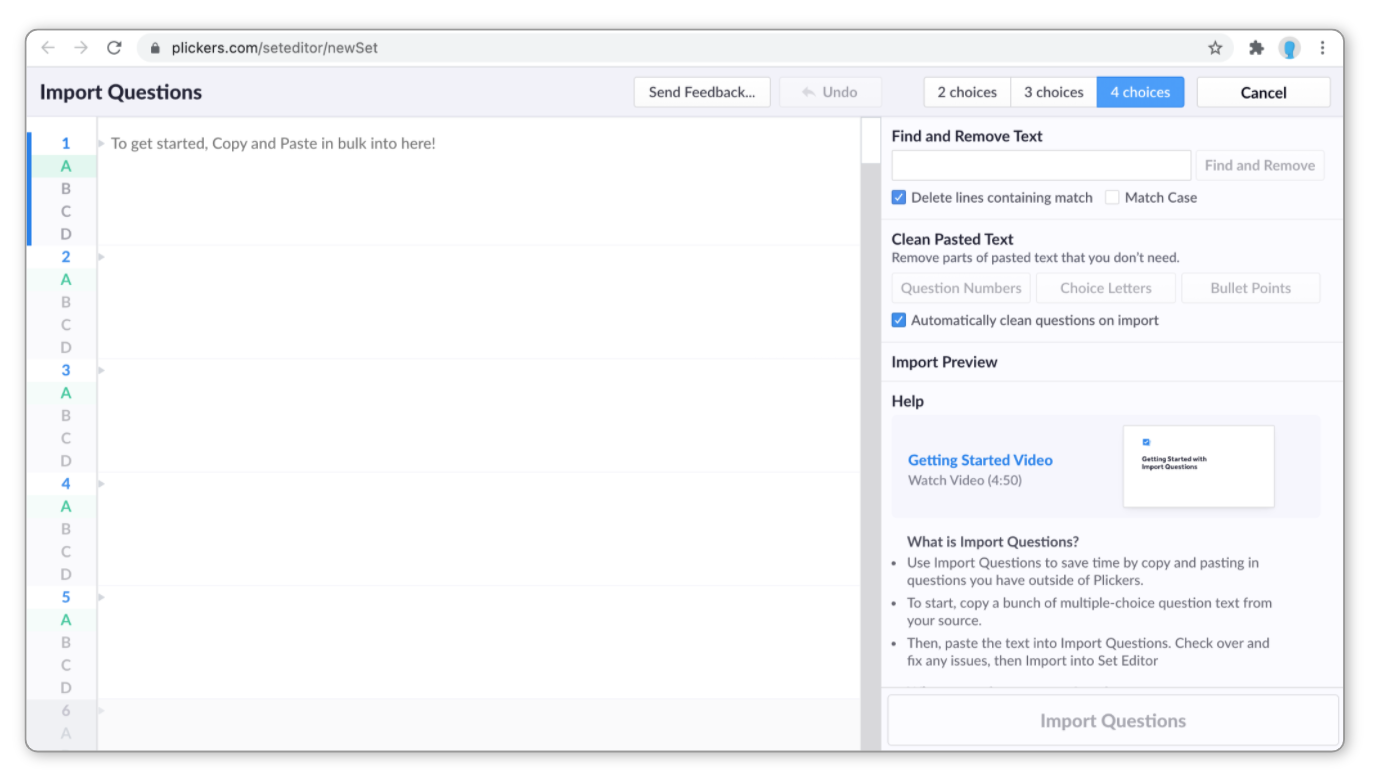
Select 'Get Started'
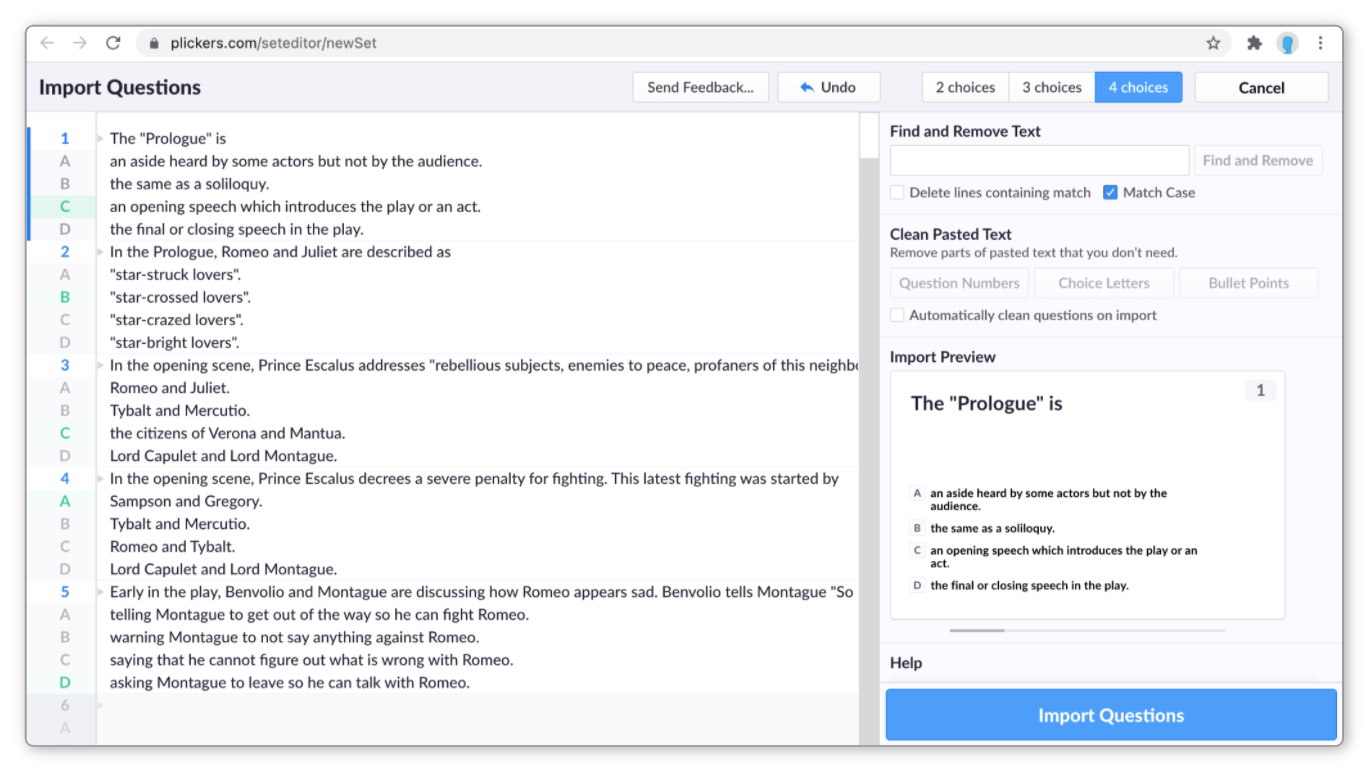
You'll then be taken to the main Import Questions page, which looks like this:
 More info
Within the Import Questions page, there's a help section available at the bottom of the right-hand toolbar. If you scroll down, you'll see lots of FAQs to browse through.
-
Choose how many answer choices you need for your questions
You can do this in the top right-hand corner by selecting 2 choices, 3 choices or 4 choices.
-
Copy your selection of questions
Briefly move away from Plickers to find your question resources.
Highlight all of your text and select Copy.
-
Paste your selection into line 1 of the Plickers 'Import Questions' window
Your content will appear in the question and choice lines, as you can see below:
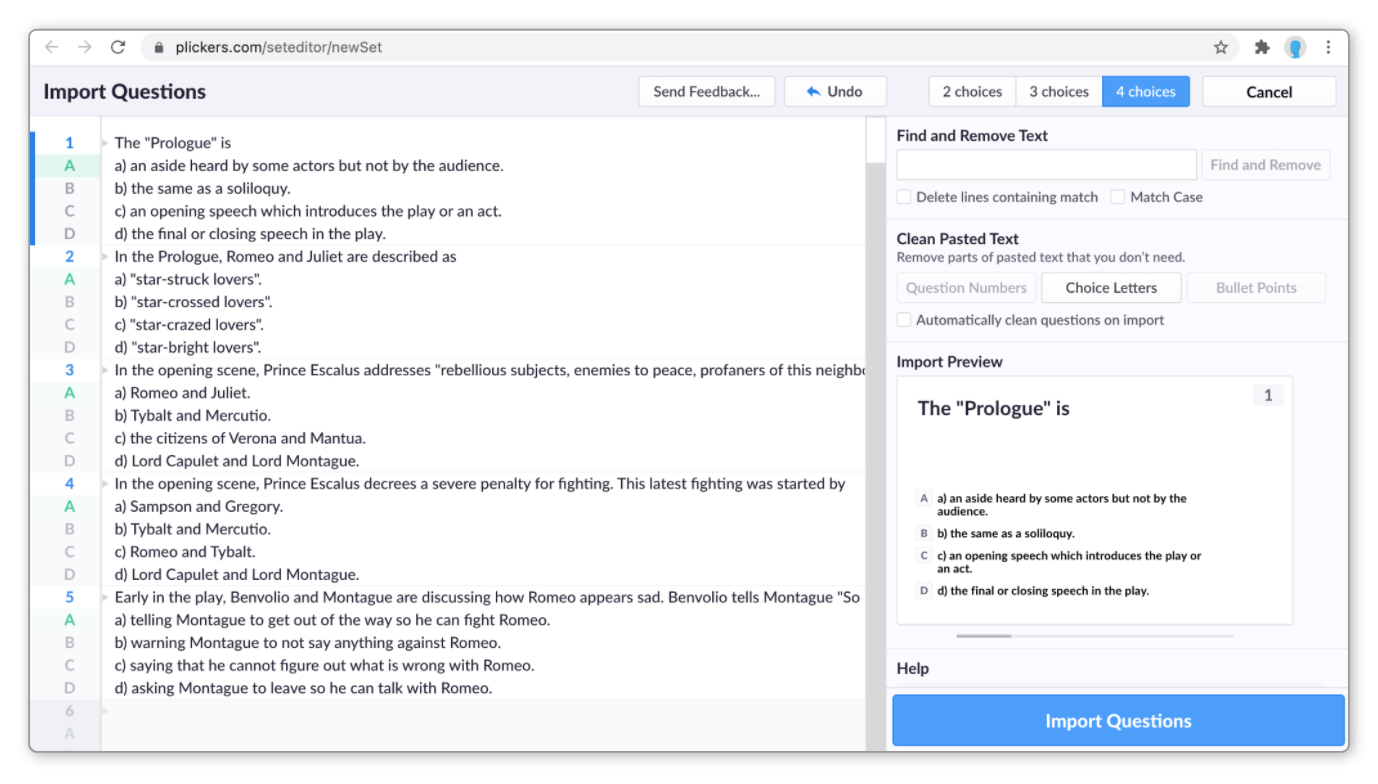
At this point we recommend having a quick check to ensure that the questions and answer choices are lined up properly.
-
Use the right-hand toolbar to tidy up your questions
There are several tools you can use to quickly edit your text so that it appears exactly how you like it. These are listed in the dropdown boxes below.
TipUse the Import Preview box (more info available in step 11) to keep an eye on how your questions will look once they've been imported.
As an example (to demonstrate the tools you have at your disposal), below we complete the task of removing choice letters from some text. Select the dropdown boxes to find out more about each tool:
-
Type a specific phrase in the text box that you'd like to remove.
Then select whether you want to remove only that phrase, or the complete line that contains that phrase. And finally, check the box if you want to match the case when searching.
In our example, we'll type in 'a) ', and tick 'Match Case'. The image below shows the result, upon selecting Find and Remove:

You can see that the text 'a) ' has been removed from choice A in all questions.
-
This is a quick way to remove things like question numbers, choice letters and bullet points that may have been inherited from your original list.
All you need to do is click on the relevant button under the Clean Pasted Text heading.
In the case of our example, we'll select the Choice Letters button, and this is what we get:
You can see that all choice letters in the text itself have been automatically removed, leaving only the relevant information in the preview.
-
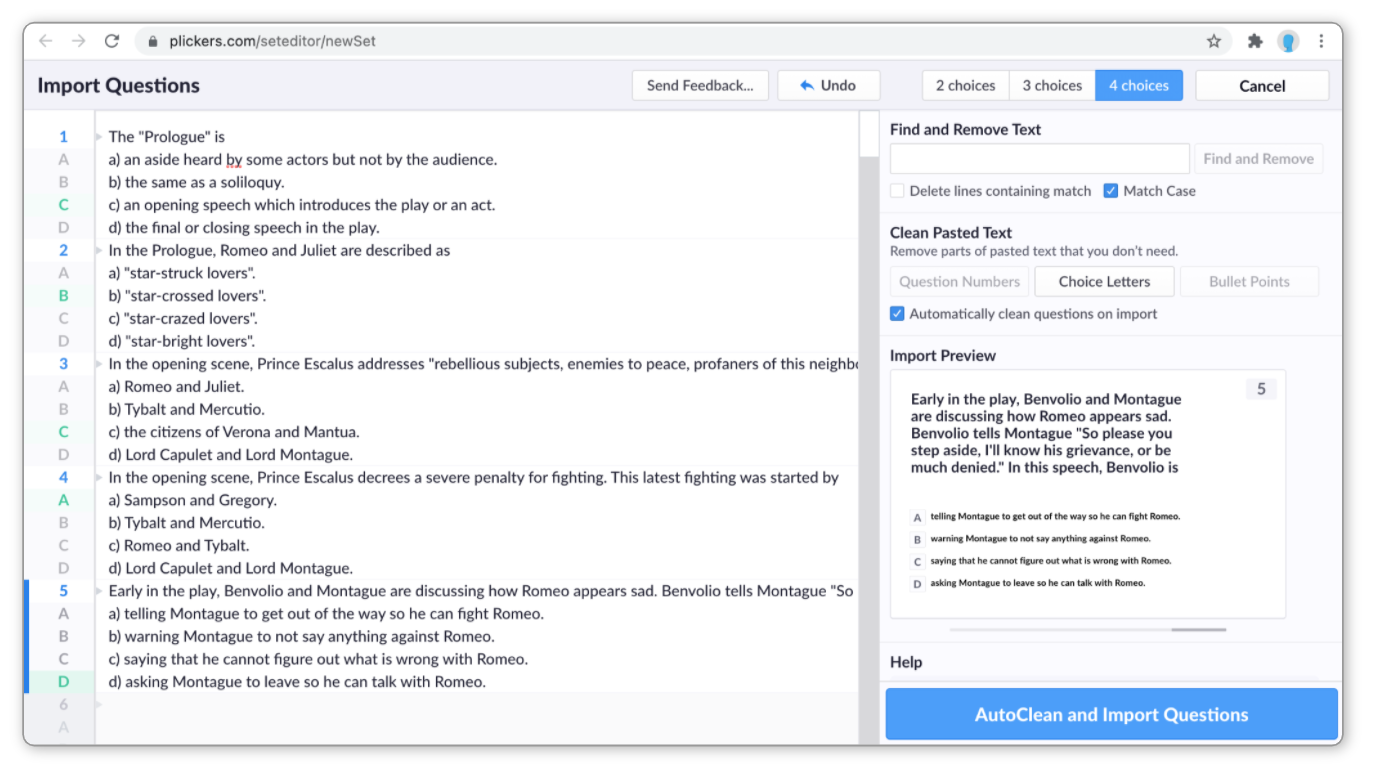
This option automatically cleans your text.
If you select this checkbox, you'll see that your text on the left is not edited, but the proposed changes are reflected in the Import Preview display.
In the example below, notice how the choice letters remain on the left-hand side, but are not present in the preview:
-
Of course, you can also make any manual changes to the questions that you pasted in. Simply make your changes by typing in the main text window.
-
-
Mark the correct answers
For each question, review your answer choices and mark the correct answer by selecting A, B, C or D from the left-hand column. You can see what this looks like in the image in step 10.
TipMake sure to read through the next step if you want to include a Survey question in your Set.
-
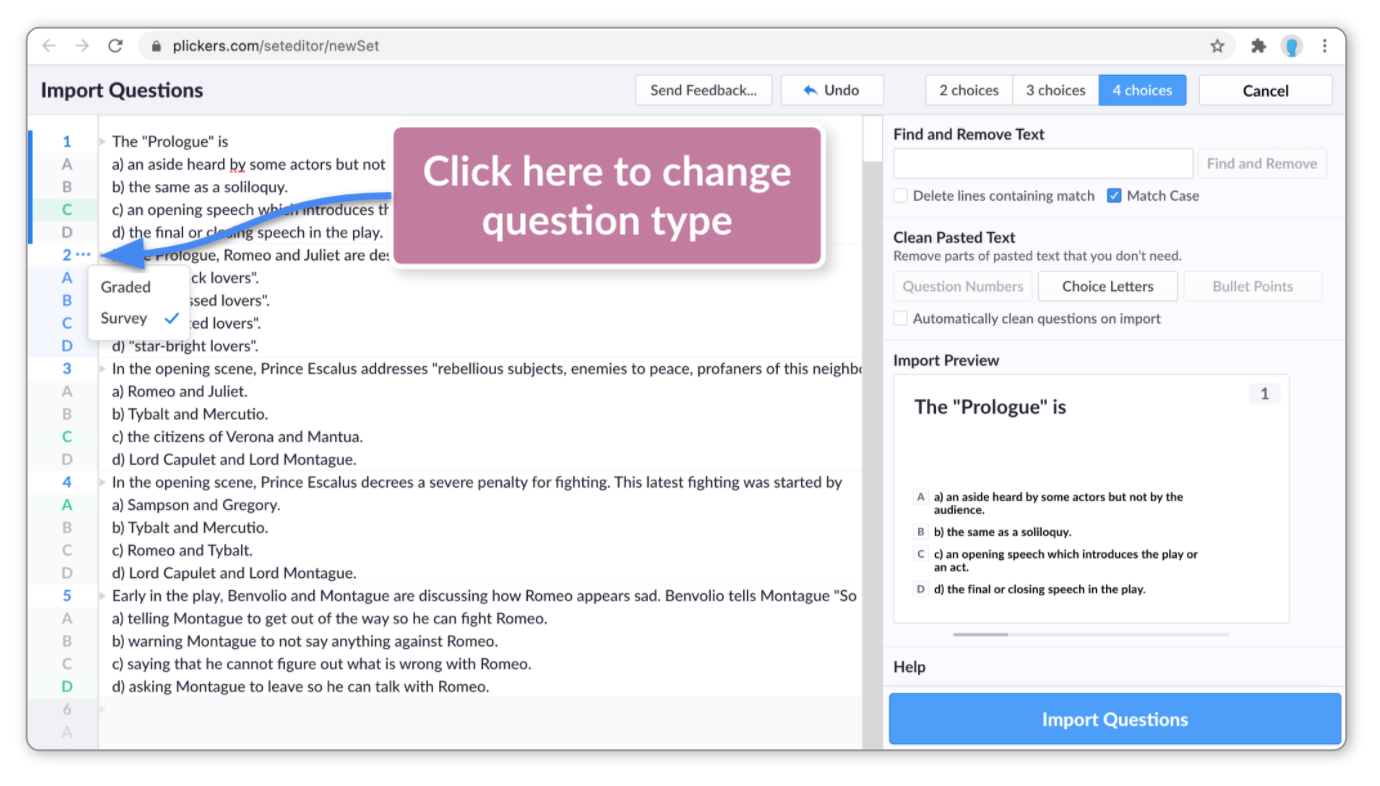
Mark any survey questions you want to include
If you have any surveys within your collection, you can easily change the format of a single question.
To do so, find the relevant question in the main window and click on the question number in the left-hand column.
Then choose Survey from the dropdown menu, as shown in the image below:
 Note
NoteYou may find it easier to mark correct answers and survey questions in the usual way within the Set Editor, after your questions have been imported.
-
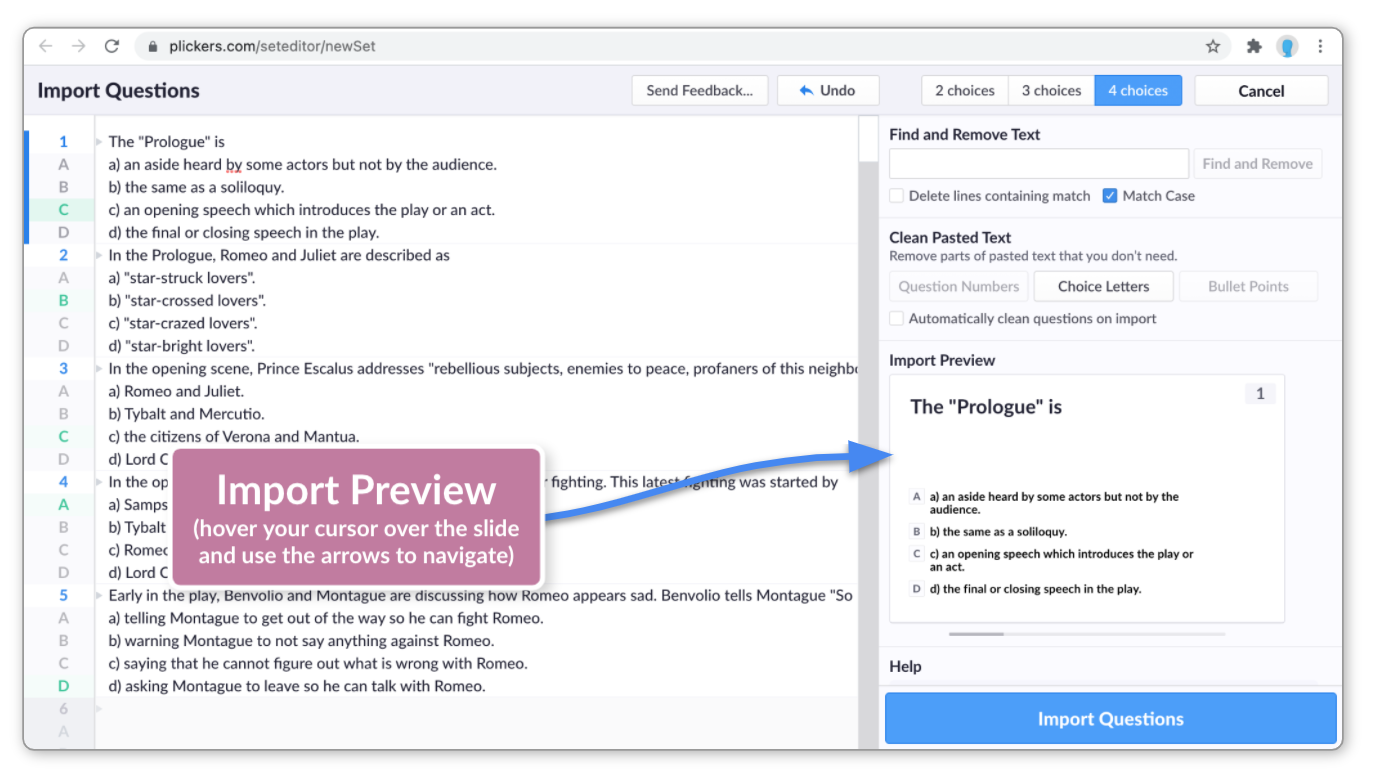
Preview your content
Use the Import Preview area to flick through your question slides to make sure everything is appearing as it should (when you hover your cursor over the question slide, you'll see the arrows you can use to move on to other questions).
-
Select the blue 'Import Questions' button
Your questions will then be added to your Set. If you're in an existing Set, the questions will be added in a block at the end of the Set.
We're a big fan of this feature as it can be a great timesaver when creating content for your class, and so we hope this guide has been useful for you.
If there's anything else you'd like to know, feel free to browse through the FAQs in the article linked here (those FAQs are also available within the feature itself at plickers.com).
You're also very welcome to get in touch with us by emailing our support team at support@plickers.com.
Comments
0 comments
Article is closed for comments.