Each Class in your Plickers account has its own customizable Queue, to which you can add content items as you prepare for a lesson. Then, in the classroom, you can save time by selecting each item to play from the top of your Queue, one after the other. To find out more, click here.
This article takes you through the process of selecting the items you would like to add to your Queue, ready to play to your students in the classroom.
Flash guide
- In the left-hand sidebar of plickers.com, select the Class you're working with
- In the section at the top of the Class Homepage, seek out the content item you want to add to your Queue (from the suggestions list, or by selecting the Search button)
- Select the Add button for your desired content item
- That content item will appear at the top of your Queue, and you'll be free to continue adding items in the order you require
The flash guide above uses the Classes area at plickers.com to access the Queue. It's worth remembering though that there are a few routes you can take, depending on your preference, including through the Plickers mobile app.
This guide assumes you have created the content you require for class, so that it's available in Your Library. (If you change your content, don't worry, the items already in your Queue will update.)
There are two routes you can take within both plickers.com and the app, depending on what's best for you. We'd probably recommend going via plickers.com, using route 1 shown below.
Route 1: Via your Classes
This route involves heading to the Classes section first, to build your Queue from one central location.
-
-
Log in to plickers.com on your laptop/computer
-
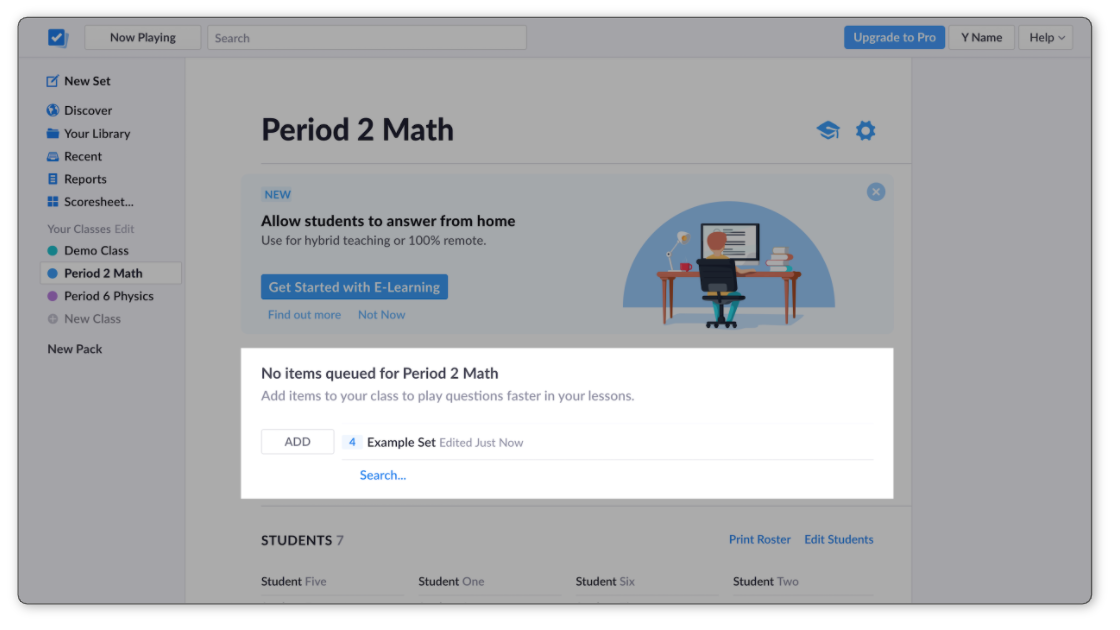
Click on the Class you'd like to work with (from your left-hand sidebar)
You'll be taken to the Class Homepage, where you'll find the Queue section near the top of the page:
-
If the content you require is in the suggested items list, click on 'Add'
-
If you can't see your content, click on 'Search...'
You can then use the search bar in the pop-up screen to find your content, and click Add.
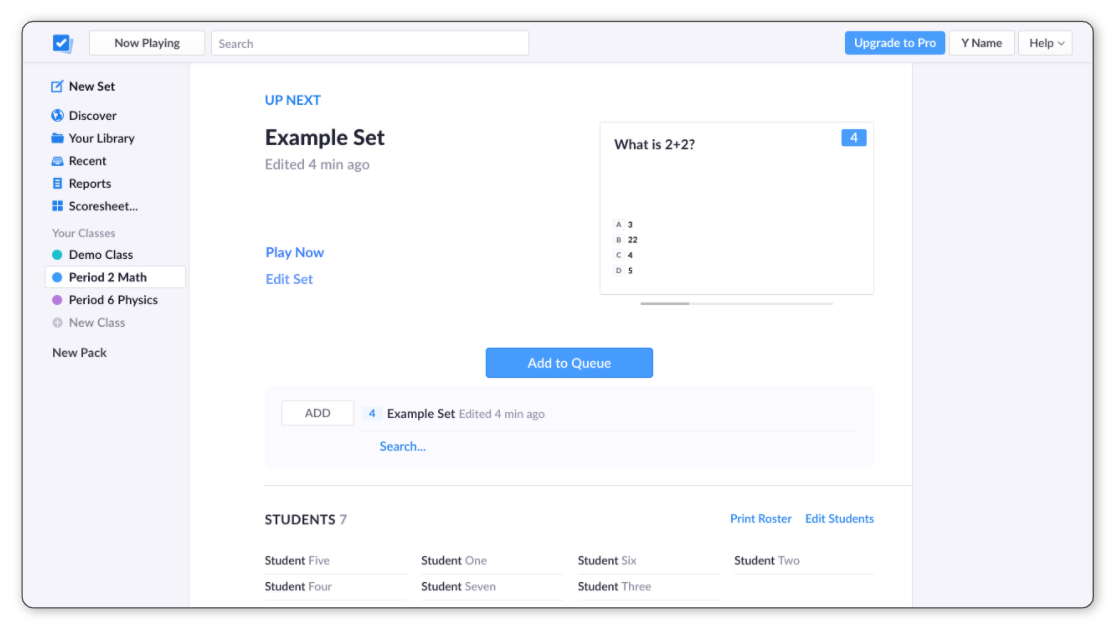
Your first item will appear at the top of the page under the heading Up Next (as shown in the next step).
-
Continue building your Queue
Click the Add to Queue button and repeat the process.
Head back up to check out the mobile app route
-
-
-
Open the Plickers mobile app and sign in
-
Tap on the Classes icon
 at the bottom of the screen
 -
Select the Class you'd like to work with
You'll then see the following screen:
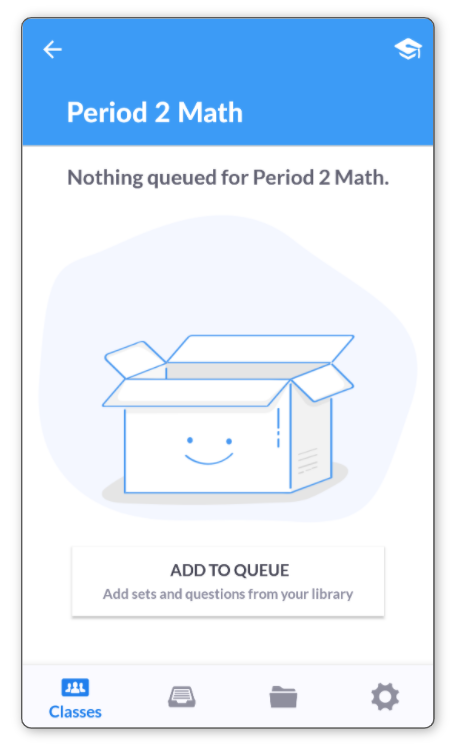
Or, if you already have items in your Queue, they'll show up instead of the graphic shown above.
-
Tap 'Add to Queue'
If you already have items in your Queue, scroll down to find the Add to Queue button.
-
Select the content item you'd like to add
-
Repeat from step 4 until everything you need is queued up
Head back up to check out the plickers.com route
-
Route 2: Via Your Library
If you'd rather navigate through Your Library, looking for content and adding items to your Queue as you go, here's how:
-
We've included two routes below:
-
Several tasks within Plickers can be performed quickly with the right-click menu; adding content items to your Class Queue is one of them.
-
Log in to plickers.com on your laptop/computer
-
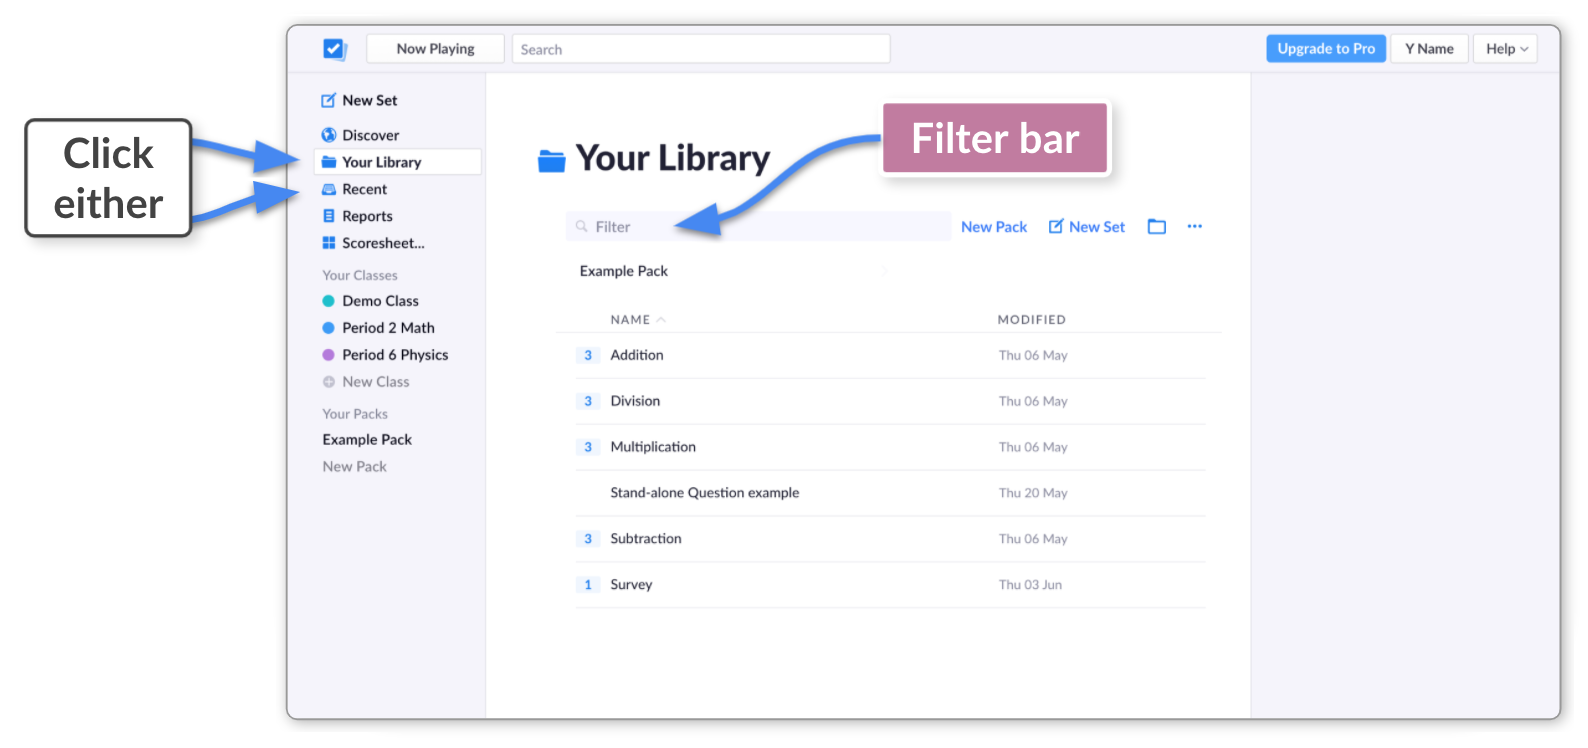
Click on Your Library (from the left-hand sidebar)
You'll see all your content listed right there. Or you can search for it, using the Filter text box underneath the Your Library heading.
TipYou can also click Recent in the left-hand sidebar, which orders your content chronologically by the last time you interacted with it (you can use the Filter here too).
-
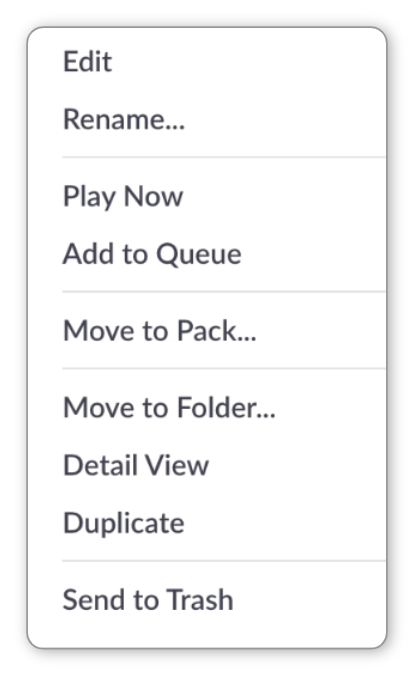
Right-click on the item you want to add to the Queue
You'll see the following menu appear:
-
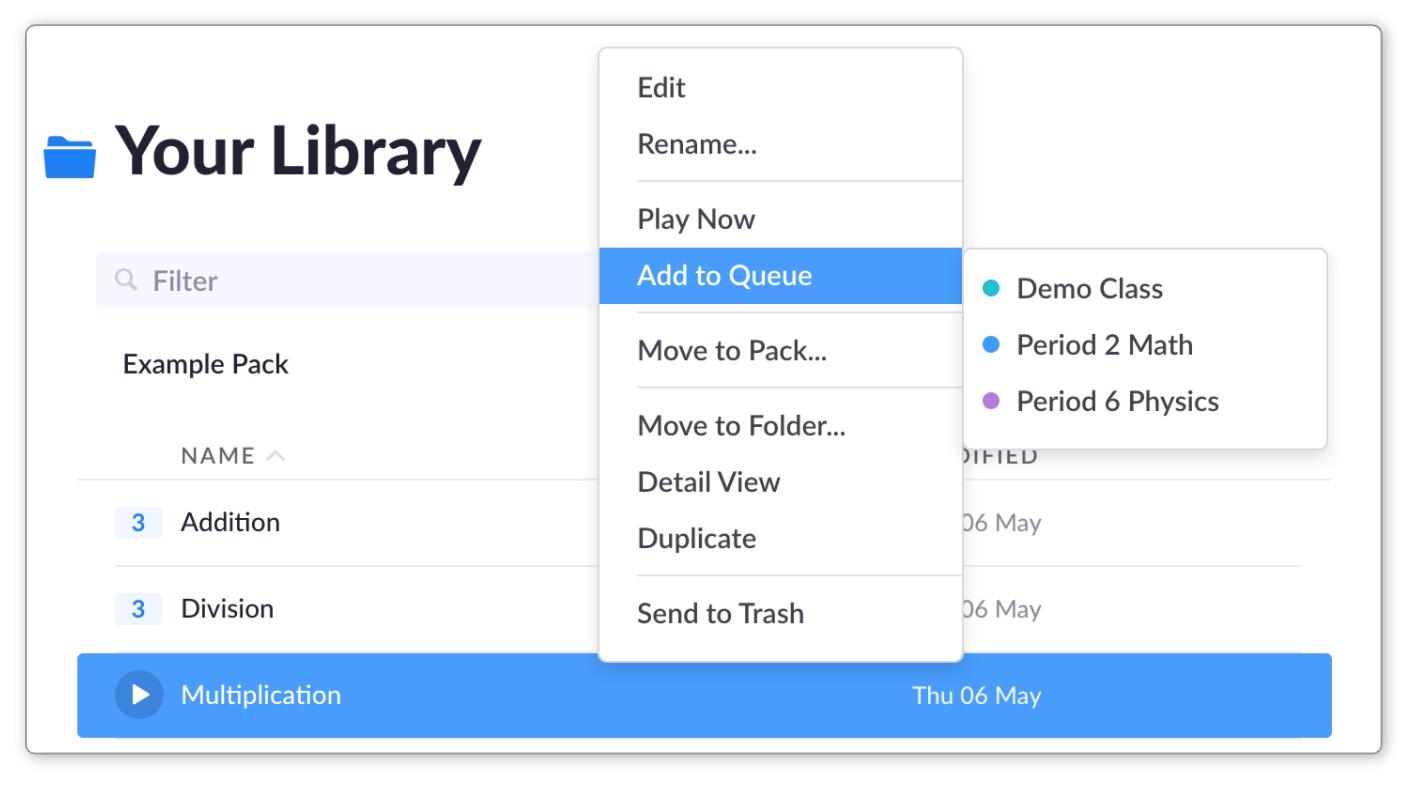
Hover your cursor over 'Add to Queue'
You'll see your list of Classes appear to the right, like in the image below:
-
Select the Class you're working with
The content item will then be added to that Class Queue.
TipAfter you do this, notice that the name of the Class appears in the right-hand sidebar for the content item selected. This is how you can quickly tell if a content item has been included in other Class Queues.
-
-
It's likely you'll want to use the quicker route above, but we've included the steps below as well, to give you a little more info about what's possible within Plickers.
-
Log in to plickers.com on your laptop/computer
-
Click on Your Library (from the left-hand sidebar)
You'll see all your content listed right there. Or you can search for it, using the Filter text box underneath the Your Library heading.
TipYou can also click Recent in the left-hand side bar, which orders your content chronologically by the last time you interacted with it (you can use the Filter here too).
-
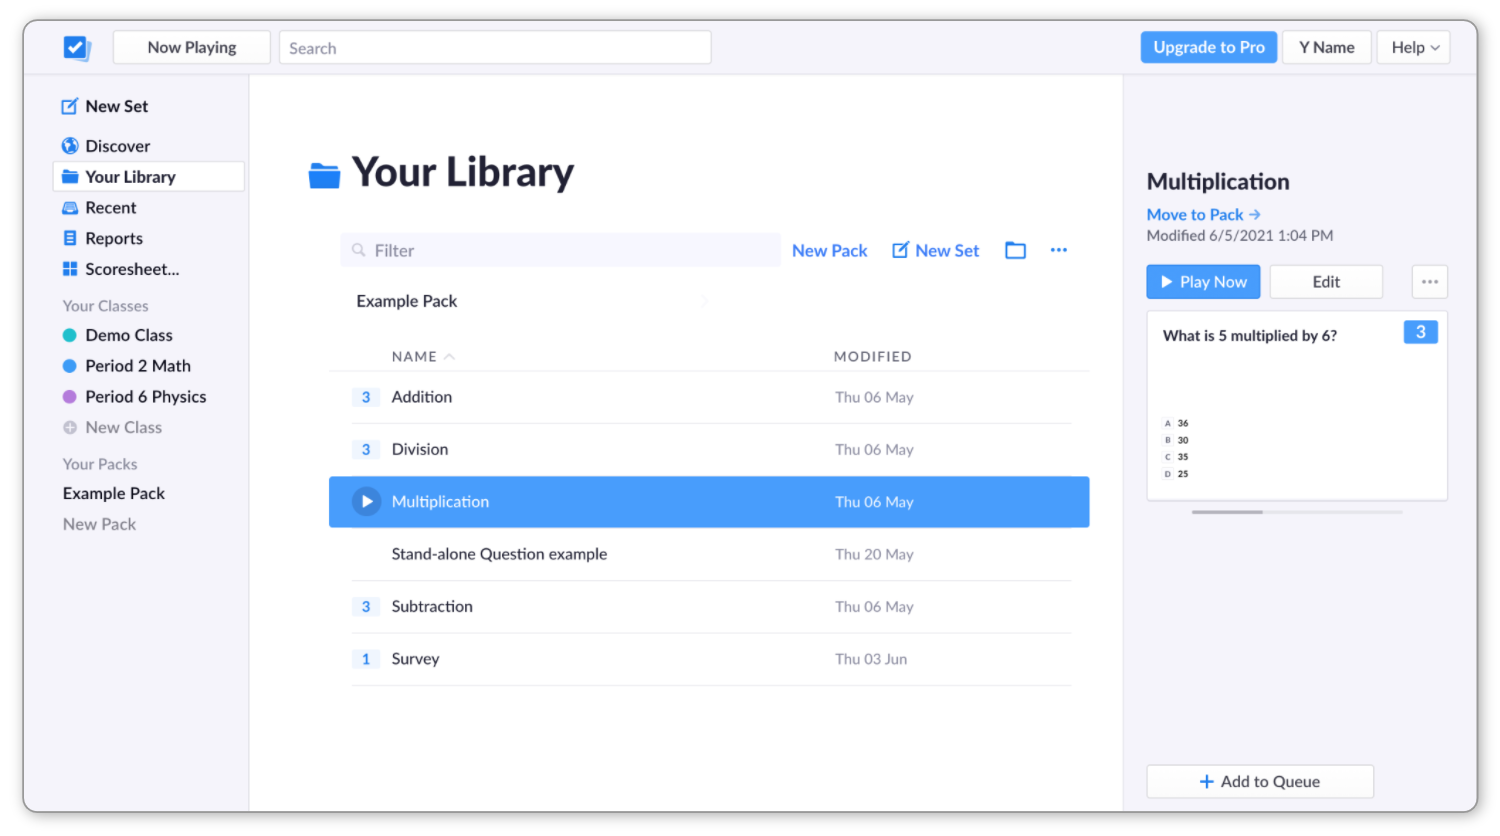
Select the item you'd like to add to the Queue
It'll be highlighted in blue, and you'll see a list of options appear in the right-hand sidebar.
-
Click on 'Add to Queue' at the bottom of the right-hand sidebar
A pop-up menu will appear, containing your Classes.
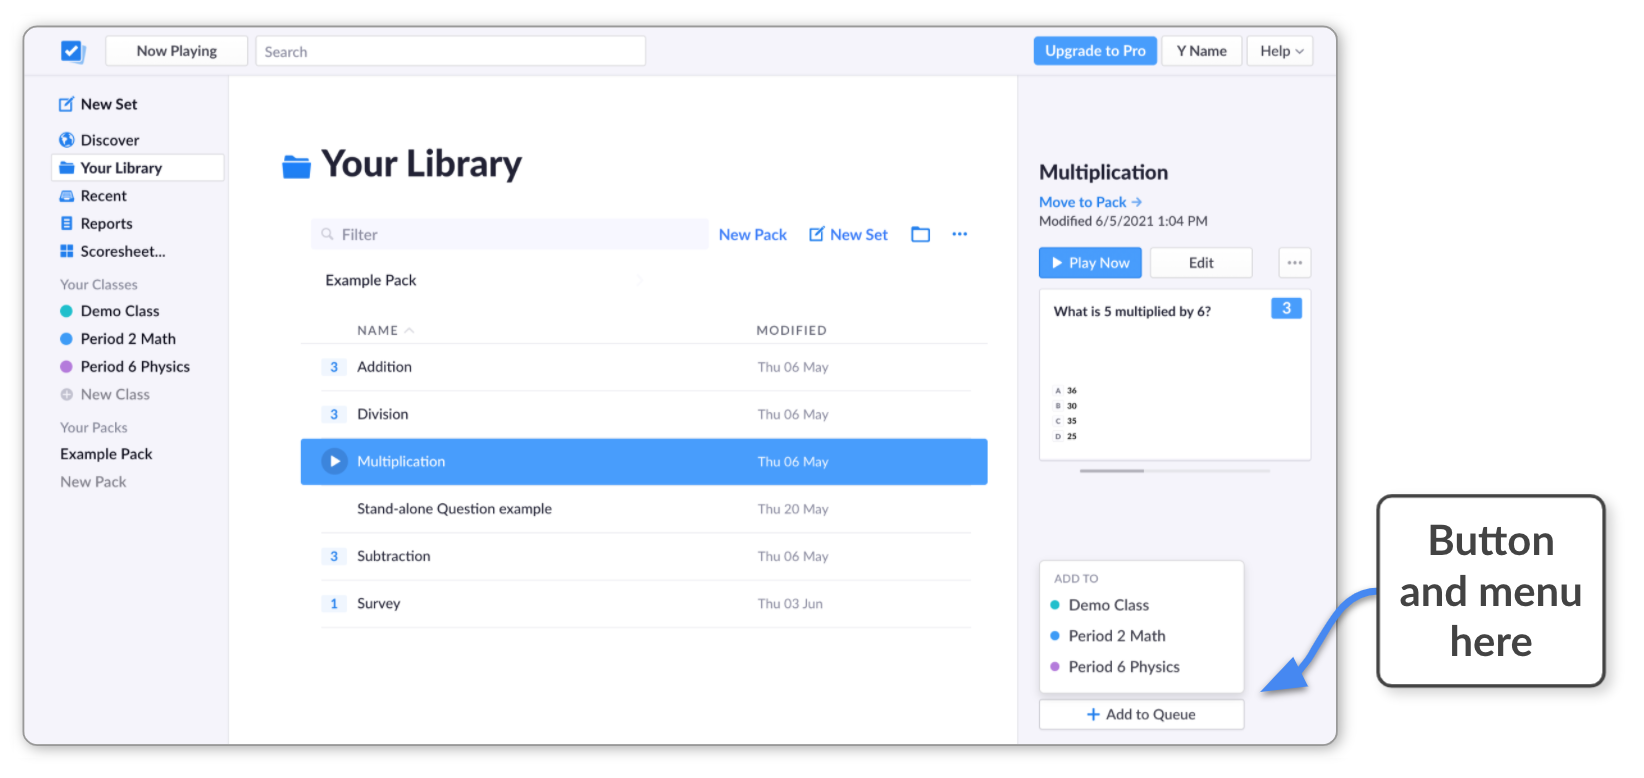
-
Select your Class to add the item to the Queue
TipAfter you do this, notice that the name of the Class appears in the right-hand sidebar for the content item selected. This is how you can quickly tell if a content item has been included in other Class Queues.
-
Head back up to check out the mobile app route
-
-
-
Open the Plickers mobile app and sign in
-
Tap on the Library icon
 at the bottom of the screen
You can also try using the Recent
 icon if that's easier.
 -
Find and select the item you'd like to add to your Queue
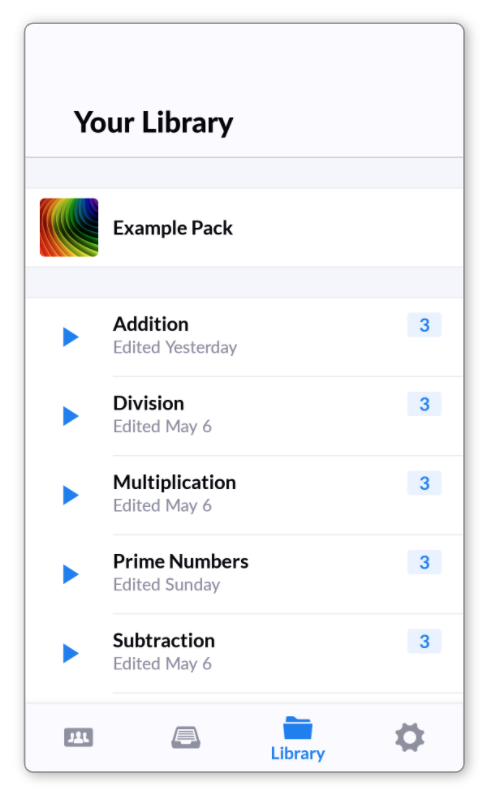
By tapping the title of your item, you'll be taken to a screen showing the content within it (shown in the next step).
If you're on Android, avoid tapping the 'play' icon to the left of the above screen - these are used to play an item immediately (more info about this is available here).
-
Tap 'Add to Queue'
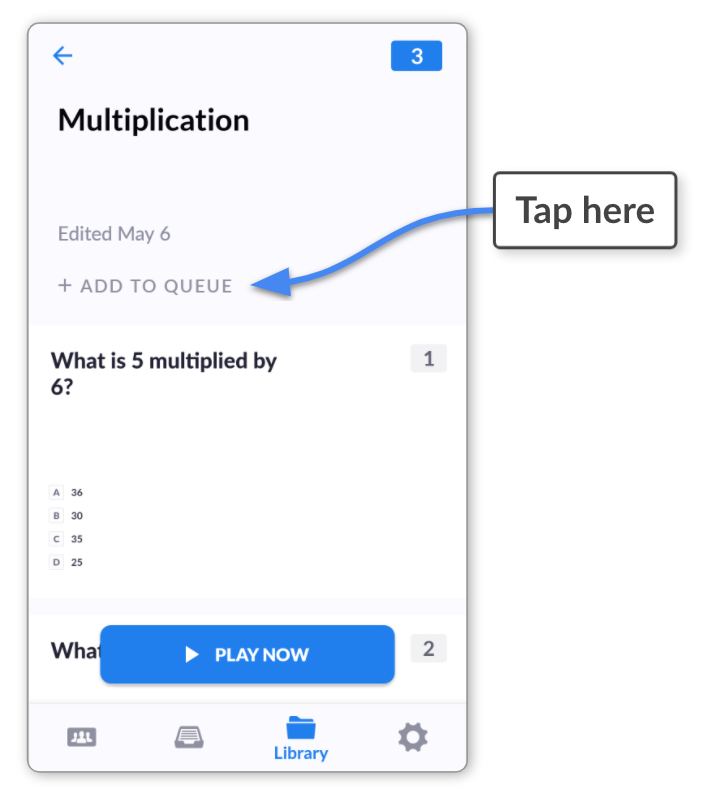
The iOS app design differs slightly to the above screenshot - the Add to Queue button is in a similar place but on the right.
A list of your Classes will appear at the bottom of the screen.
-
Select the Class you're working with
-
Tap the 'Add to Queue' button to confirm
The content item will then be placed at the end of the Queue for that Class.
Head back up to check out the plickers.com route
-
If you prefer to be a little more spontaneous in your classroom, you can play content on-the-fly, rather than use your Queue. Check out routes 3 and 4 in this How-to guide to find out more.
Comments
0 comments
Article is closed for comments.