This is a Plickers card:
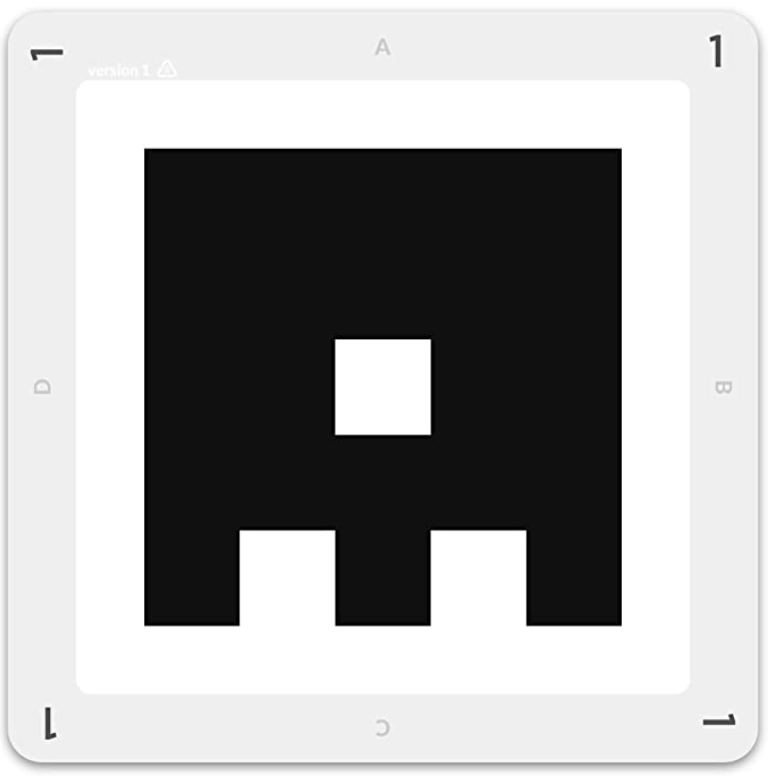
To use Plickers, each student in your class will need one of these cards.
We offer free printable cards here, as well as more durable versions (and stickers) on Amazon. You can also find more information on obtaining cards in our Get Cards article here.
Using your cards
The steps below will take you through how to make use of Plickers cards.
But before we start, remember how each student was assigned a number on plickers.com when you added them to a Class? Well, this is where those numbers come into play...
-
Hand out the appropriate card to each student in your classroom
Each student should hold the card that matches their given number on plickers.com.
-
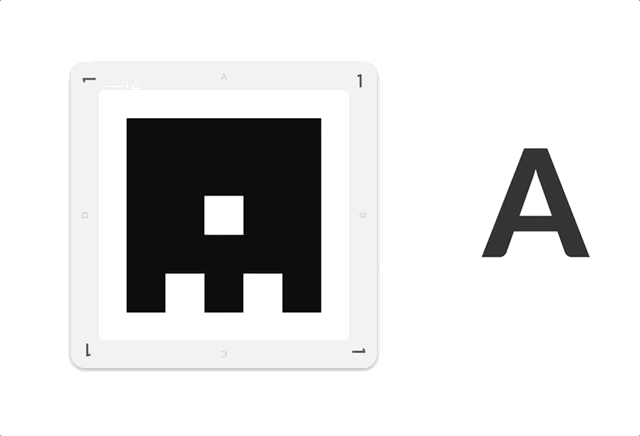
Your students can provide their answers by holding up their card
They can do this by following these two steps:
- Face the black barcode towards you (the teacher), and...
- Orientate their card so that their answer choice (A, B, C, or D) is located at the top edge.
You can see this visualized in the gif located within the section below.
-
You can then scan the classroom using the Plickers mobile app
The scanner will collect the answers and attribute them to each of your students.
For more details on scanning, and how Plickers cards fit into the process, feel free to check out our how-to guide on scanning your student answers.
About the cards
There are two important aspects to our cards, and together they allow the Plickers scanner to log answer choices and attribute them to the correct students.
-
The black barcode in the middle
The orientation of this pattern tells the scanner which answer to log.
- On each edge of the card is an answer choice - A, B, C or D.
-
For each question you ask, your students should hold up their card with their intended answer located at the top edge, like in the gif below:
NoteThere are a maximum of 63 different barcode patterns, meaning Plickers can accommodate a class size of up to 63 students. For information on classes larger than this, please contact support.
-
The card number in the corners
The card number allows the scanner to attribute each answer to each student. It can do this because the barcode design varies between each card, as you can see below:
- When you add your Classes and students during setup, you'll see each student is given a number.
- Then, in the classroom, you should give each student their corresponding card number.
-
For example, Andrew McDonnagh is number 7 in the roster below, so he should use card number 7 in the classroom.
You can find your roster by clicking on the
icon in each of your Class pages at plickers.com.
Ask your students to hold their cards as still and straight as possible while you're scanning. A few practice runs might be useful if your class is new to Plickers.
If you have any questions about our cards, feel free to have a browse through our FAQ section here.
For anything else, you're very welcome to send over an email to support@plickers.com, and we'll be happy to help.
Comments
0 comments
Article is closed for comments.