Now that you've signed up on plickers.com, you're ready to add a central part of your profile - your Classes.
Your Plickers experience will revolve around your Classes. You'll add students to Classes, play content via your Classes, and analyze results in the context of your Classes.
There are two methods you can try here. The quickest is to use our Import from Google Classroom feature. Alternatively, if you don't use Google Classroom, it's easy to take the Plickers route too.
In this article:
Using Google Classroom
If you already have a Google Classroom account set up, this method means you won't need to spend extra time re-entering your student rosters within Plickers.
Here's how it's done:
-
Head over to plickers.com on your laptop/computer and sign in
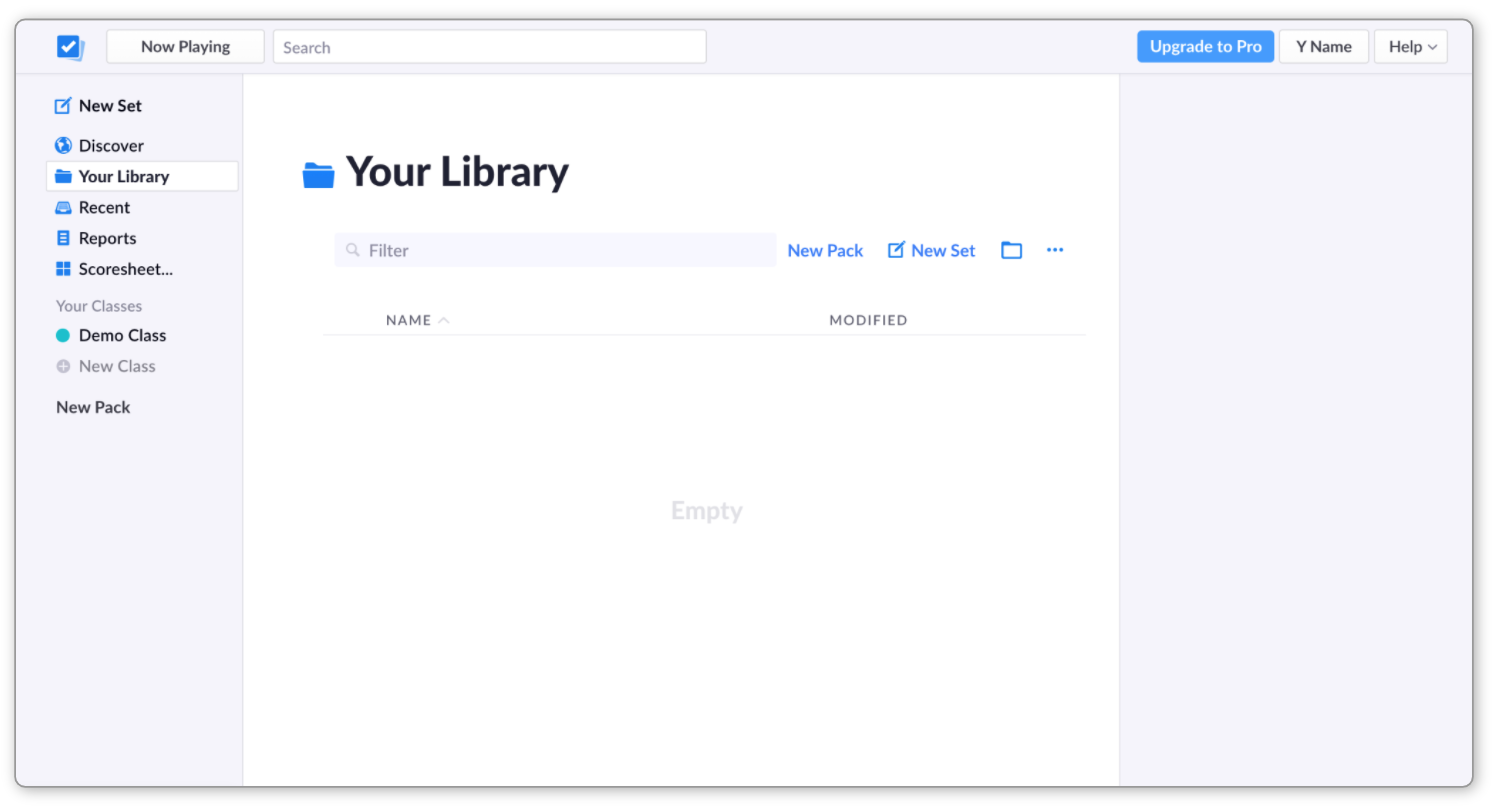
You'll see the following homepage:
-
In the left-hand sidebar, click on the link called 'New Class'
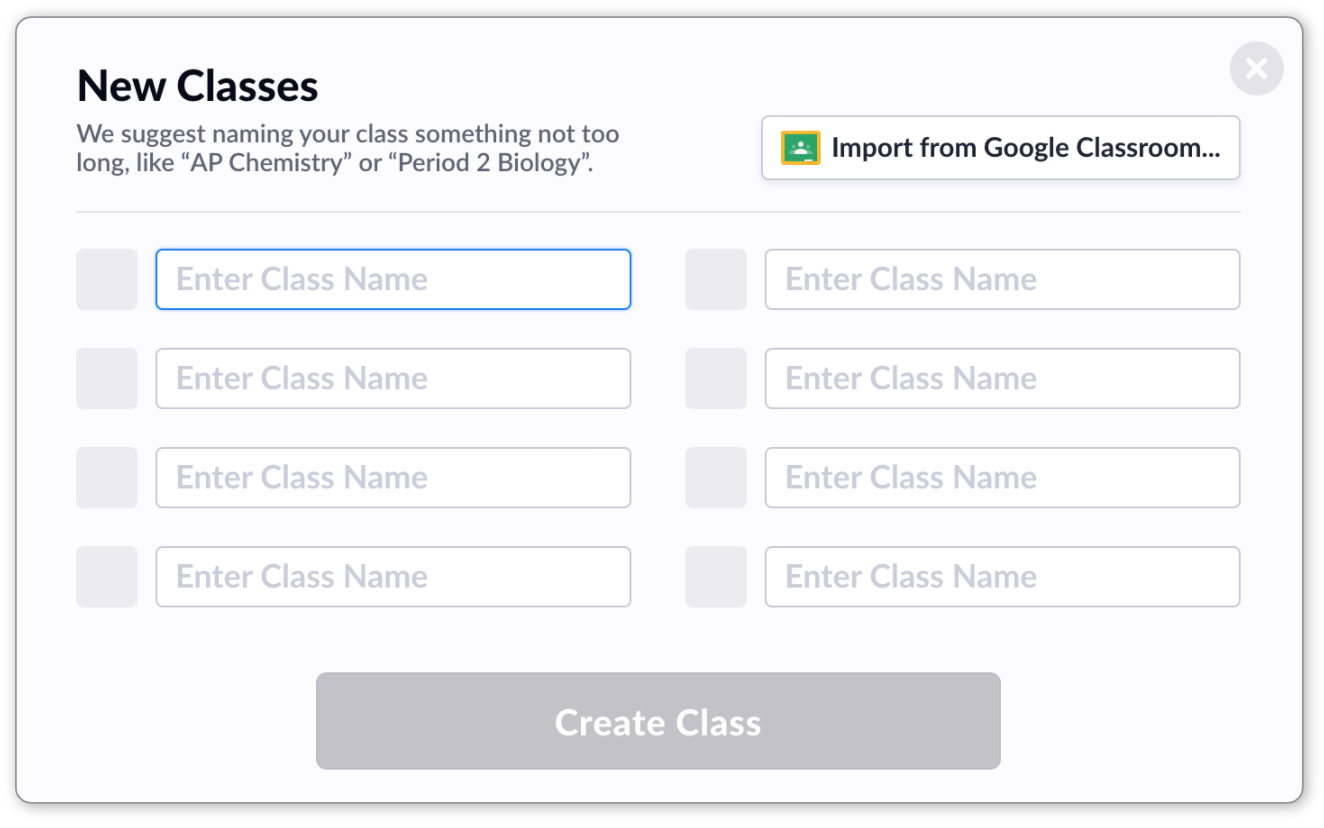
A popup window will appear that looks like this:
-
Click on 'Import from Google Classroom...'
-
Select the Google account you wish to use
You'll be asked to allow Plickers access to your account.
-
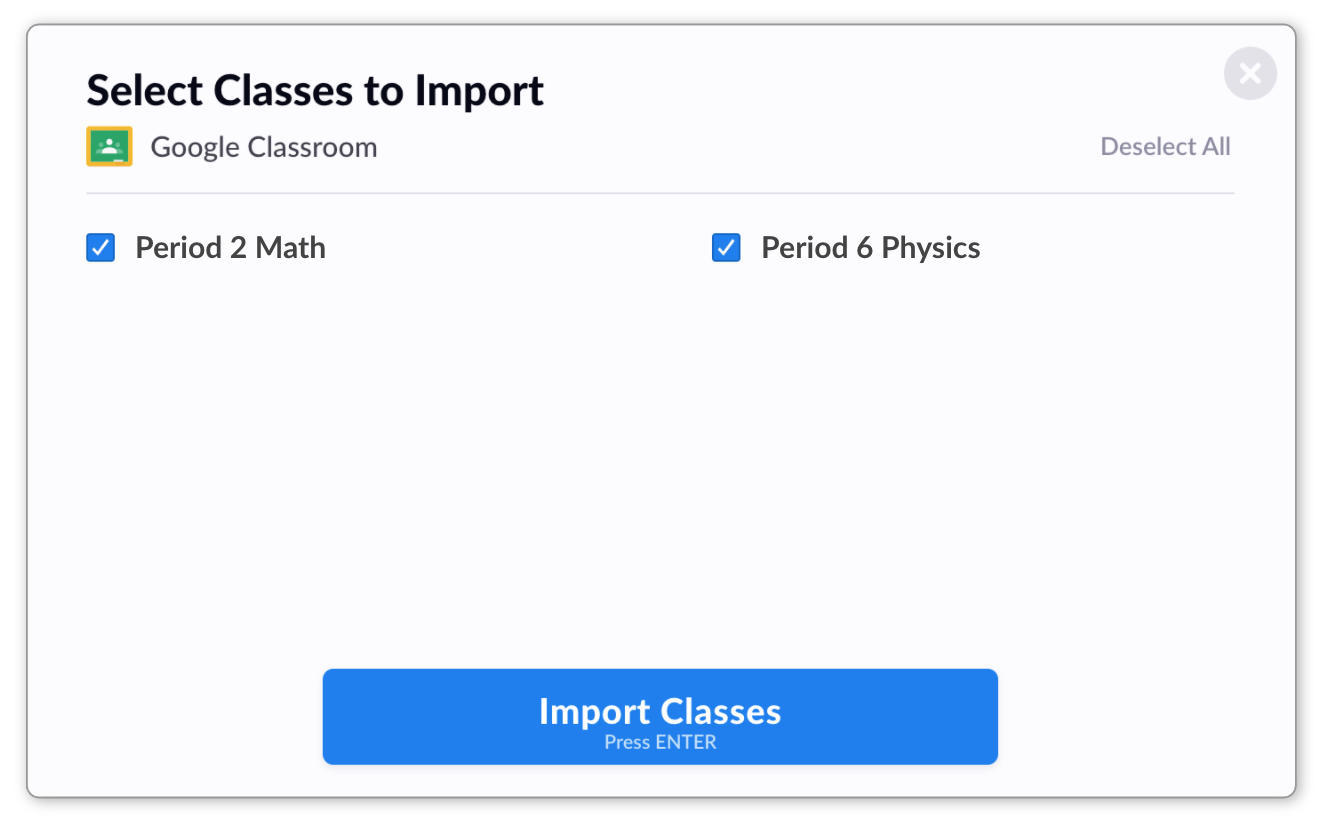
Select the Classes you'd like to import
You can check the boxes next to your chosen classes, then press the blue Import Classes button (as shown below).
-
Your Classes will then appear in the left-hand sidebar of your homepage
If you then click on one of your Classes, your Class homepage will appear, and you'll see that your student roster has automatically been imported too. There's more information about the Class homepage available at this link.
To edit your student roster, start off by making the required changes within your Google Classroom account. Then in your Plickers Class homepage, click Edit Students, then Sync Students.
Back to top
Using Plickers to add Classes
The gif below demonstrates how to add your Classes the Plickers way:

Or you can follow the steps below:
-
Go to plickers.com on your laptop/computer
-
In the left-hand sidebar, click on the link called 'New Class'
A popup window will then appear, in which you can add multiple Classes at once.
-
Enter the names of your Classes and click 'Create Classes'
If you need to go back and create another Class, you can simply select New Class again from the left-hand sidebar.
When you've finished adding your Classes, you'll be taken to your first Class homepage, where you can add your students.
Using Plickers to add Students
With your Classes set up, you're ready to start adding your student rosters.

-
Navigate to the Class you'd like to work with
You can reach your Class homepage by clicking on the name of your Class in the left-hand sidebar of plickers.com
-
Click on the 'Add Students' button
A popup window will appear, and you'll be able to enter your students into the left-hand text box.
-
Enter your students' names
There are two ways you can do this:
-
You have two formats to choose from here:
- First name then last name - if you use a 'space' when inserting names, we assume the forename appears first e.g. Alex Sanchez
- Last name then first name - if you use a comma, we assume the surname appears first e.g. Sanchez, Alex
-
To save time, you may want to paste in an existing roster. You'll just need to make sure that each student shows on a new line, and their first names and last names are ordered consistently (as described in the box above).
-
-
Check and sort your student names
All your students will appear on the right-hand side of the window as they're entered. Have a quick check of these to make sure they all look correct. Then click 'Next'.
In the next window, you'll be given the opportunity to sort your student names alphabetically (either by first name or last name) or to keep the order as originally entered.
Note the numbers on the left-hand side of the 'Sort' window - these will be your students' card numbers. Further details on cards can be found here.
TipIt is possible to change card numbers for each student - click here to find out how.
-
Click 'Done' and review your new Class homepage
At this point, you'll arrive at your Class homepage, where you'll see your list of student names at the bottom.
More InfoFor further details on what's possible within your Class homepage, click here.
With your Classes now created, you're ready to start adding the content you'll be playing to your students.
Comments
0 comments
Article is closed for comments.